Hi @MartnD - @CoryAllen is out on his honeymoon, so I’m stepping in to help answer the forum questions.
This is a great question! We are overdue in updating our camera placement documentation online, so thank you for your timely question.
Rather than give a specific recommendation, I’ll share a few design considerations so that you can make a choice based on your capture goals. I know you are an experienced volumetric video technician, so I think this is the best way for me to advise you. If you still feel unclear after the below, just let me know and we can workshop your scenario to come up with the best option.
Hero Camera
Most of our camera design center around the concept of a hero camera. A hero camera is positioned to capture the area of most interest, generally the head and chest, or bust, of a standing figure facing forward. This camera should be as close as possible, pointed at eye level. it does not need to cover head to toe (the other cameras will fill this in) and in many situations we’ve also bumped the resolution of this camera up to 2160p, even if the other cameras in the array are at 1440p
Side Cameras
The side cameras are for filling in the full form. At a minimum, you need 4 cameras in a square configuration, 90 degrees apart each, covering the subject head-to-toe. We recommend placing these about half way up the figure - so shooting a 6ft subject, you’d place them at 3 feet pointed straight out.
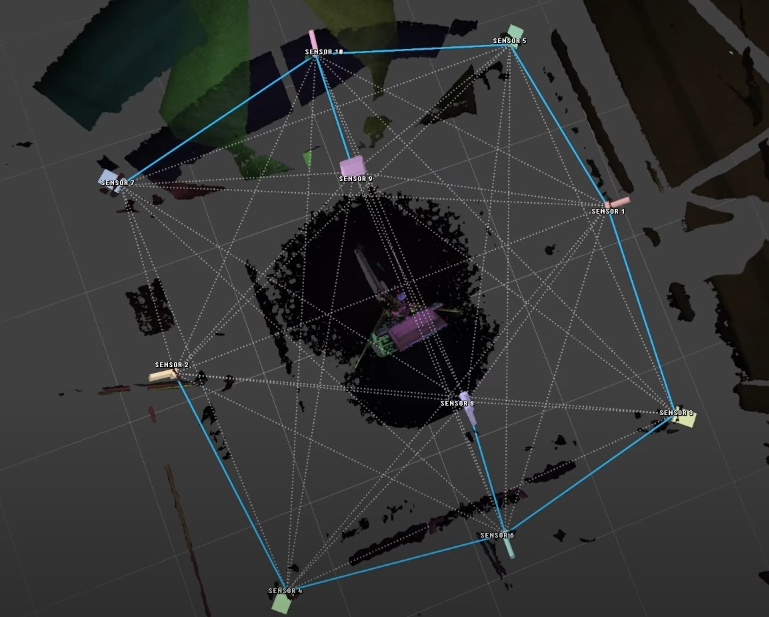
Top Cameras
Adding additional top cameras, like the 2 in the image you posted from our tutorial, serve two important functions. The first is to fill in hair, which can be challenging material based on your subject’s hair type (very dark or frizzy hair can work against the lasers). Having a camera pointing straight at the subject’s hair from above, and closer than the others in the array, does a lot to recover these details.
The second reason for the top camera is to fill in occlusions on the chest during hand gestures. Most people gesticulate when they speak, and the nuance realism of these gestures can be one the most compelling aspects of volumetric video. However, these gestures can come with bad artifacts on the chest where the hands occlude the cameras. Having overhead cameras mitigates these artifacts by filling in the details from a view that is not occluded by the hands
Camera orientation
The Azure Kinect data streams are not square, so orienting the cameras in portrait (aka “mobile phone style” as you put it) helps for standing subjects because it can capture better data on top and bottom. In the example 10 camera configuration above, we mix the orientations to ensure we have both coverage of the full height of the subject as well as movement through the volume.
Hope this helps!