Custom Nodes
Okay so the first step was unfortunately diving to the fringes of Unity’s documentation and learning about how to create custom Shader Graph nodes. The documentation is also in a weird spot, with node documentation split between Unity’s official docs, their dedicated Shader Graph Repo, and a new master repo that has documentation pages that link to an older Shader Graph repo.
Between the three of these however I was able to figure out how to rough out a custom node, which was going to be required for us because we have some dedicated math that needs to be run for our shader (basically everything in the .cginc file). Custom nodes are required for this because what we are doing is a sort of special use case for the graph - it’s meant much more for pure visual processing, so we’re kind of hacking it so that it can accommodate our math needs as well.
For a really simple example here’s what a custom node looks like that simply clamps a value to a certain range:
using UnityEditor.ShaderGraph;
using UnityEngine;
using System.Reflection;

[Title("Depthkit", "ClampDepth")]
public class ClampDepth : CodeFunctionNode
{
	public ClampDepth()
	{
		name = "Clamp Depth";
	}
	protected override MethodInfo GetFunctionToConvert()
	{
		return GetType().GetMethod("clampDepth",
			BindingFlags.Static | BindingFlags.NonPublic);
	}

	static string clampDepth(
	[Slot(0, Binding.None)] ColorRGB depthsamplehsv,
    [Slot(1, Binding.None)] Vector1 _DepthSaturationThreshhold,
	[Slot(2, Binding.None)] Vector1 _DepthBrightnessThreshold,
	[Slot(3, Binding.None)] out Vector1 depth)
	{
		return
			@"
{
    depth = depthsamplehsv.g > _DepthSaturationThreshhold && depthsamplehsv.b > _DepthBrightnessThreshold ? depthsamplehsv.r : 0.0;
}
";
	}

}
You can see that it isn’t the most “readable” code, but the key idea behind Unity’s custom shader nodes is that you essentially define some simple inputs and outputs, and then pass your shader code as a string.
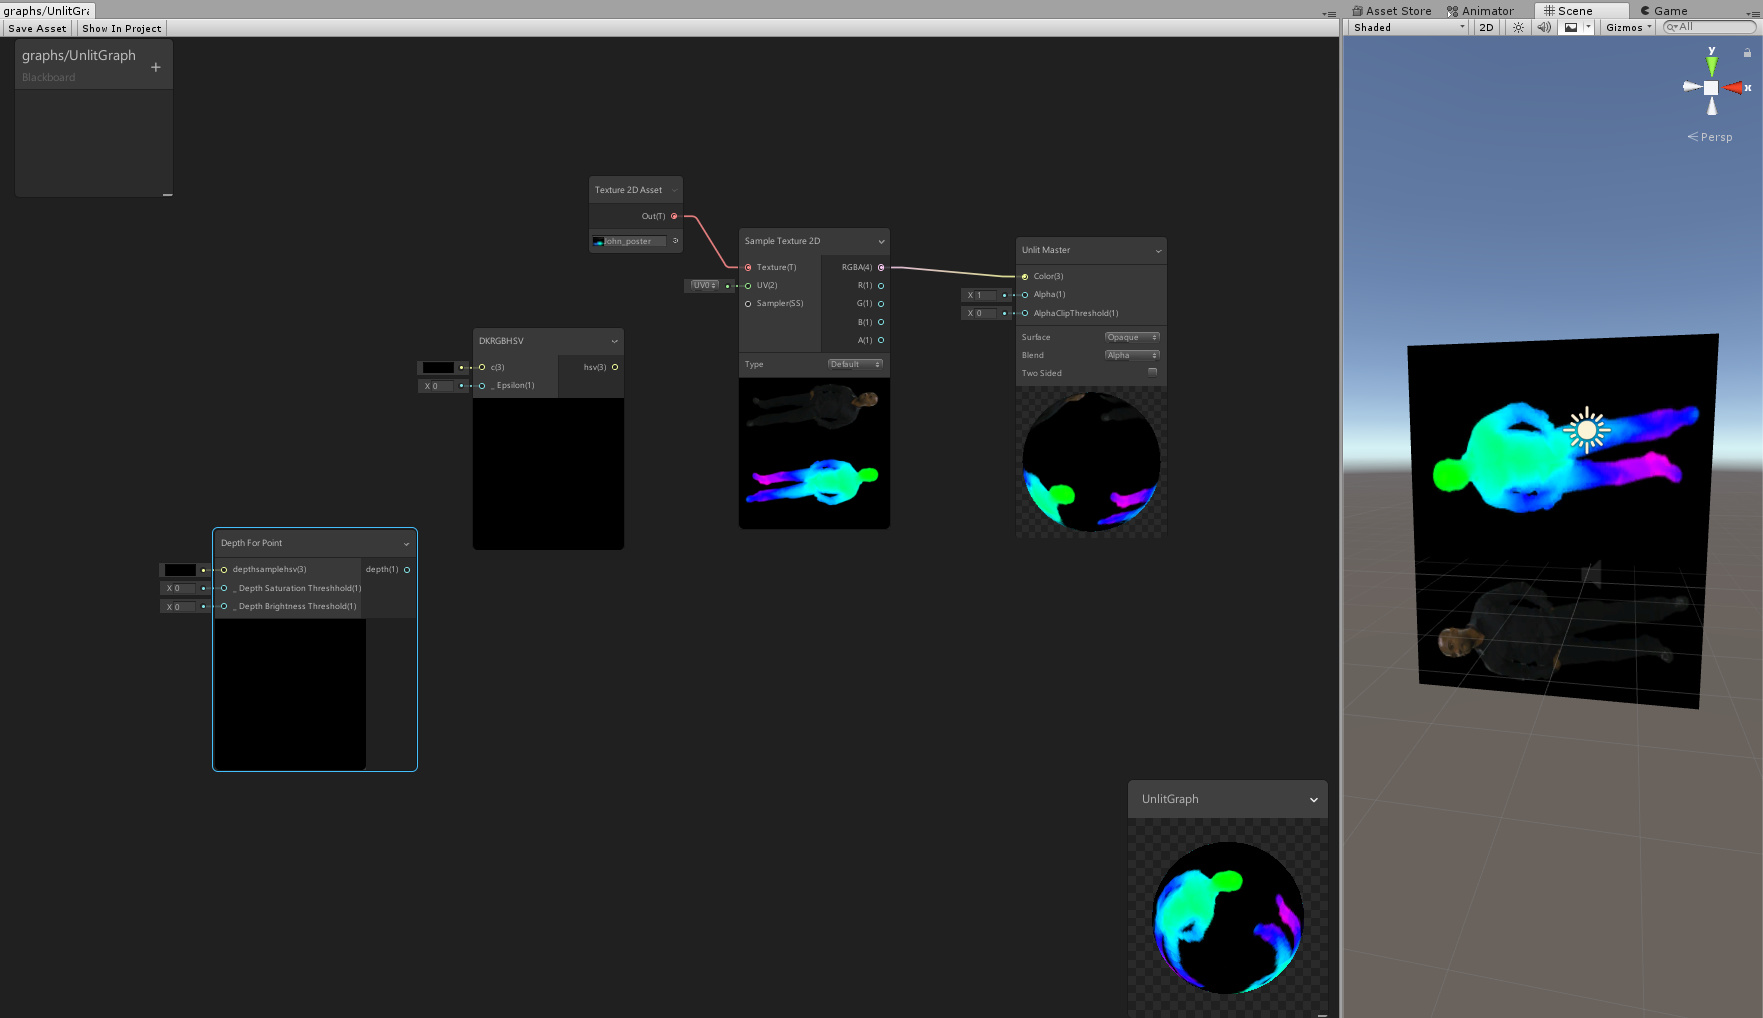
So in the clampDepth() function you can see that I define depthsamplehsv, _DepthSaturationThreshhold, and _DepthBrightnessThreshold as inputs, and then define depth as my output. These variable names then directly map to the names used in the string function that is returned.
So currently I’m just converting .cginc functions! No fun visuals yet but slowly making my way through our code to get there!