This is a quick guide to apply both a custom VFX Graph Look and a Shader Graph Look to your Depthkit clip. This guide uses HDRP and Unity 2020.1.5f1.
Setting up your Unity Project
-
Create a new project via the Unity Hub, using the HDRP template.
-
In the Package Manager window, click the add icon and select Add package from disk.
-
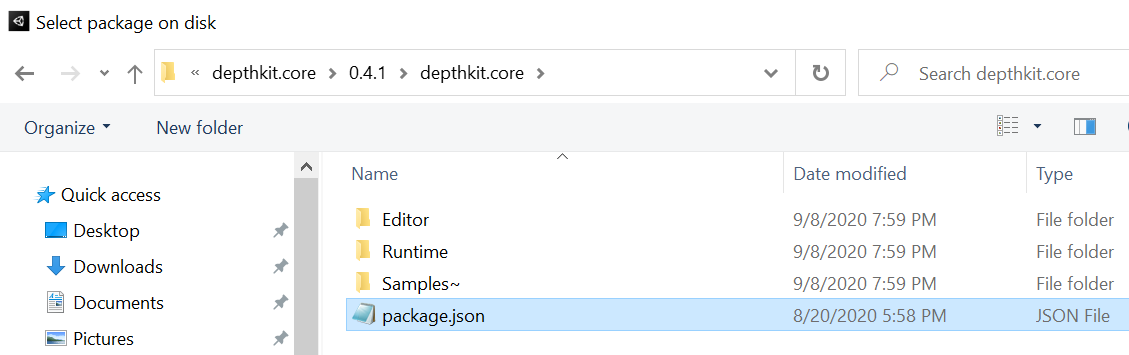
Locate the depthkit.core package folder. Within this folder, select the package.json file and click open.
-
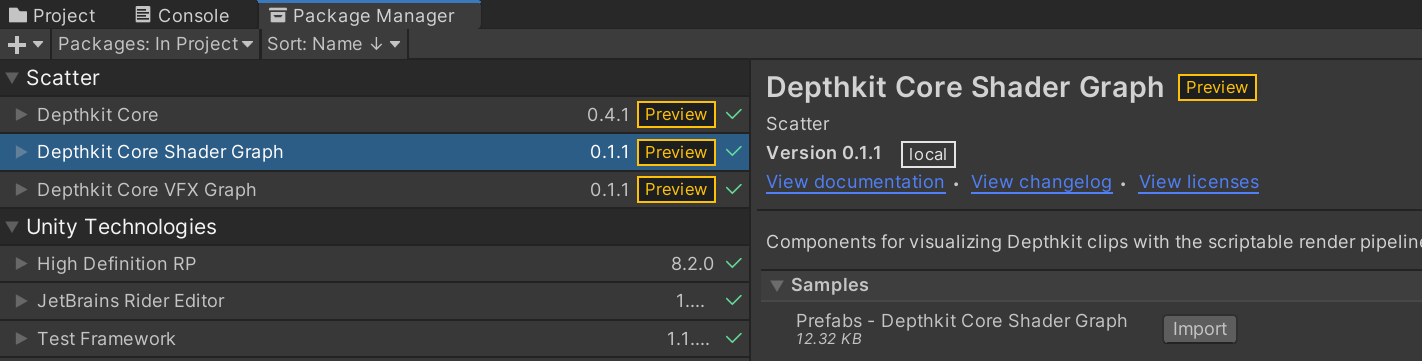
Repeat this step for the depthkit.core.vfx package and the depthkit.core.shadergraph package. Once imported, you will see all three packages in your Package Manager. Under Samples, import the Depthkit Core VFX and Shader Graph prefabs.
-
Create a new folder under Assets to hold your Depthkit video files, metadata text files, and optional poster images. Drag your Depthkit assets into this folder in the Project window or copy and paste via the explorer window.

Setting up your Depthkit Clip
-
Let’s start by creating a Depthkit clip prefab that is already set up with a Shader Graph Look in our scene. In the Project window, go to your Assets folder and locate the prefab you just imported under Samples → Depthkit Core Shader Graph → 0.1.1 → Prefabs - Depthkit Core Shader Graph. Select the Depthkit Clip + Core Shader Graph Look and drag it into the Hierarchy to populate your scene.
-
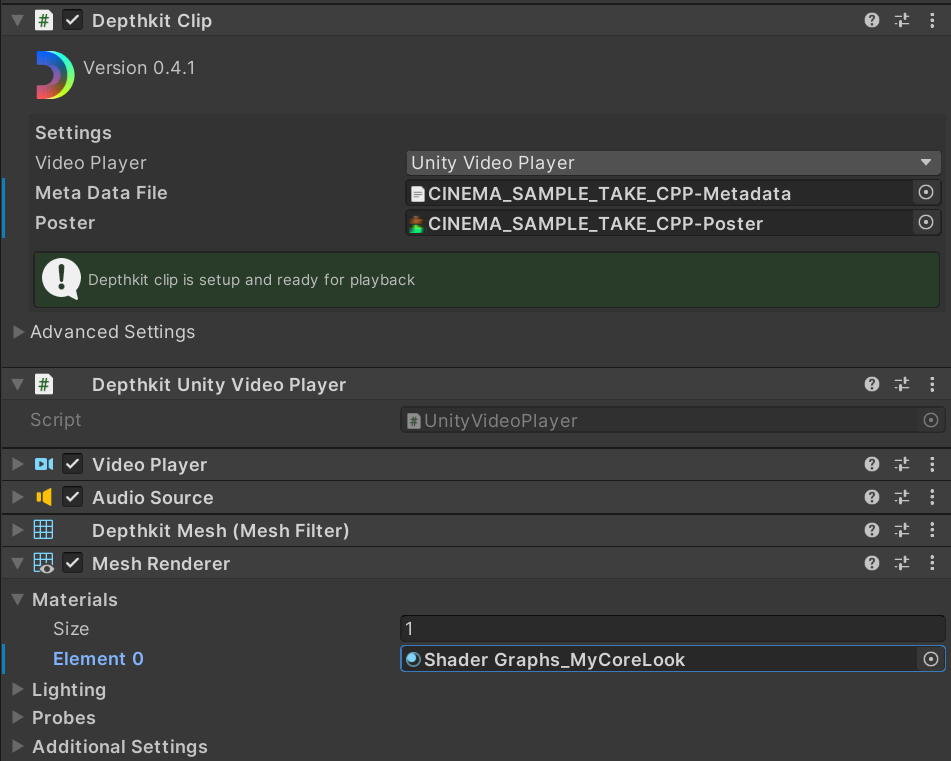
In the Inspector, you will notice that the Depthkit Clip component is alerting you that your Depthkit Clip is not set up. No worries! All we need to do is drag the Depthkit metadata file and poster image to the corresponding fields in the Depthkit Clip component. In the Video player component, drag the Depthkit video to the Video Clip field.
-
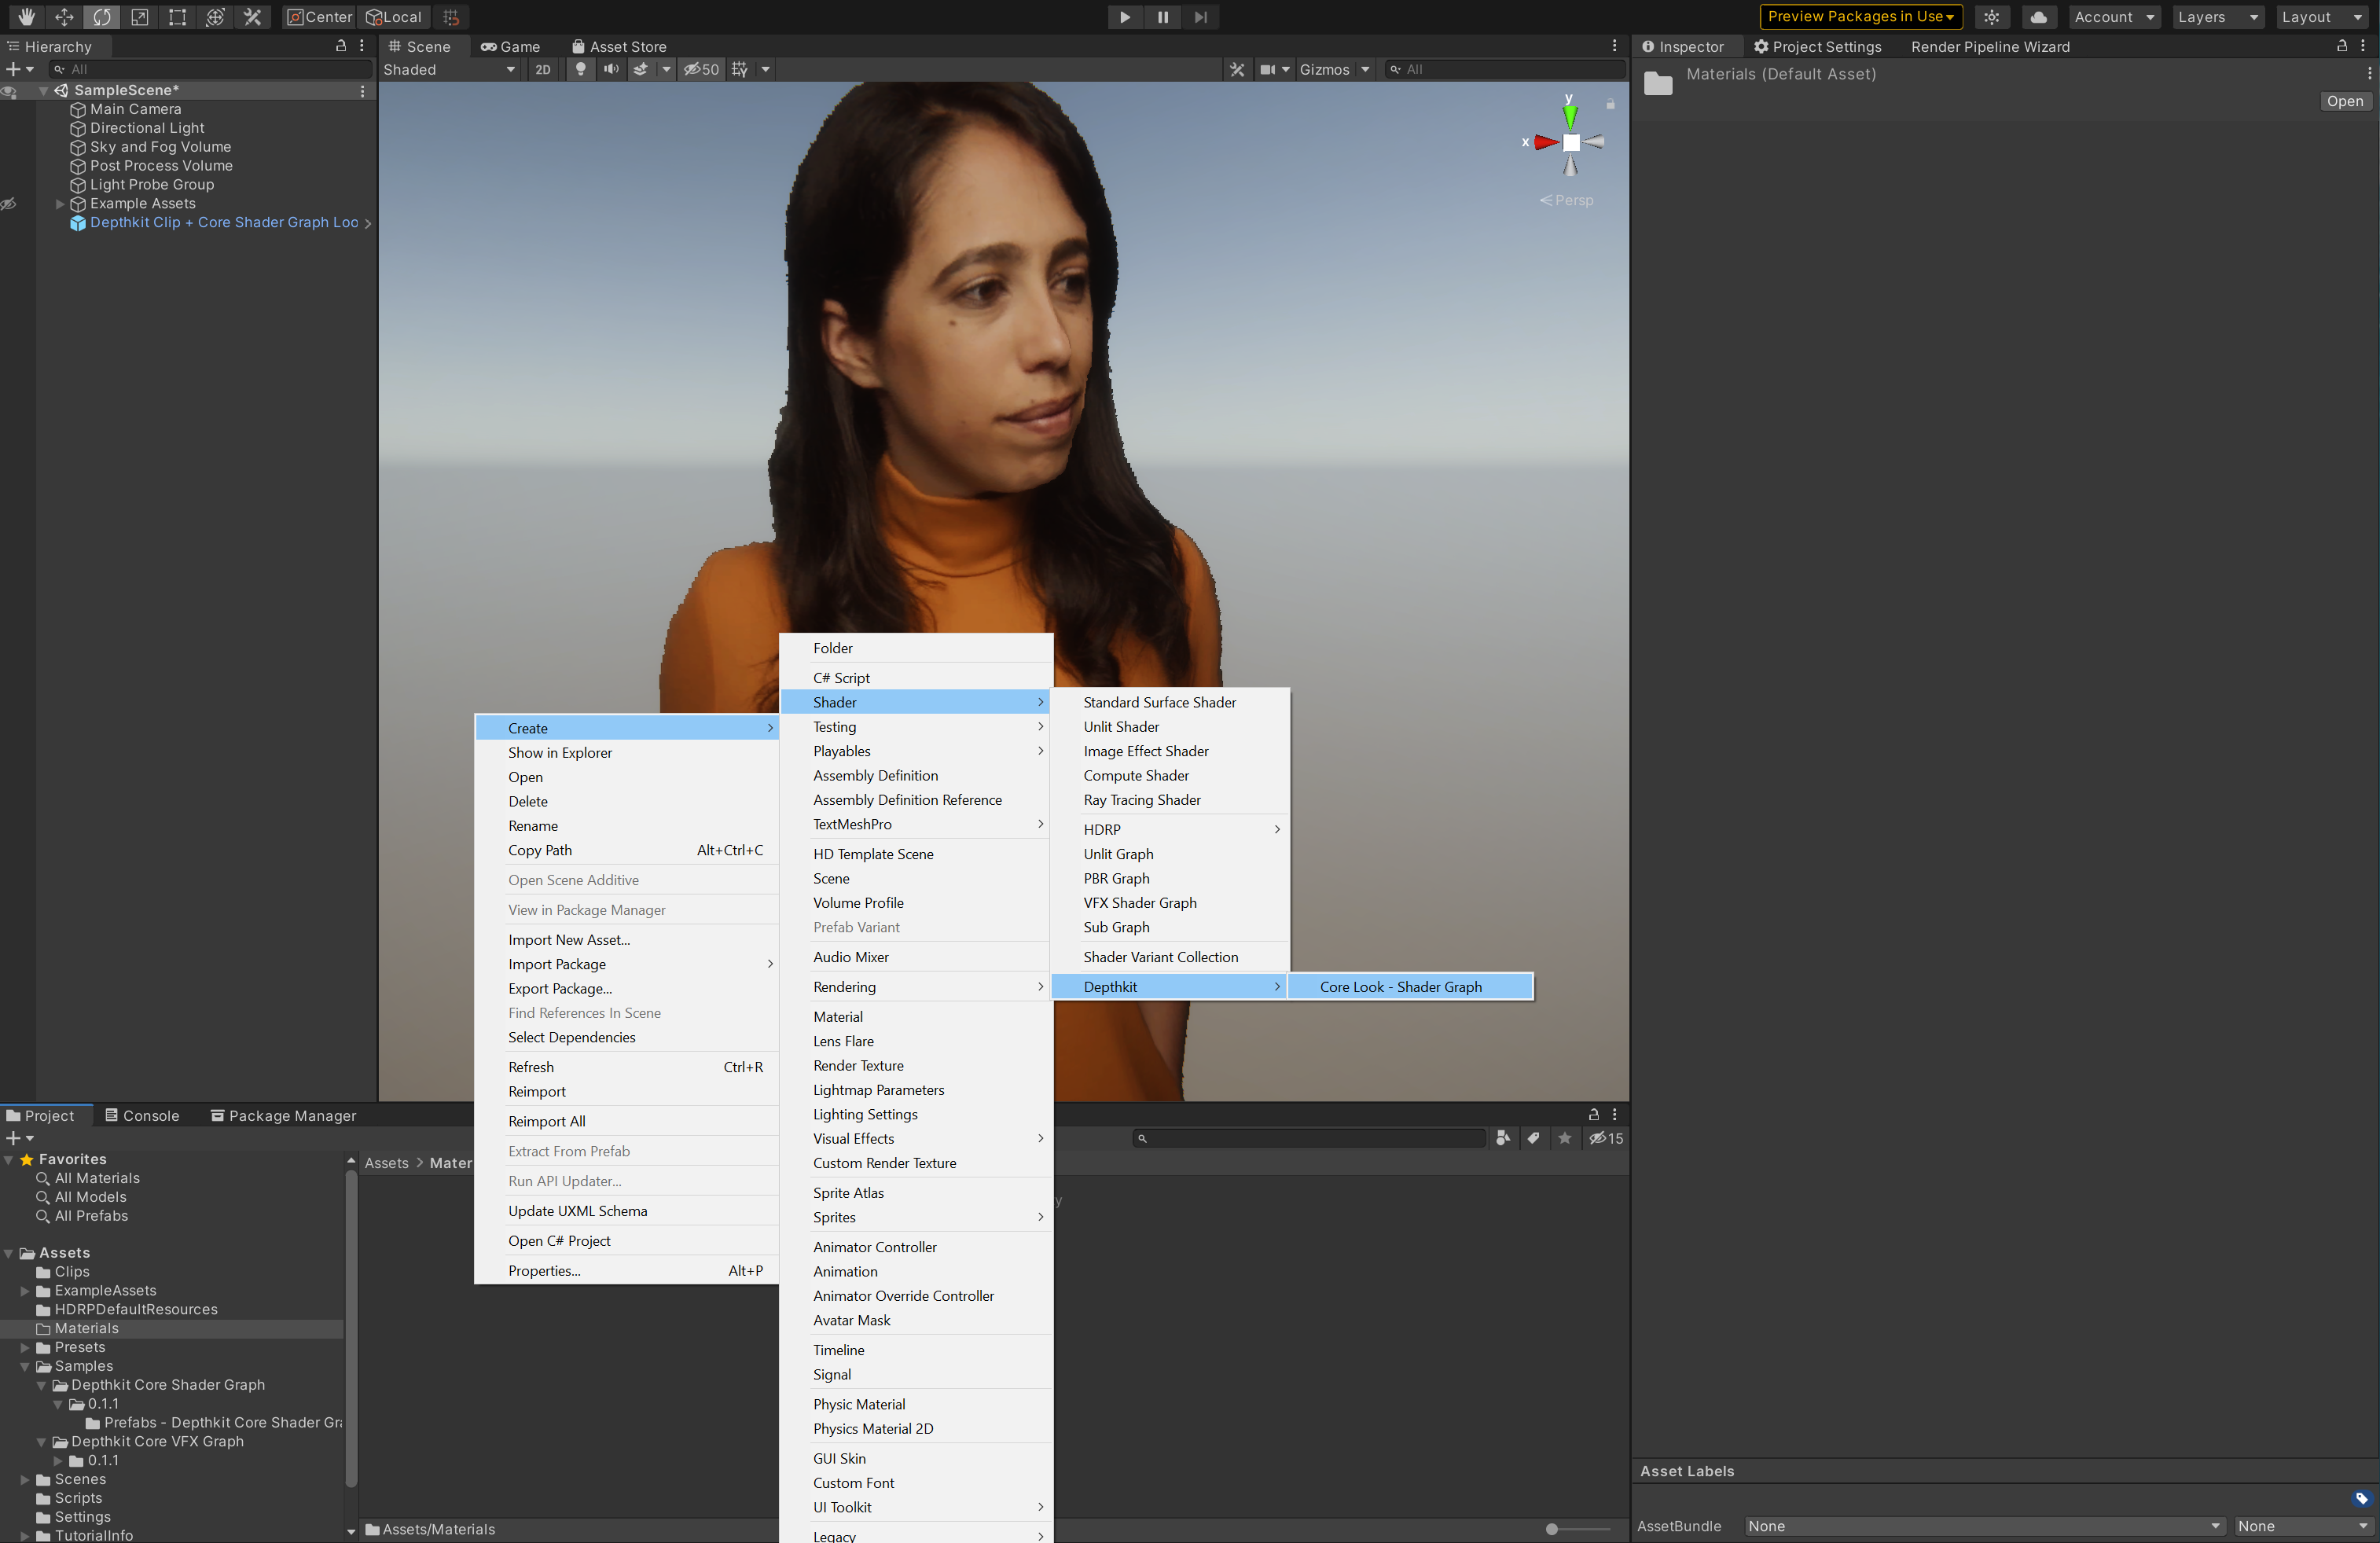
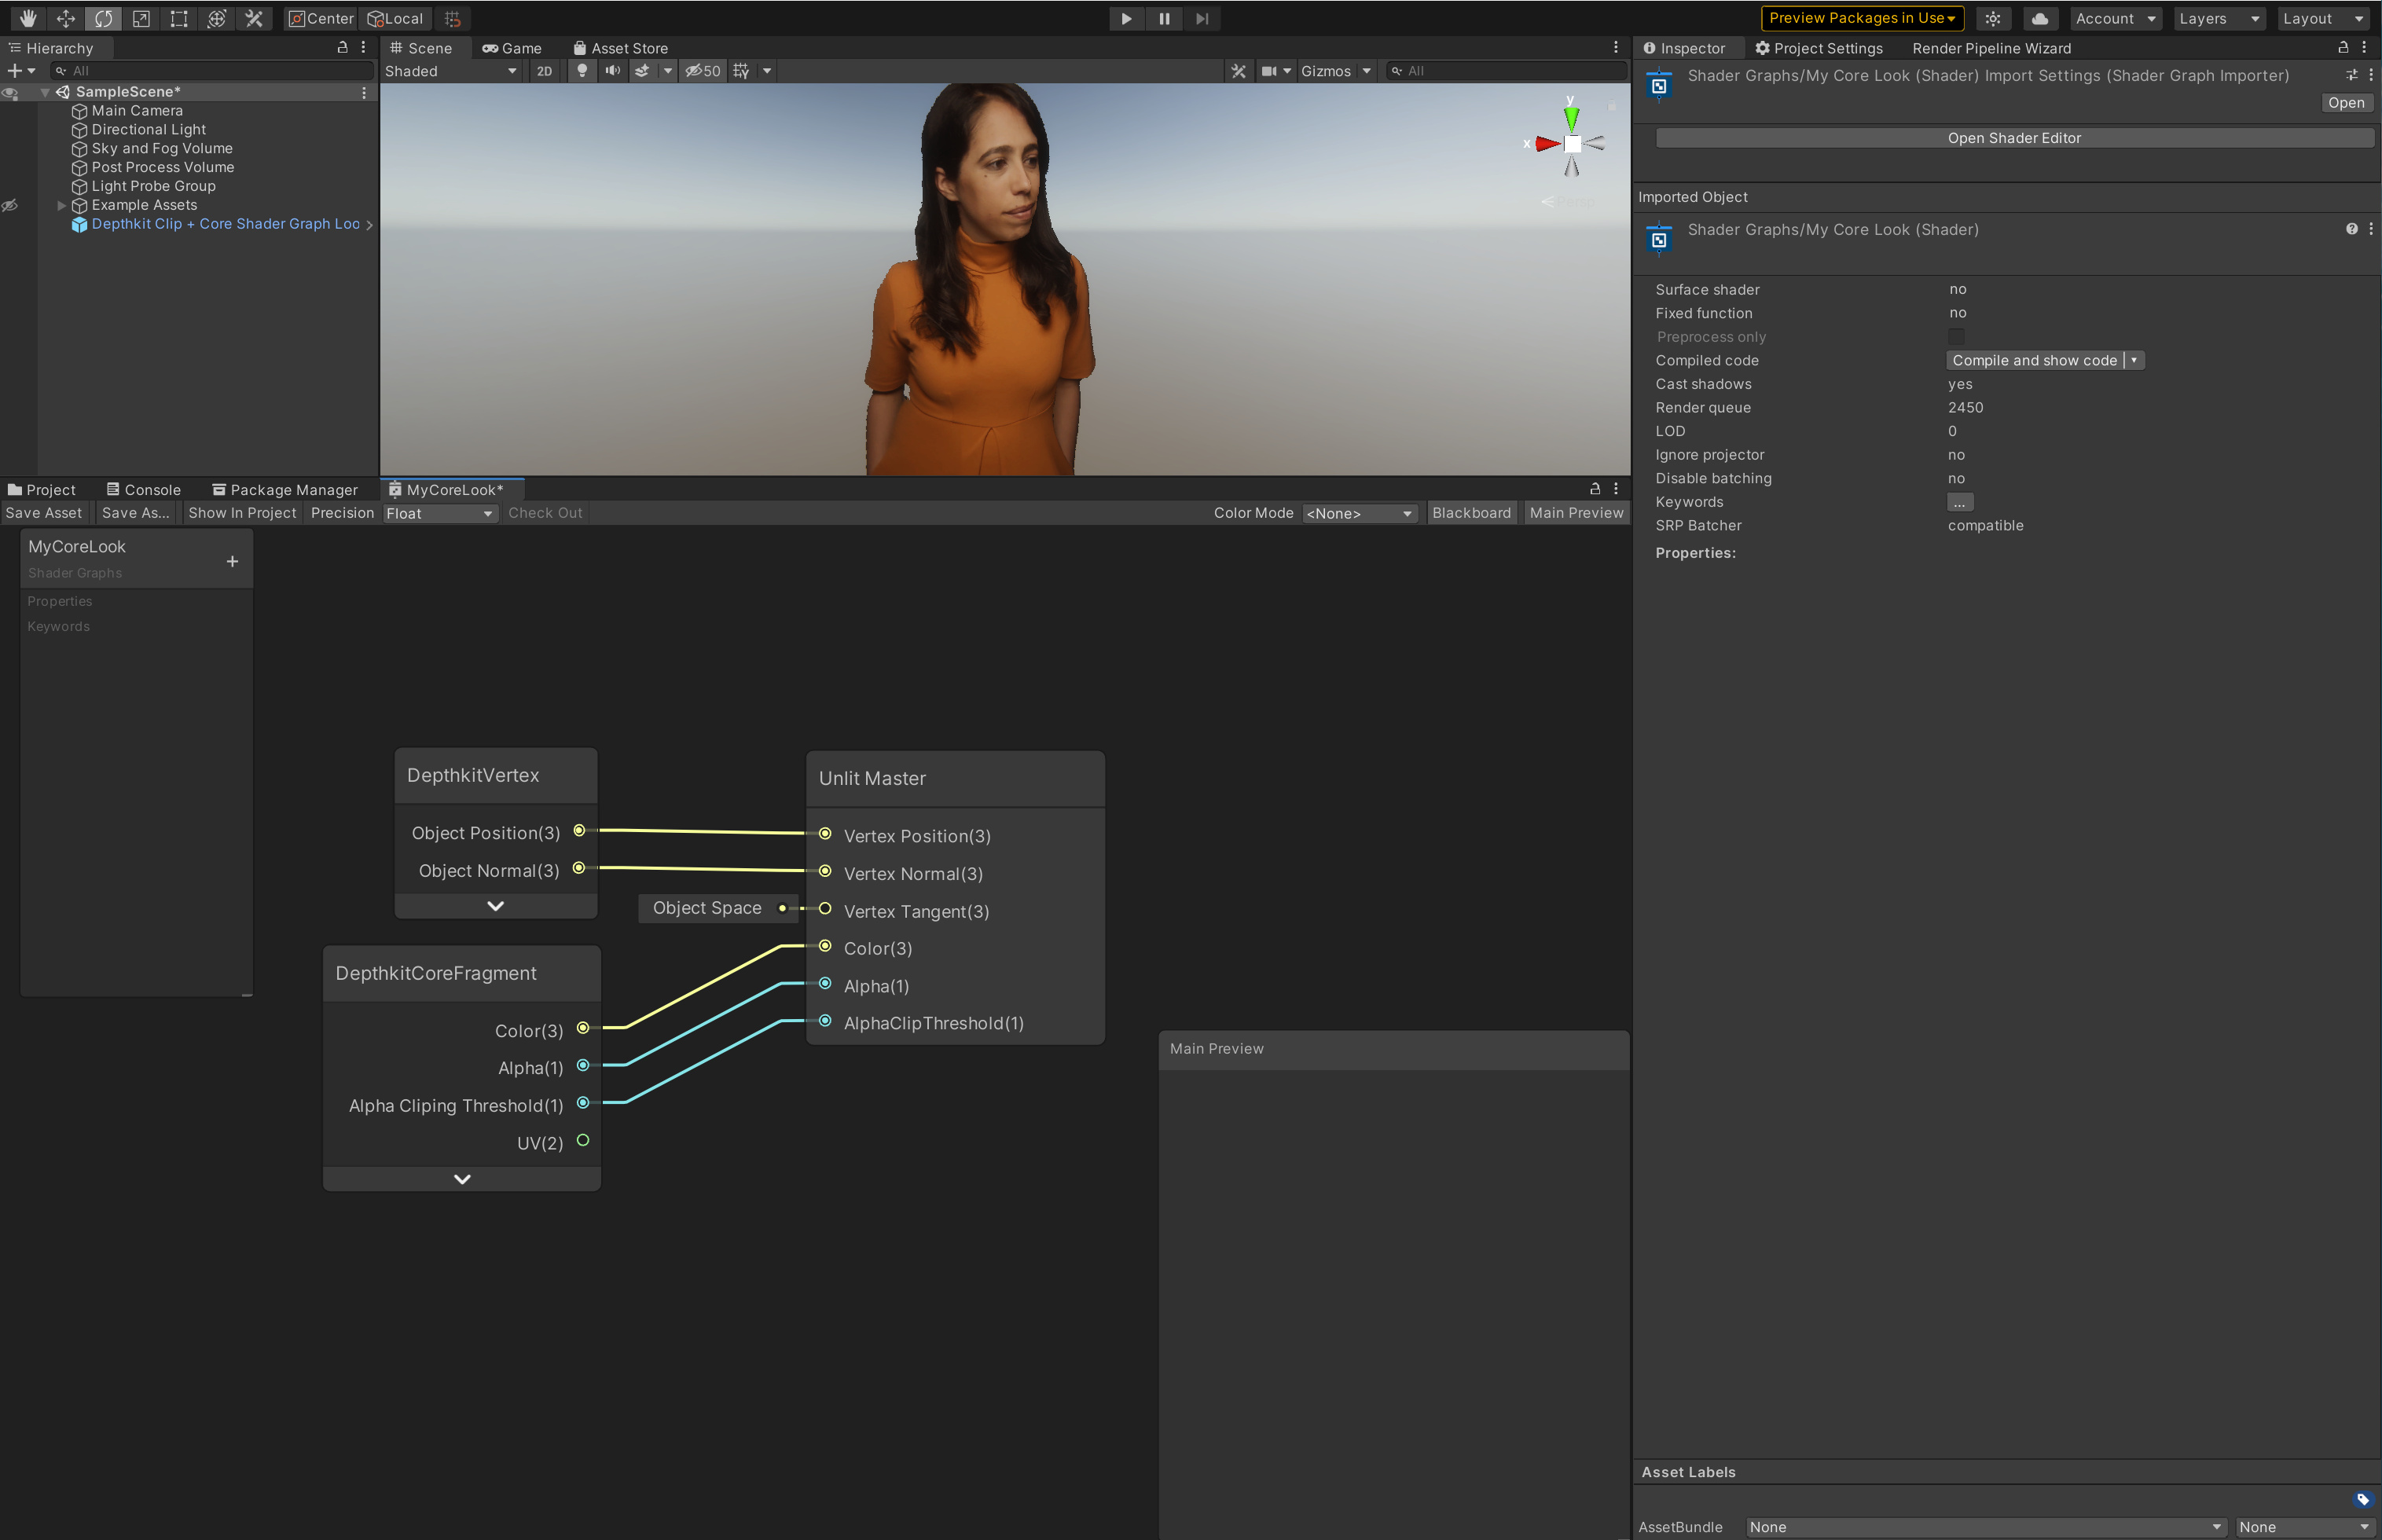
Once your Depthkit clip is set up, you will see that the clip is already configured with an example Core Shader Graph Look assigned in the Mesh Renderer component. In order to create and apply a custom Shader Graph Look, we will need to create a new Depthkit shader and material. You can do this by right clicking in the Project tab, select Create → Shader → Depthkit → Core Look - Shader Graph.
-
This will generate MyCoreLook, a new shader that is already set up to work with the Depthkit clip. Feel free to rename this file.
-
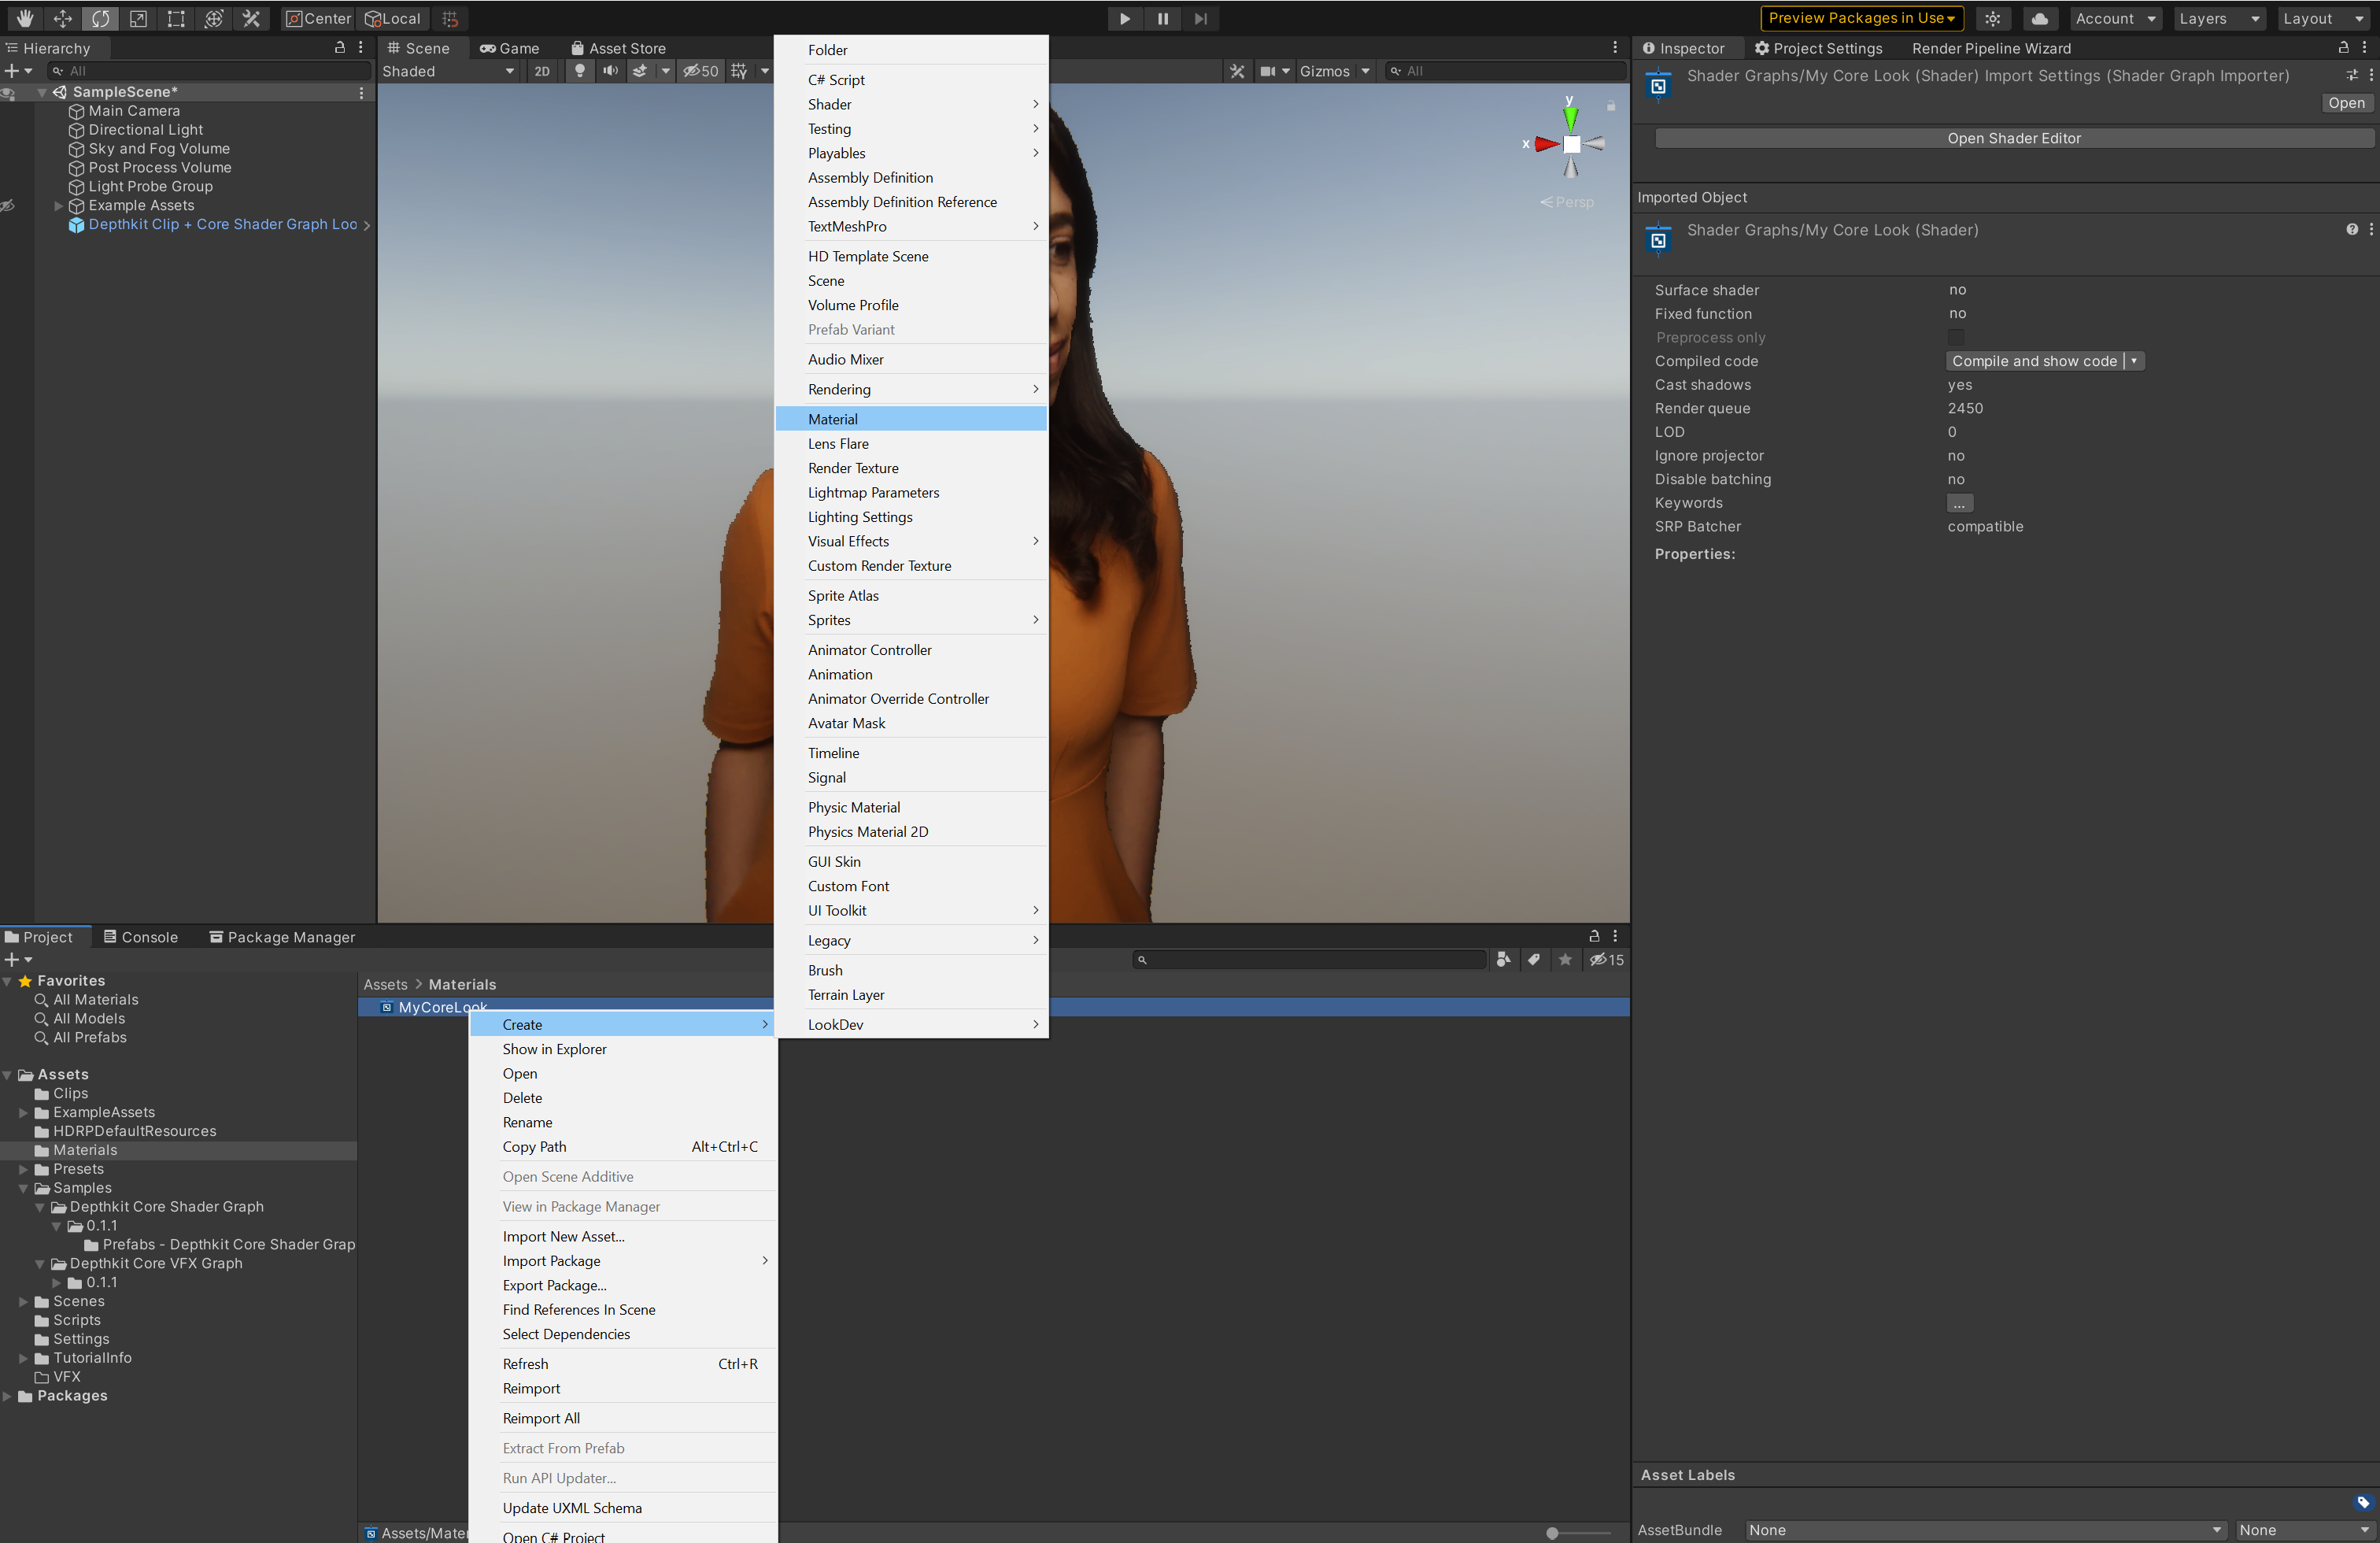
Right click the new shader. Select Create → Material.
-
Select your Depthkit clip in the Hierarchy and see the inspector. In the Mesh Renderer component, under materials, replace the example Depthkit Core Photo Look Unlit with your new Material.
-
Now we are ready to build the custom Shader Graph Look and see it applied to our Depthkit clip. Double click this shader to launch the Shader Editor.
-
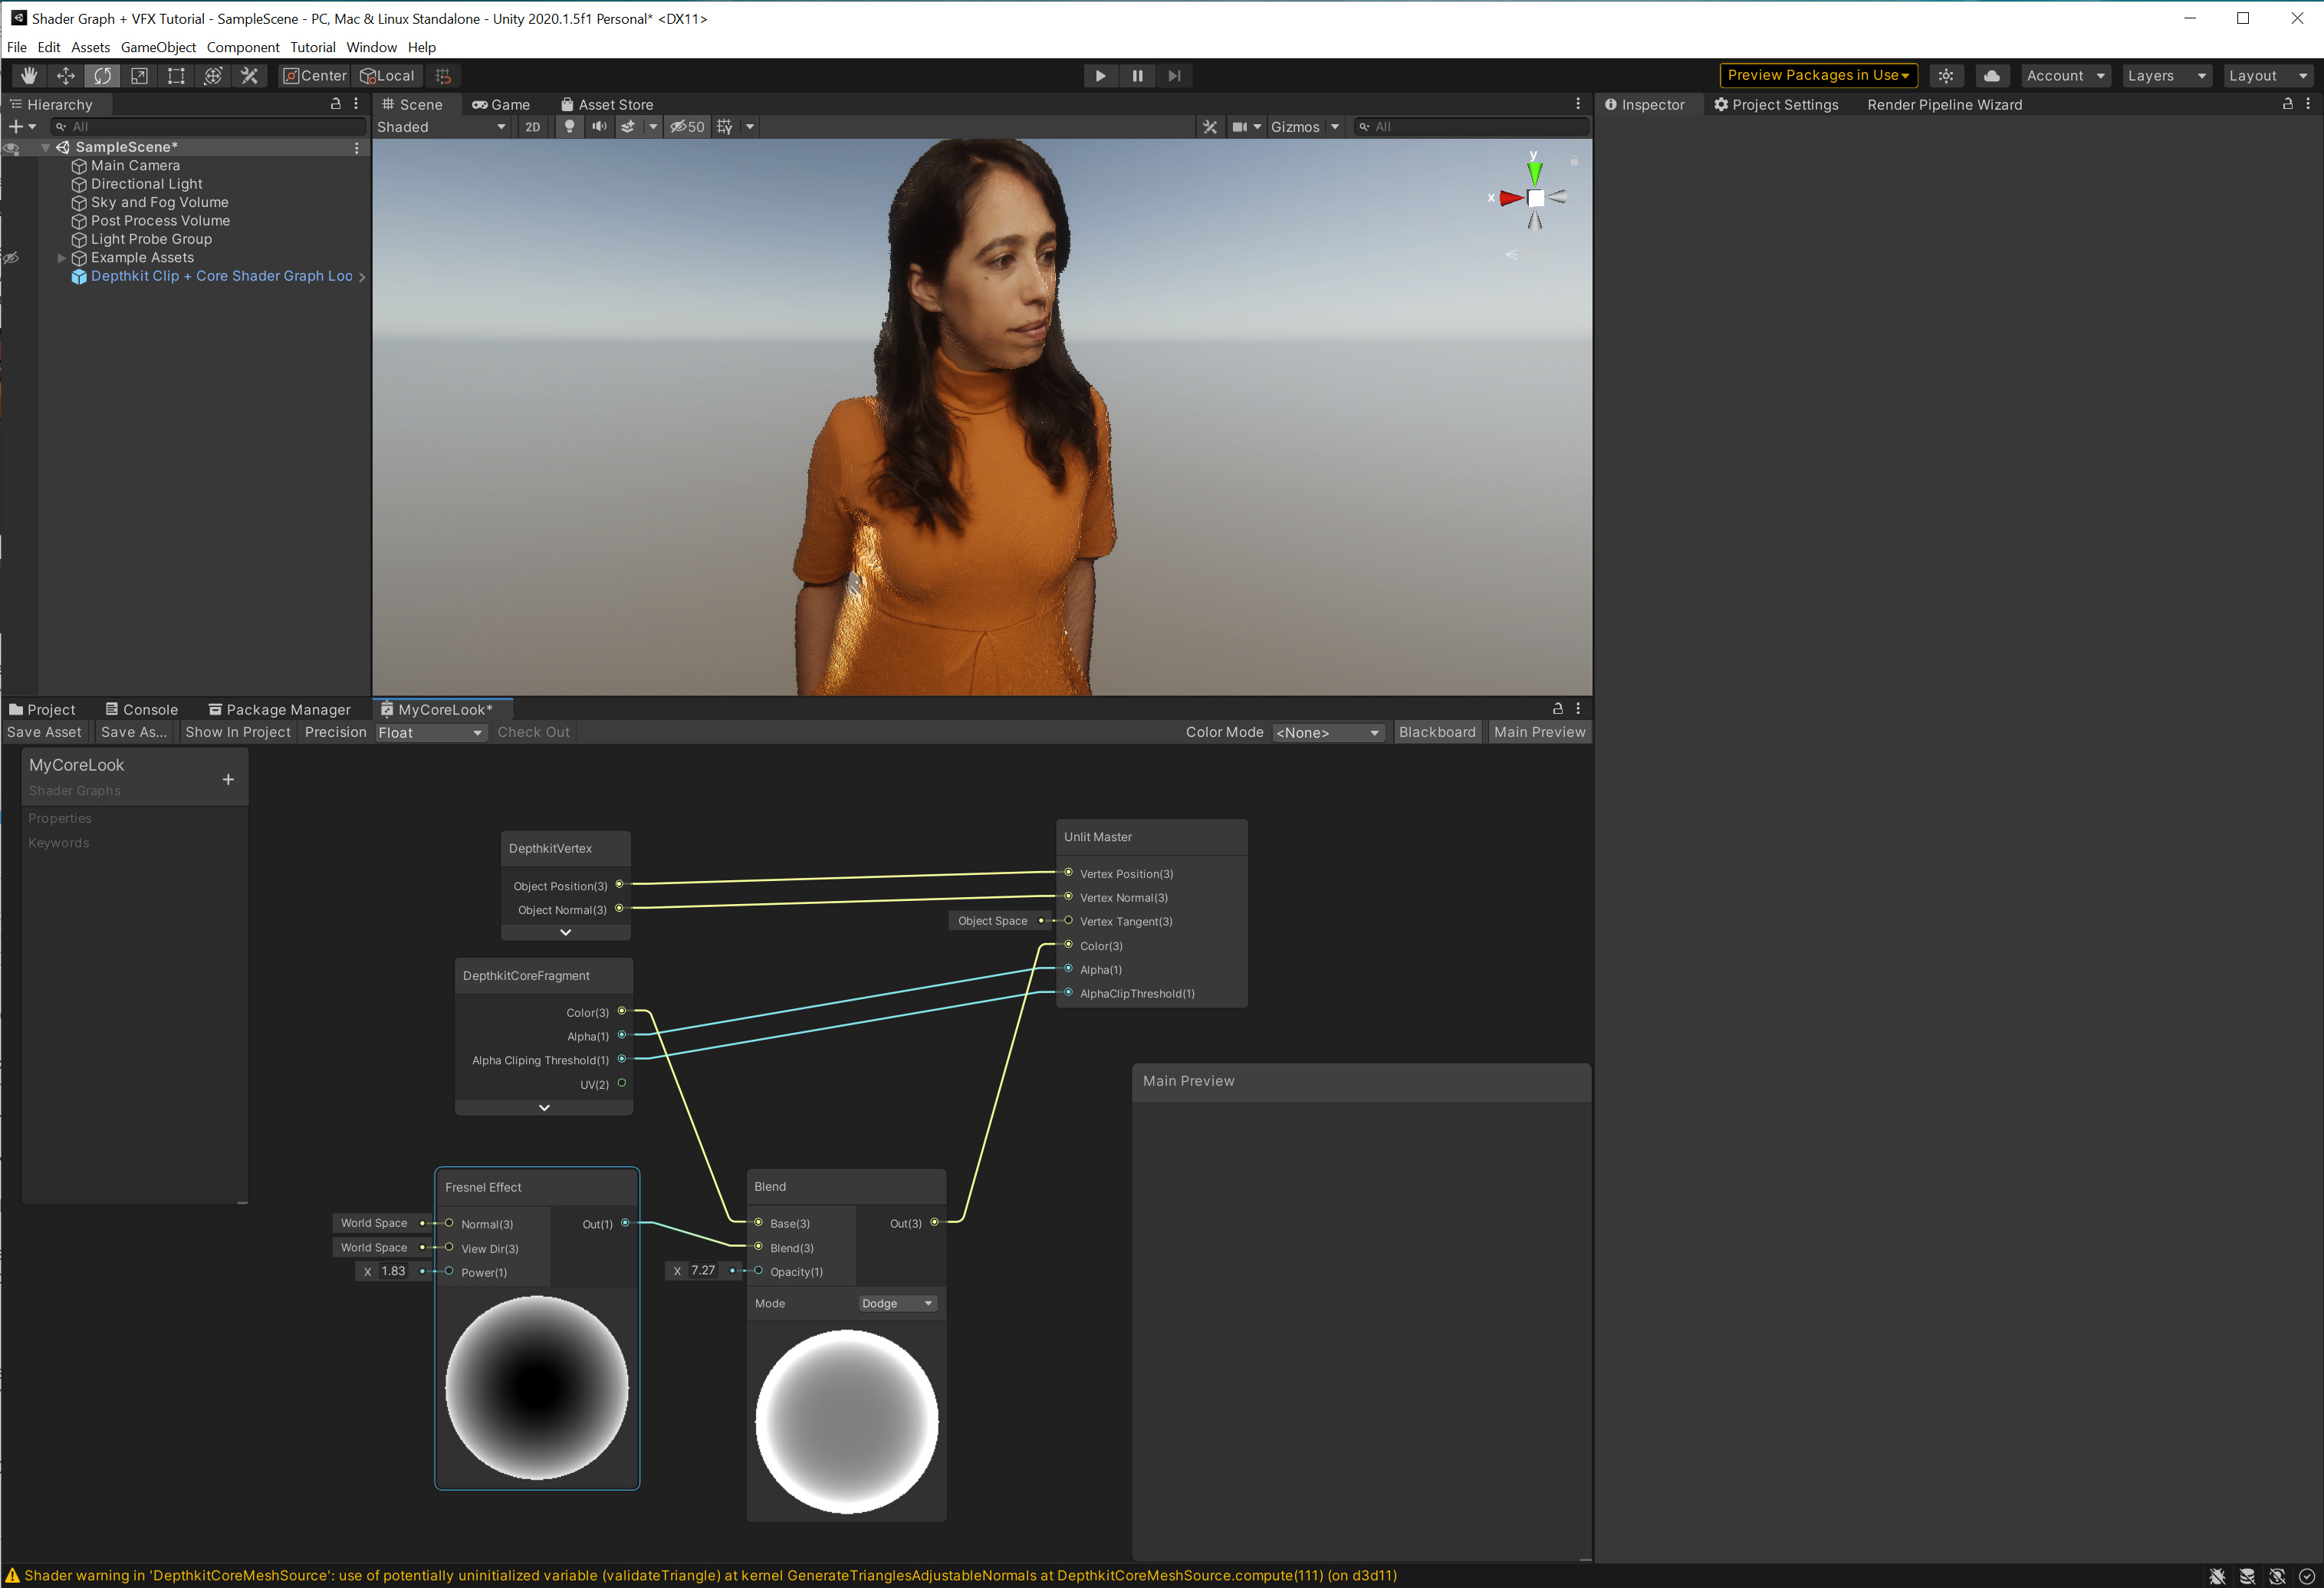
At this point, you can design your own advanced Look. For this guide, I’ve simply blended a fresnel effect to the color input of the shader in order to add a subtle glow to my clip.
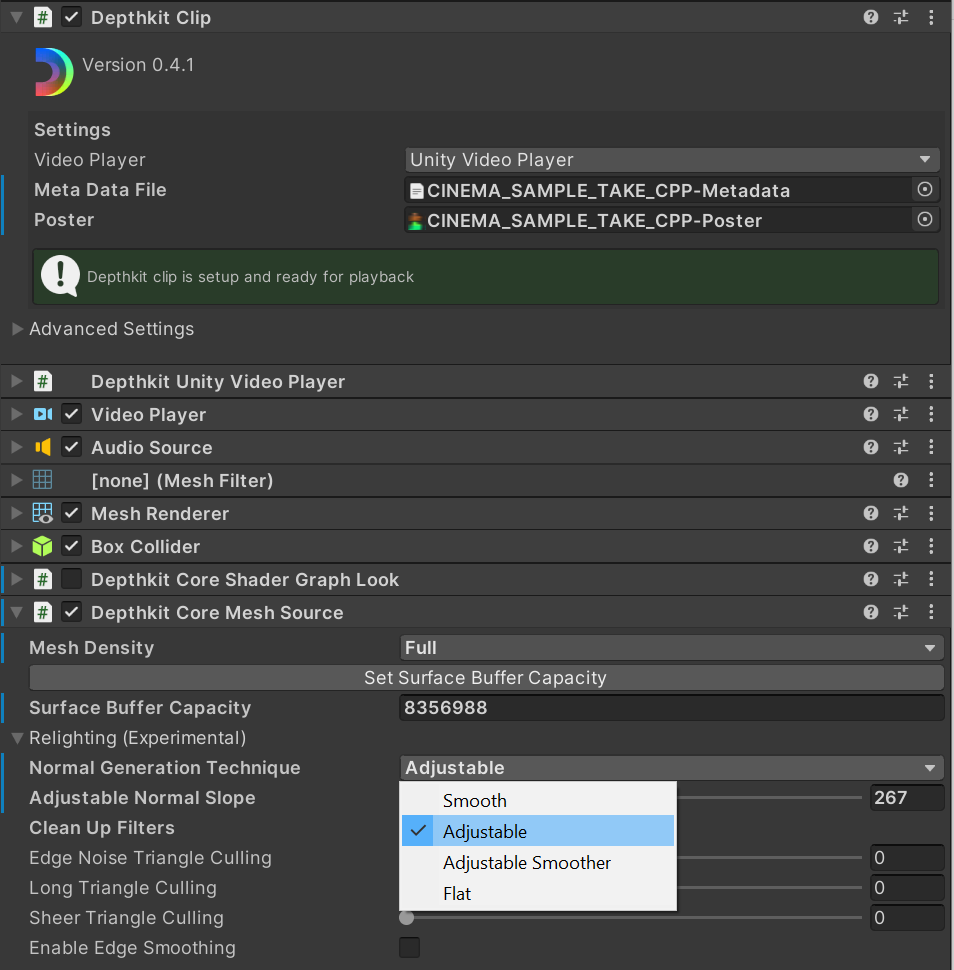
I’ve also changed the Normal Generation Technique to Adjustable. Find this under Relighting (Experimental) in the Depthkit Core Mesh Source component.
-
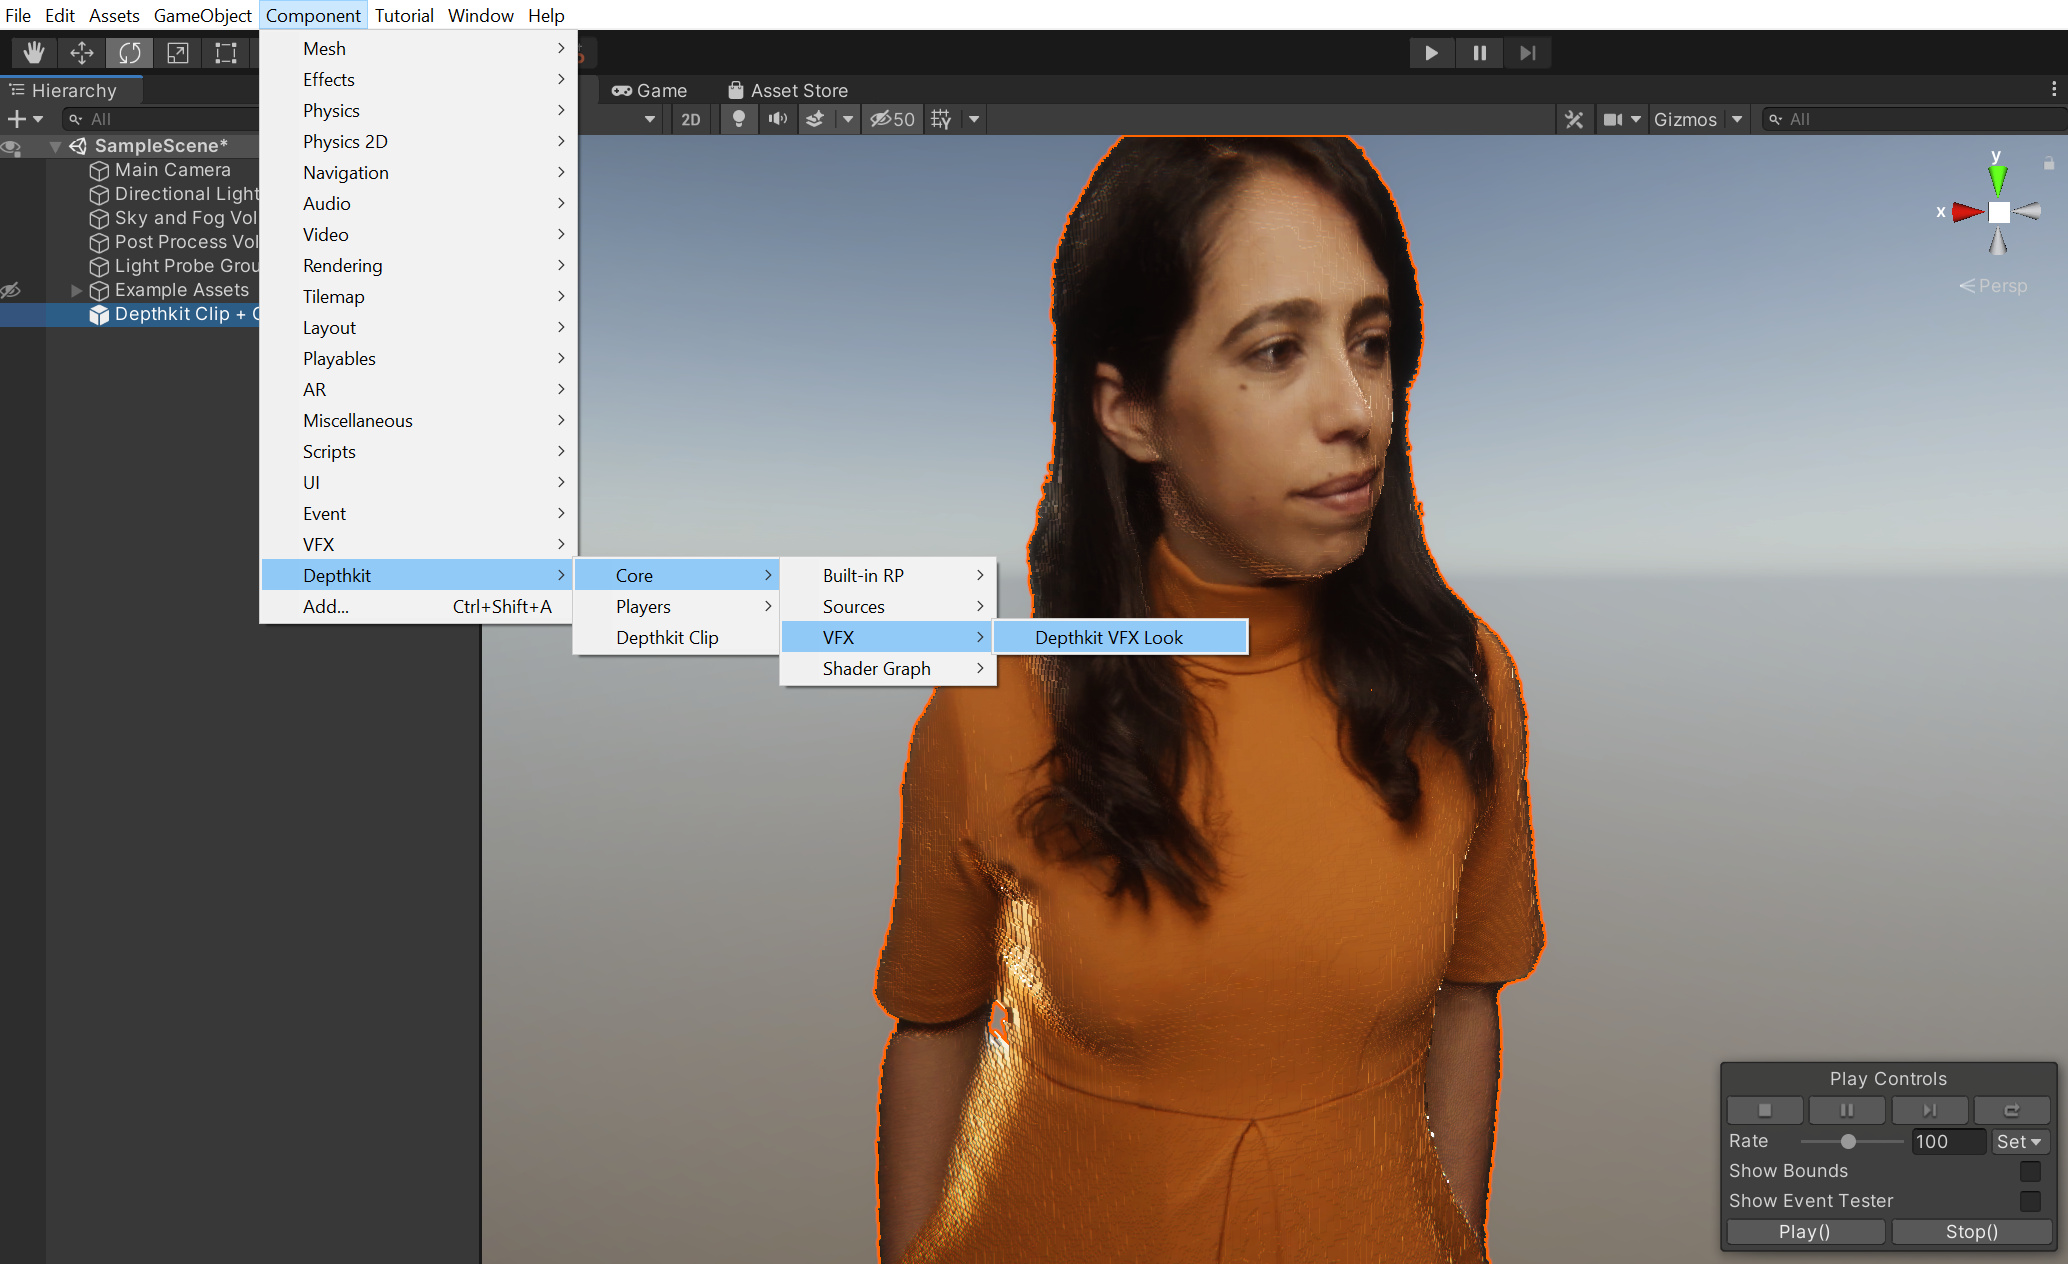
You can also add a VFX Look to the same clip. Back in the Hierarchy, select your clip and go to the Component menu. Select Depthkit → Core → VFX → Depthkit VFX Look. This will add the visual effect components to your Depthkit clip. It will also assign a Depthkit VFX Example Look to the clip.
-
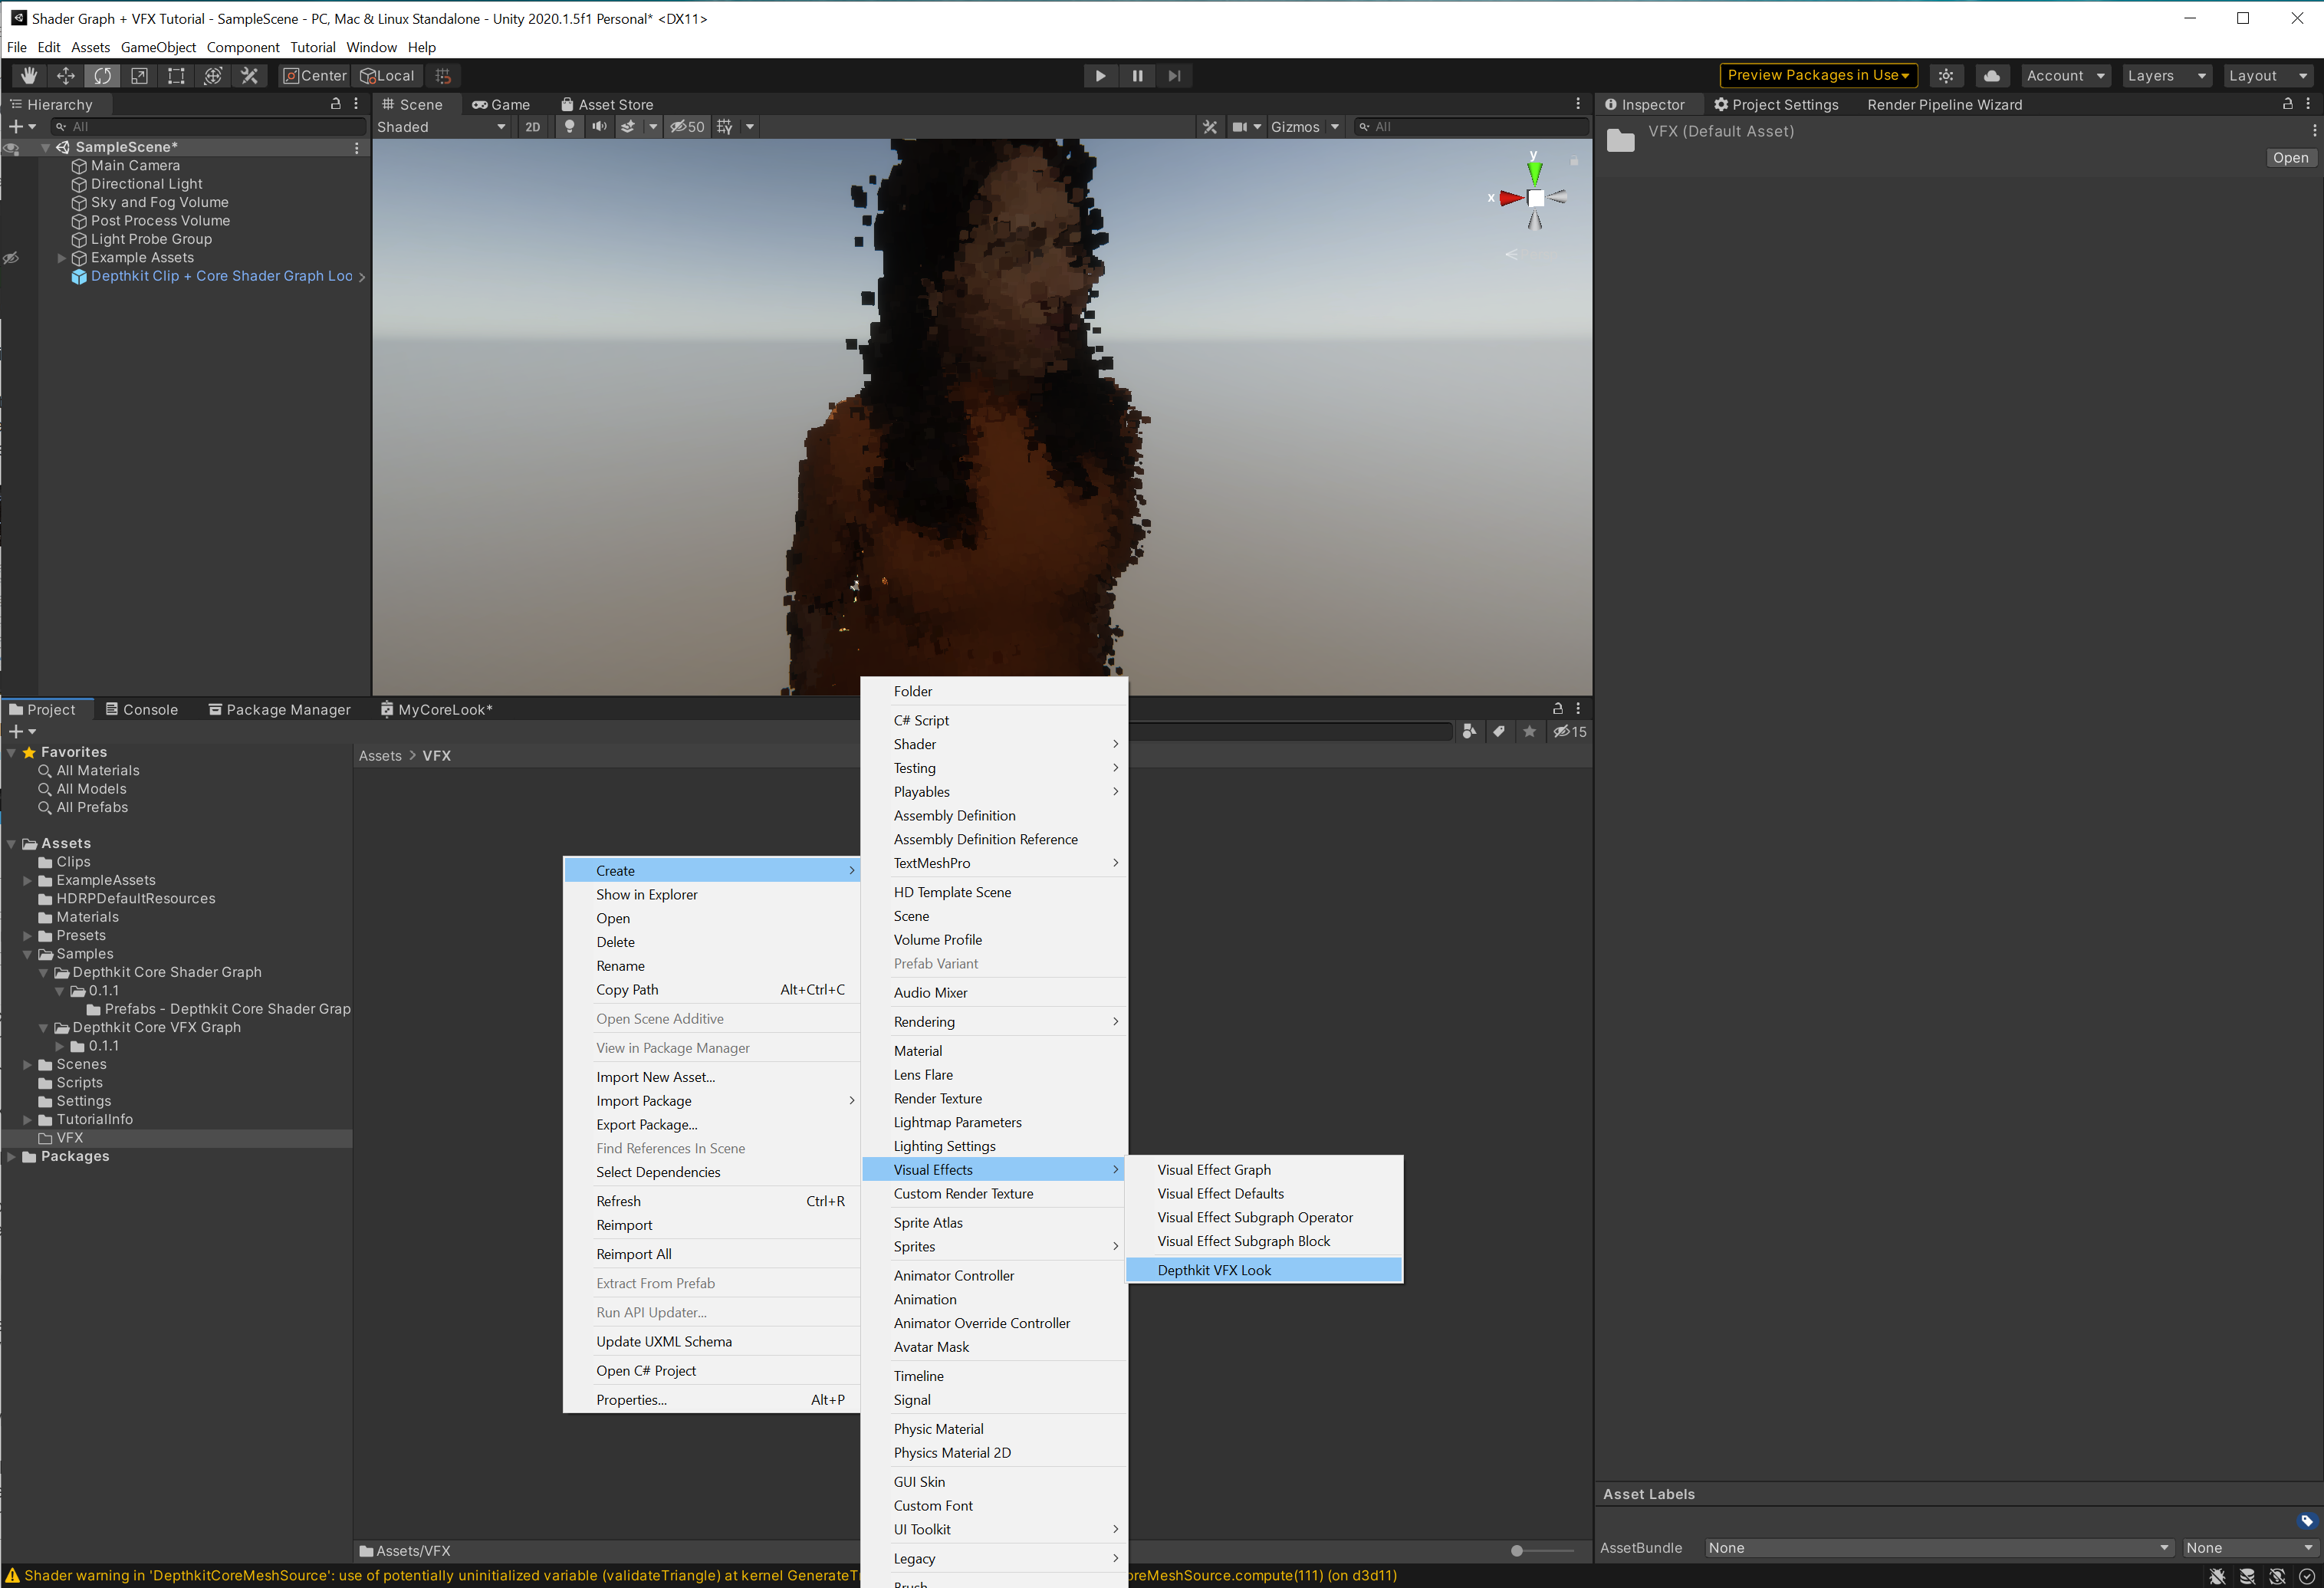
In order to create and apply your own VFX Look, you will need to create a new Depthkit VFX Look. You can do this by right clicking in the Project tab, select Create → Visual Effects → Depthkit VFX Look. This will generate MyVFXLook. Feel free to rename this file.
-
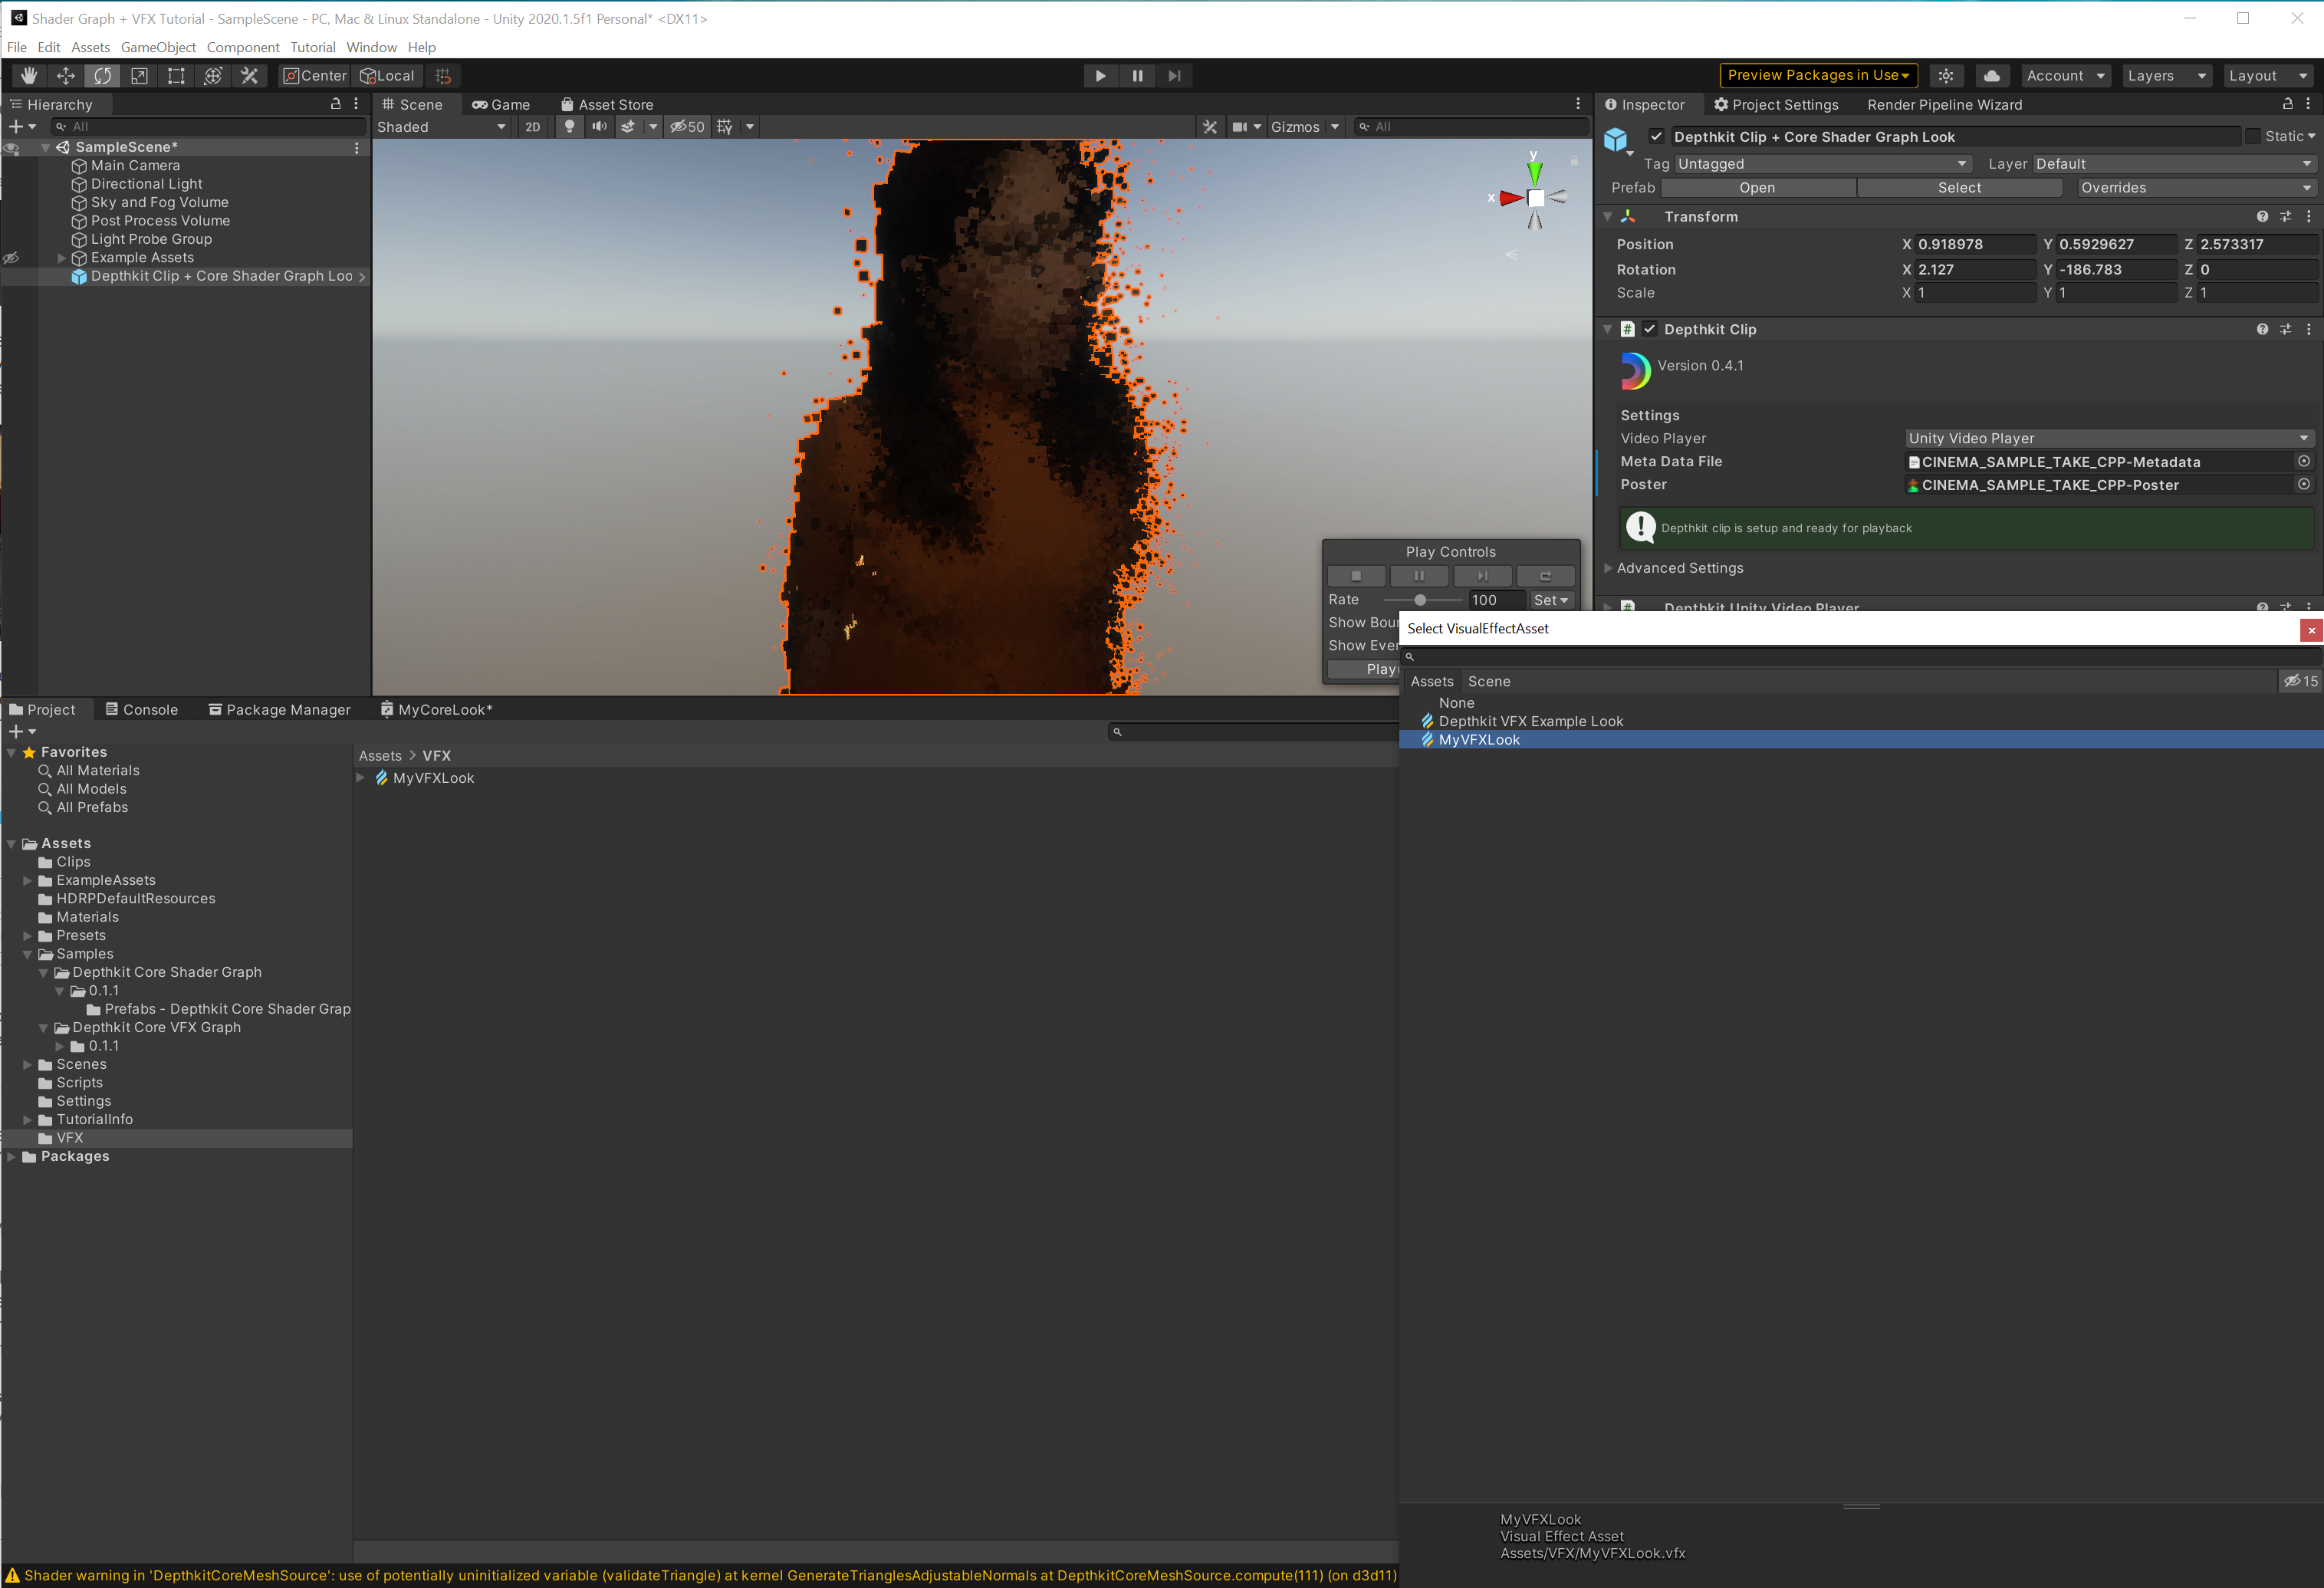
Select your Depthkit clip in the Hierarchy and see the inspector. In the Visual Effect component, update the Asset Template in order to replace the Depthkit VFX Example Look with your new Look.
-
Back in the Project tab, double click this new Look to launch the VFX Graph workspace.
-
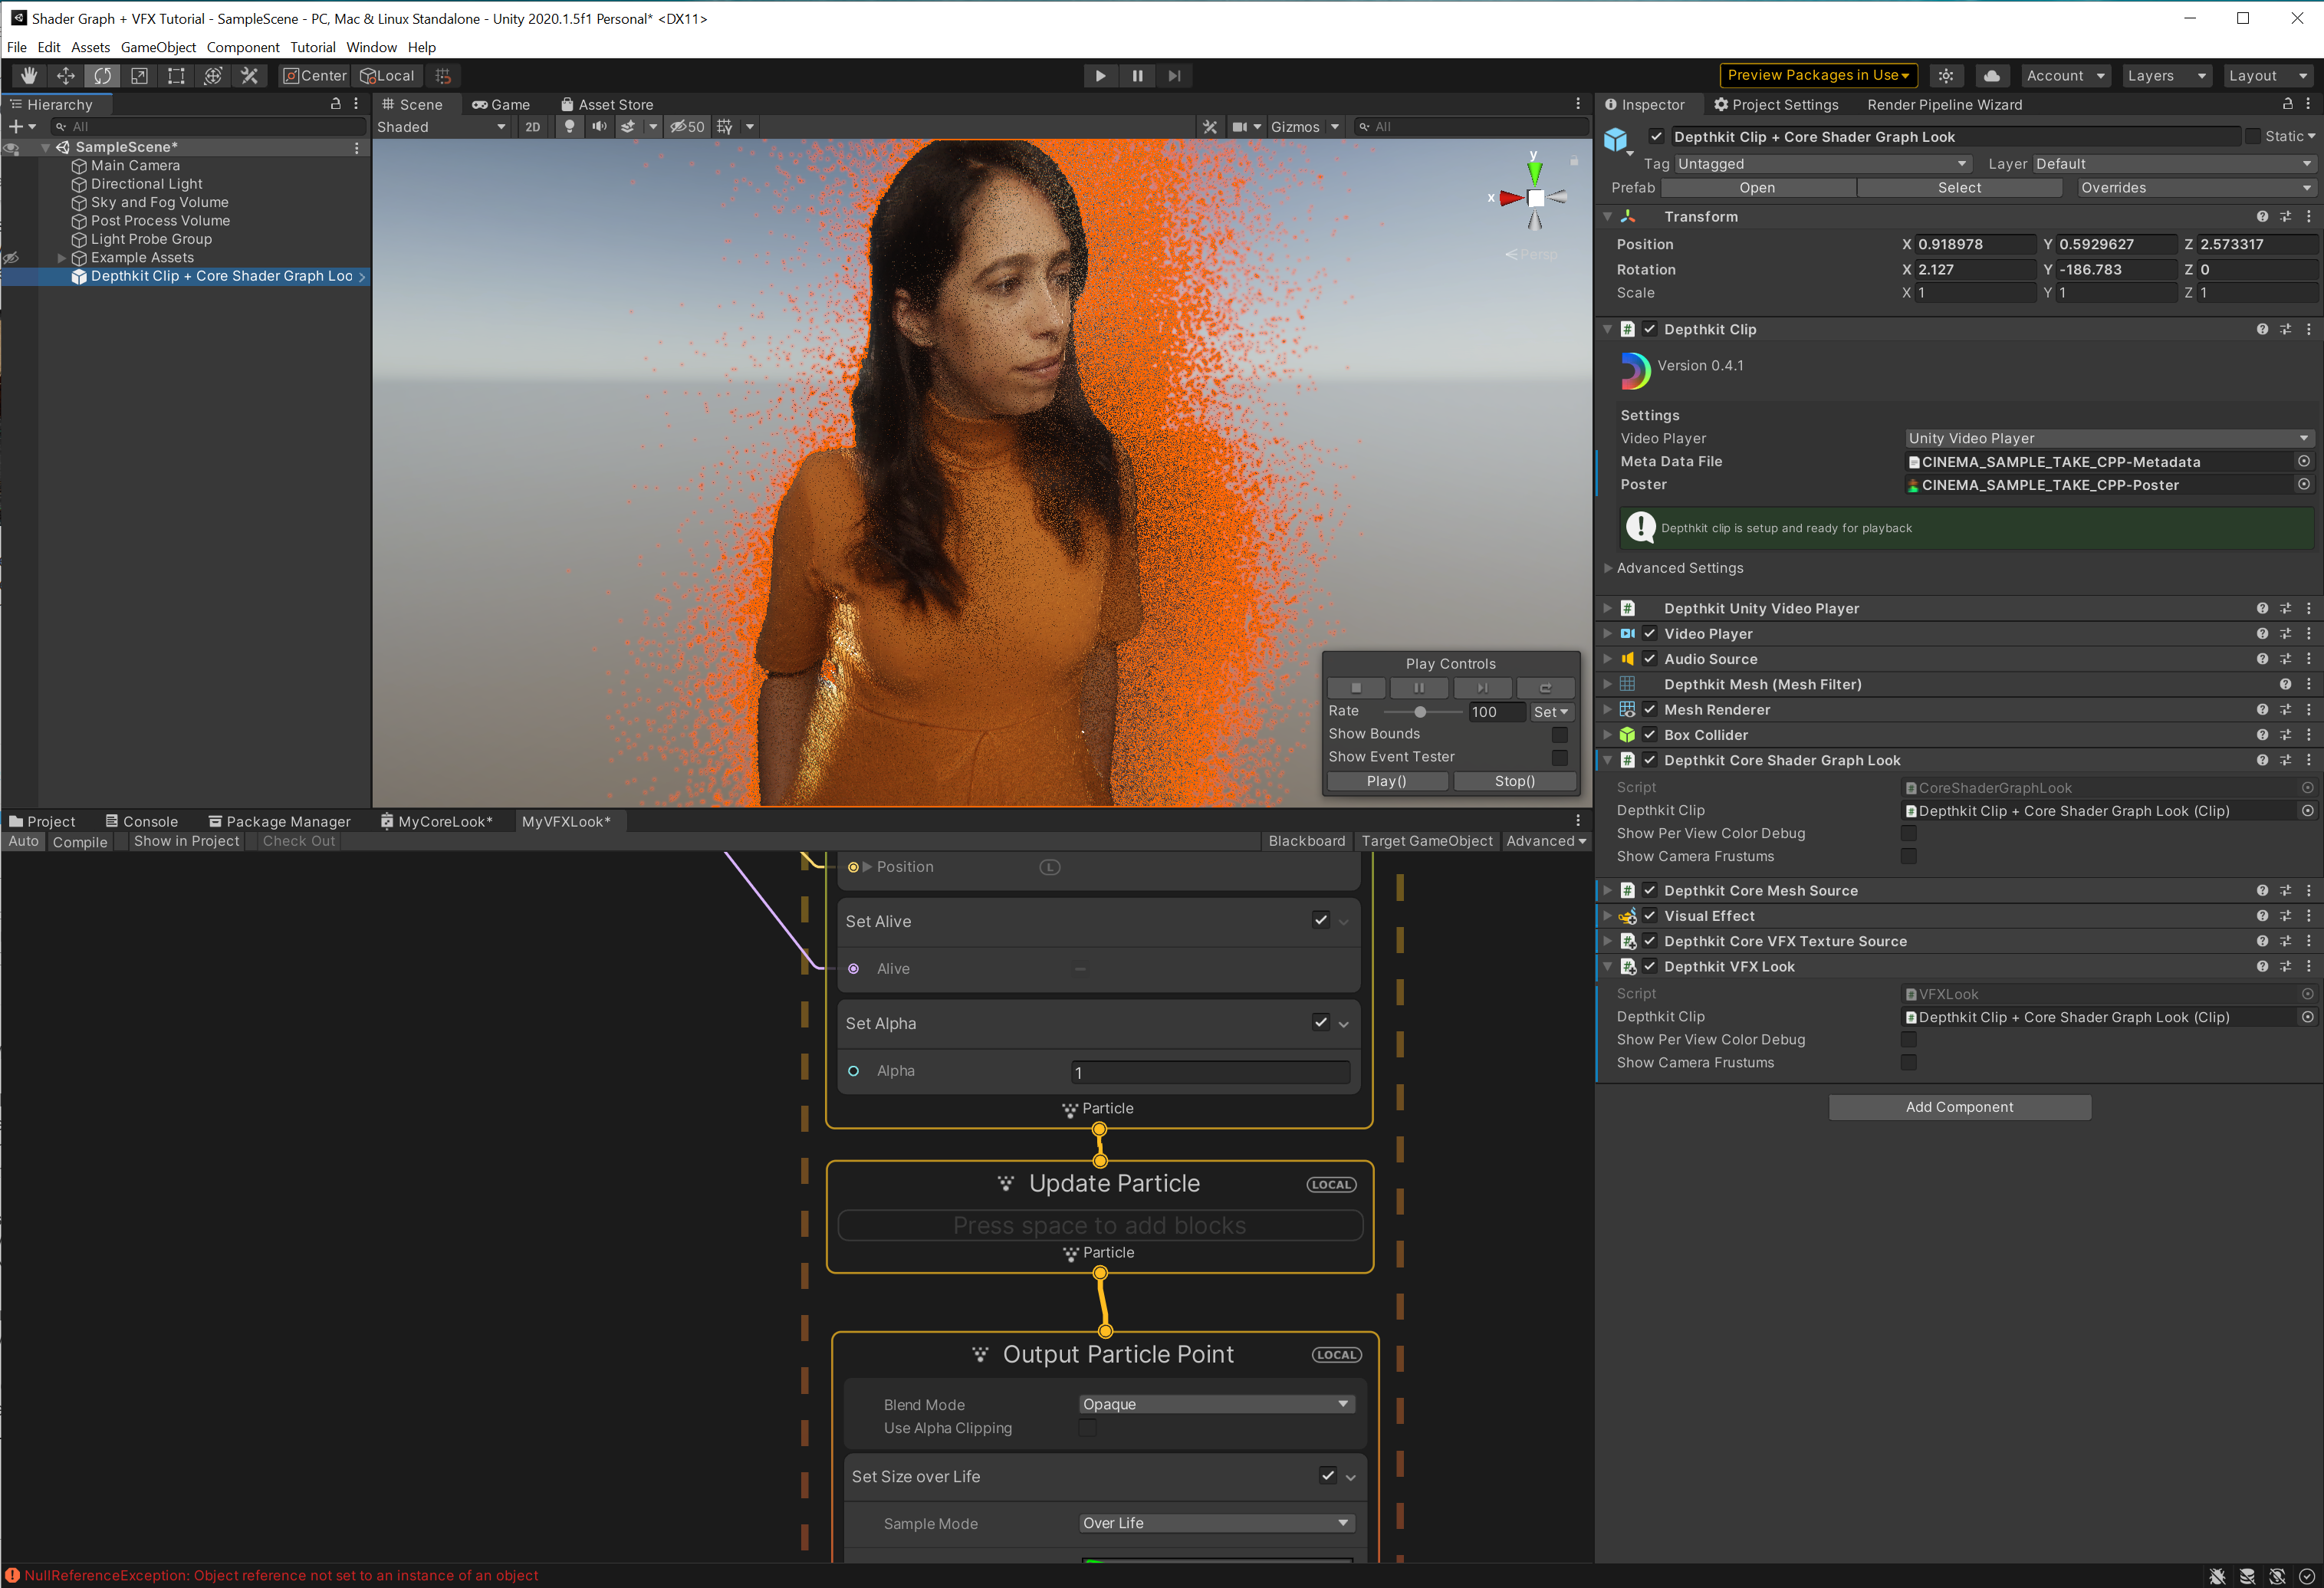
In the node graph, you have complete creative control to design and customize your VFX Look. To see your design applied to your Depthkit clip immediately, select Auto in the upper left corner of the VFX Graph editor. For this guide, I’ve simply converted the Look output to a point to apply a particle cloud effect. Note that since we have already created and applied a Shader Graph Look, my point output will appear on top of the existing Shader Look. In this case, we can see a point cloud being generated on top of the subtle fresnel effect generated with the Shader Graph.
If at any point you want to view the VFX or Shader Graph Look by itself, you can disable either of the Depthkit Core Shader Graph Look or Depthkit VFX Look components and click play.

At this point, you can continue to build and customize both the Shader Graph and VFX Look to your heart’s content!

Stay tuned for more guides on building new Looks. Have a specific aesthetic in mind? Let us know so we can share more tutorials that fit your needs!