Hi, @BryanDunphy. This is a lot of information, so thanks for sharing. The stage is looking good!
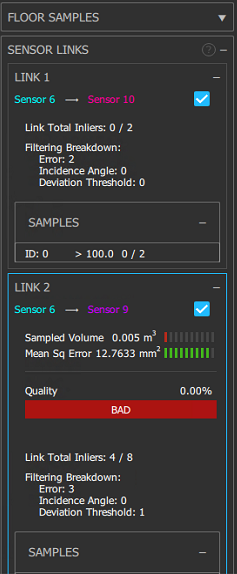
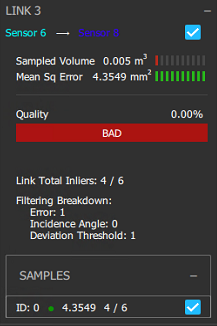
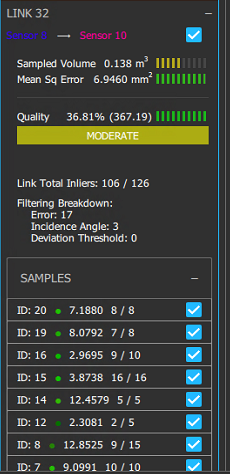
To explain the number of links you are seeing, the number of total possible links for a Depthkit Studio calibration is the total number of sensor pairs (1&2, 1&3, … 1&9, 1&10, 2&3, 2&4 … 2&9, 2&10, 3&4, 3&5 … etc.), which in the case of a 10-sensor configuration is (if my math is right) 45 possible links. With most practical sensor configurations, some of these sensors are facing opposite directions, meaning some of the pairs will never be able to see the same calibration marker at the same time, and never form a link. Depthkit gathers samples for all links, and then automatically filters out all but the best links needed to link all sensors, meaning that although you may have 33 links, only 9 (total sensors minus 1) are in use, as indicated by the blue outline surrounding them (see in your screenshots how Link 2 is active, but Link 1 is not). This automatic selection of the best links usually (but not always) chooses adjacent sensors because they usually share samples with the least amount of error, but if there aren’t enough good samples in a link, the calibrator will choose a different one.
The easiest way to see all of the links at once is to hover over the ‘?’ next to the ‘SENSOR LINKS’ header, and a tool tip will show you how each sensor is linked to each other. You can then look up each sensor number’s serial number in the ‘SENSOR CONFIGURATION’ pane to see which sensor number corresponds to which physical sensor, and look for any links which might be causing issues (e.g. a link containing two sensors at opposite ends of the volume).
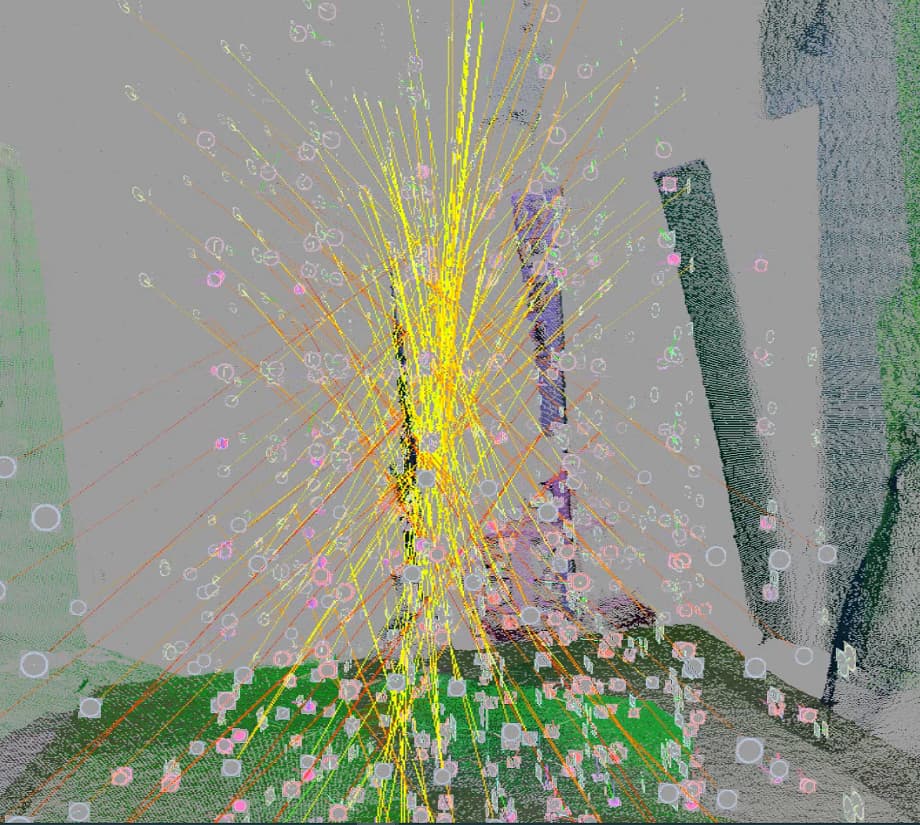
The long yellow and orange lines in the 3D viewport indicate that based on the current calibration, some of the sensors disagree on where a particular marker was when it was captured, and the longer the line, the larger the disagreement. Ideally, your calibration should make these lines as short as possible - less than 1cm in most cases.
In your screenshot, it looks like the overwhelming majority of the samples you have captured have been filtered out as indicated by the presence of rings to represent the samples rather than dots, which is probably what is causing things to misalign.
- Do these lines go away (and do the point clouds from each sensor better align) if you open up some of the filters to be more inclusive?
- What is the best overall Quality you’re able to achieve after adjusting the slider positions?
- What is the overall Sampled Volume when the quality is the highest?
- What numbers are being reported in the overall Filtering Breakdown?
Although your calibration object is able to put many markers in front of the sensors at once, many of the markers may still be excluded by the Angle of Incidence filter if they aren’t squared up enough to a pair of sensors. However, if the filters need to be opened up too much, they will start to include low-quality samples, which will throw off the calibration.
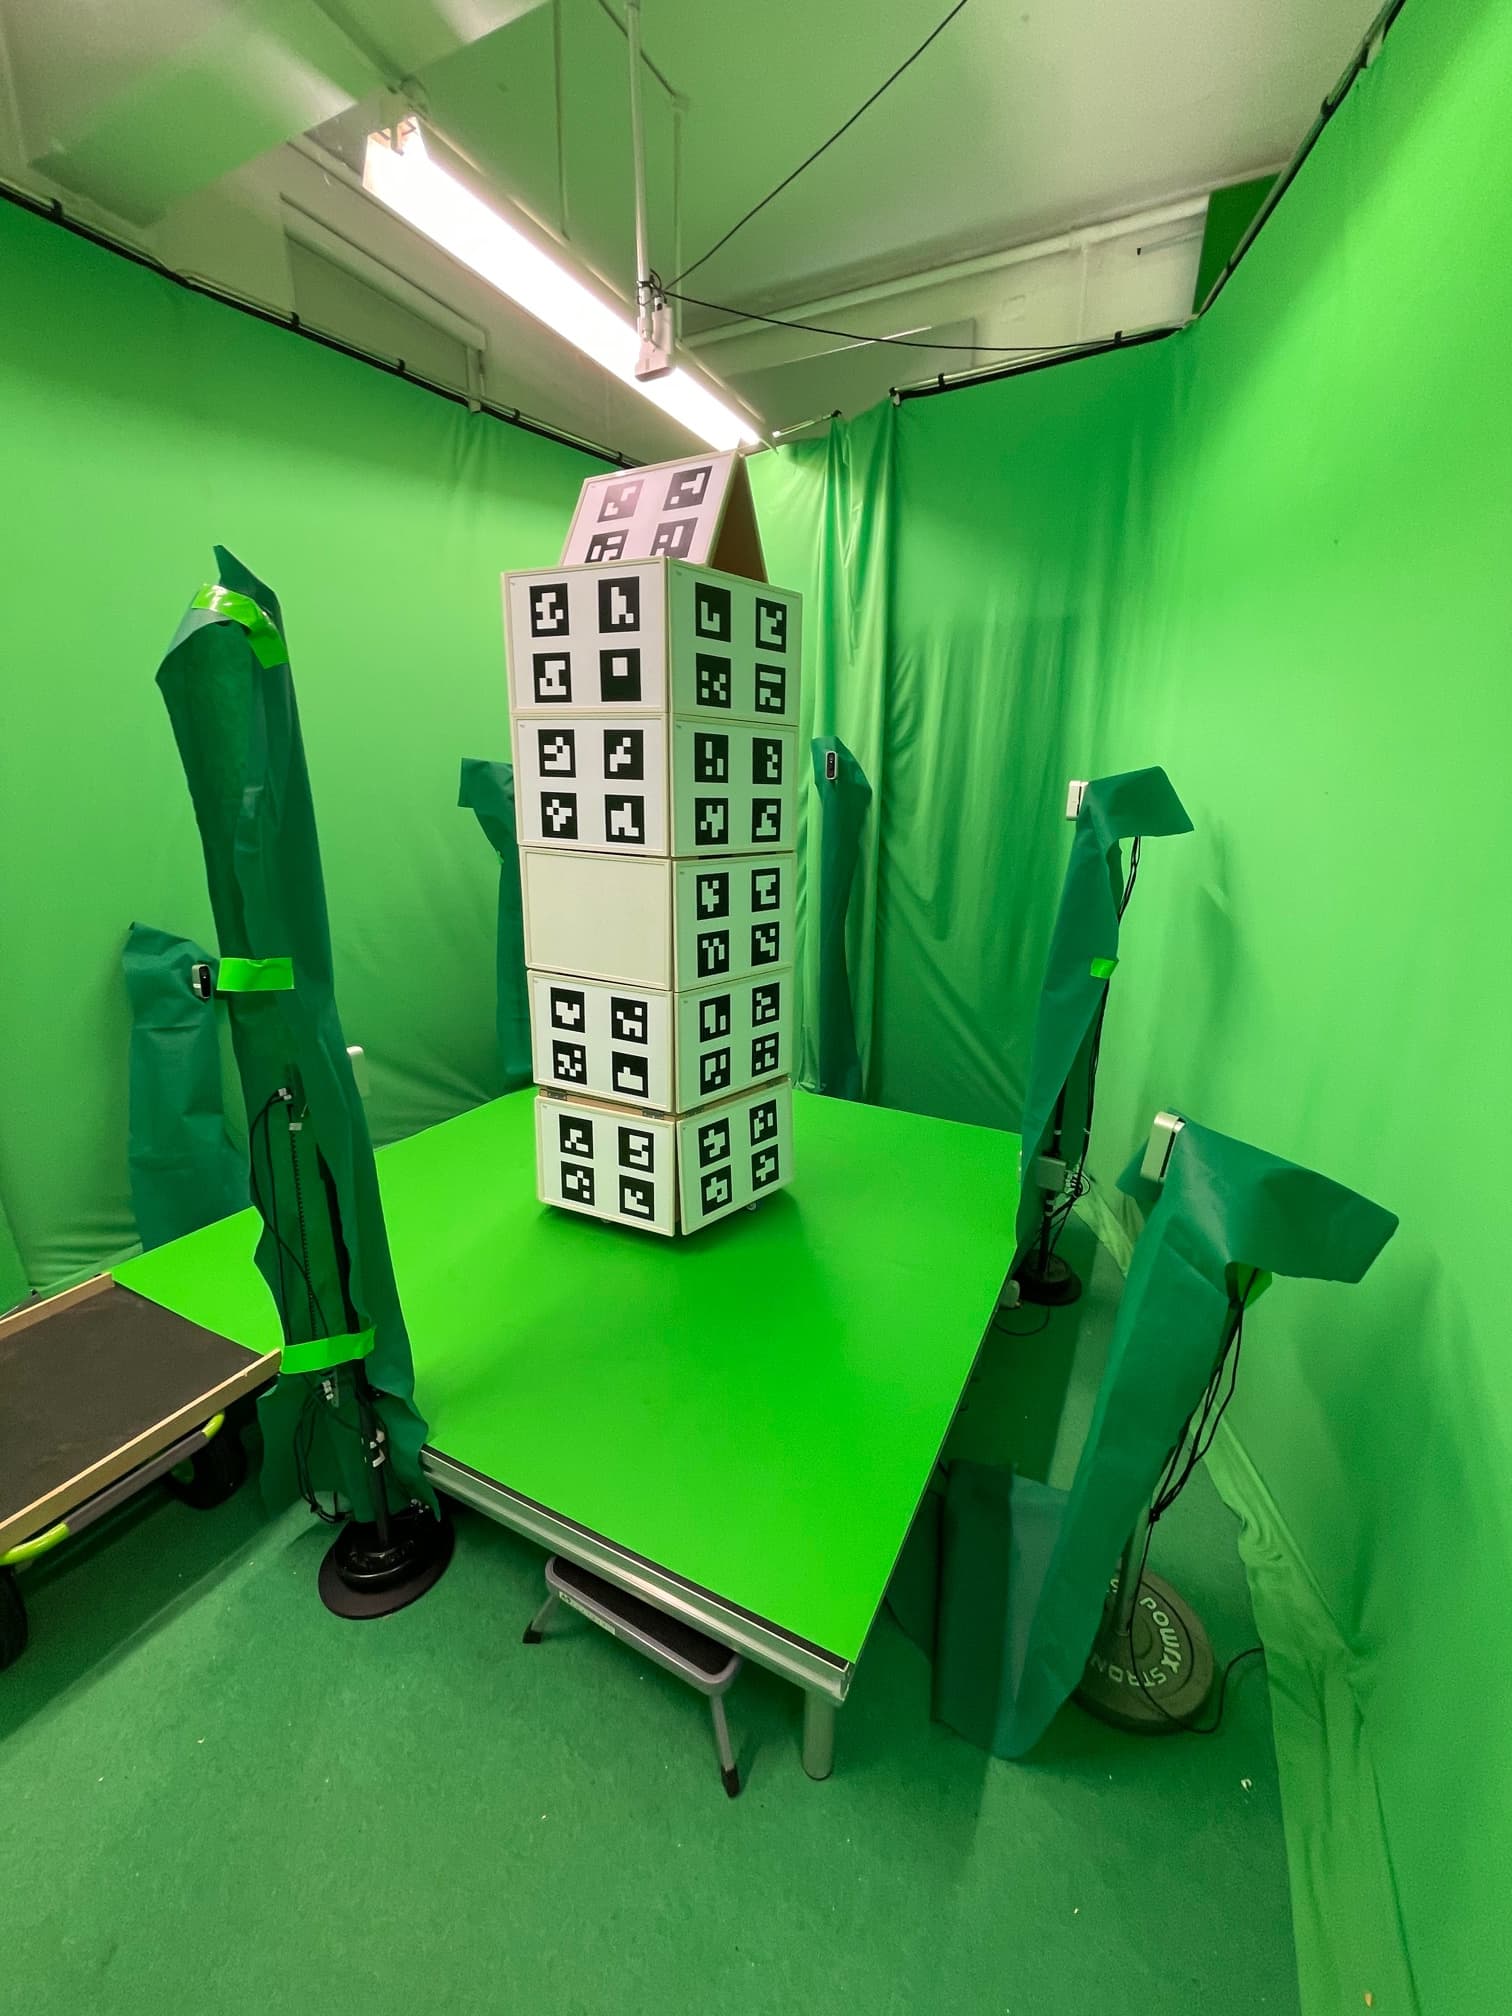
In your photo of your calibration object, the two sensors on the near-left side of the stage have a great view of many markers on one side of the object, however, this is not a good position to link those two sensors with either of the mid-level sensors flanking it, as both flanking sensors are seeing that side at a shallow, glancing angle. If you rotated the calibration object ~30 degrees, both the near-left sensors AND the flanking sensors would have a good view of common markers. Make sure you are factoring this rotation into your calibration sample positions.
Finally, we are in the process of tuning the calibration metrics and cleaning up the calibration interface for a future Depthkit release. We’ll keep you posted about when you can expect this update.
In the meantime, please let me know the answers to the above, and we’ll go from there.