Check out this tutorial as a quick video or explore written guide below.

Setting up your Unity Project with the Depthkit Core Package
-
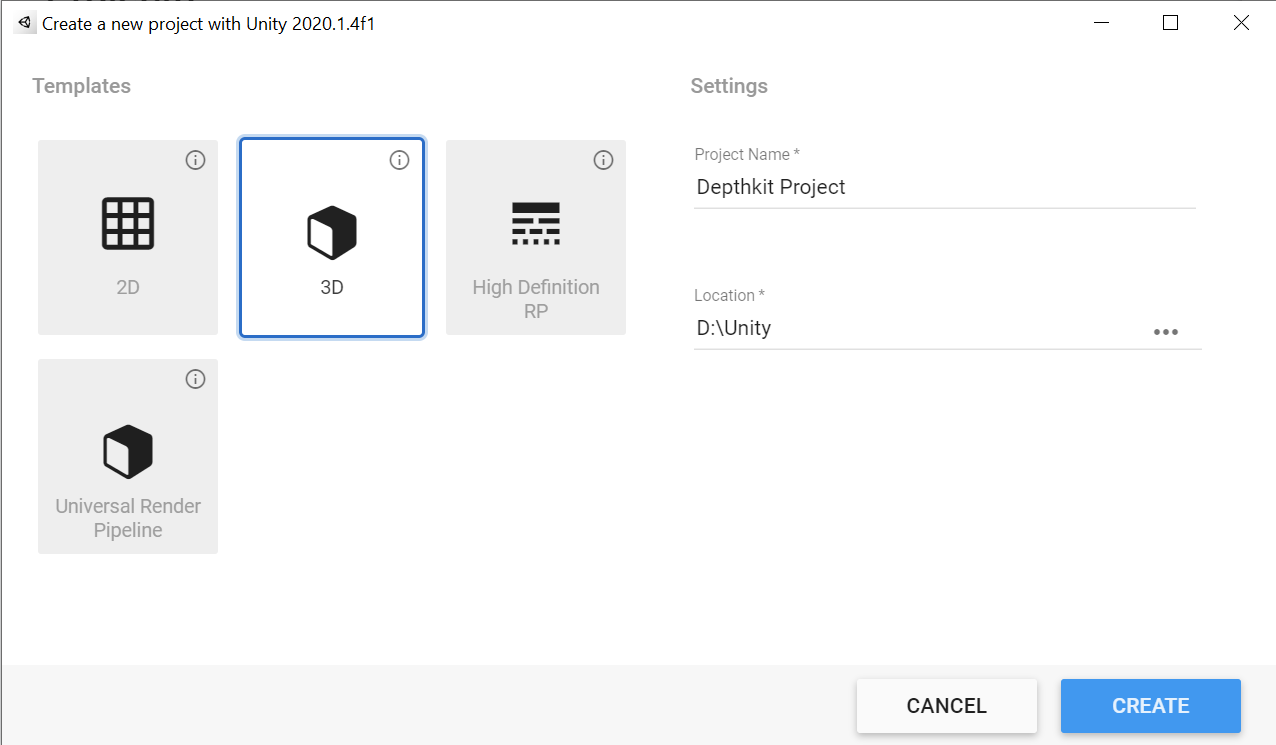
Create a new 3D project via the Unity Hub.
-
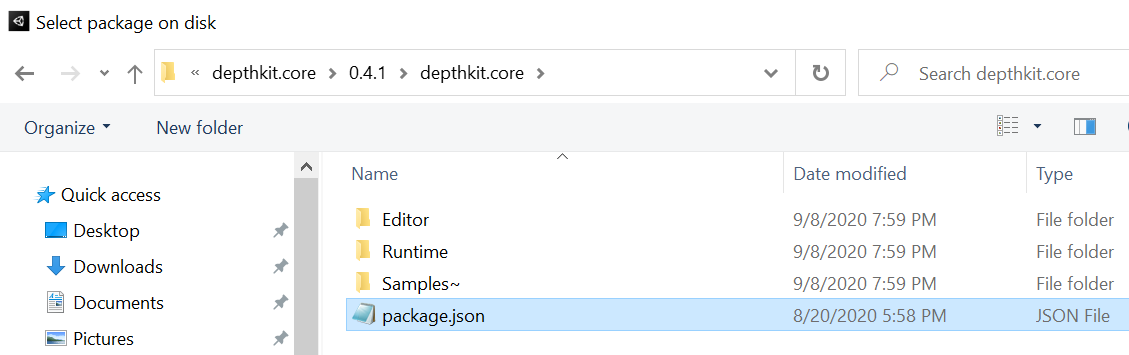
In the Package Manager, click the add icon and select Add package from disk.
-
Locate the depthkit.core package folder. Within this folder, select the package.json file and click open.
-
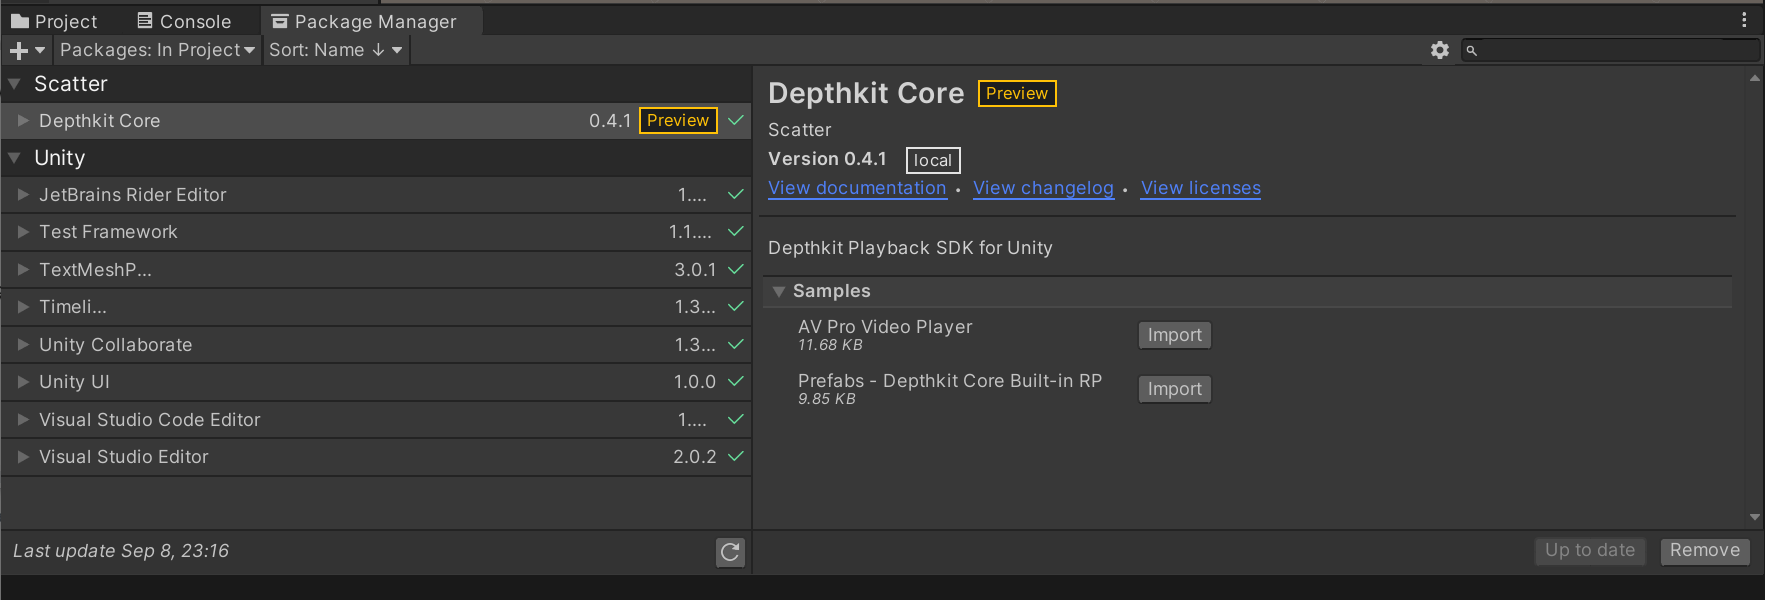
Once imported, you will see the addition of Depthkit Core within the Package Manager. Select this item and expand the Samples toggle. Import the available Depthkit Core Built-in RP Prefab. This will import a Depthkit clip prefab that is preconfigured for your project.
-
In the Project window, go to your Assets folder and locate the prefab you just imported under Samples → Depthkit Core → 0.4.1 → Prefabs - Depthkit Core Built-in RP.
-
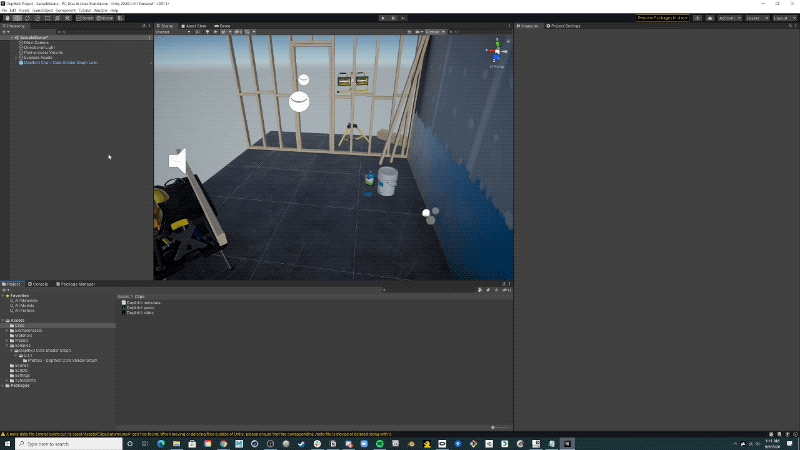
Select the Depthkit Clip + Core Built-in RP Look and drag it into the Hierarchy to populate your scene. This prefab has everything you need to playback a Depthkit clip with a Photo Look in Built-in RP. Now we simply need your Depthkit footage!
-
Back in the Project window, create a new folder under Assets. You can do this by right clicking in the Project window and selecting Create → Folder. I like to name this folder Clips. This will hold your Depthkit video files, metadata text files, and optional poster images. Drag your Depthkit assets into this folder in the Project window or copy and paste in the explorer window.
-
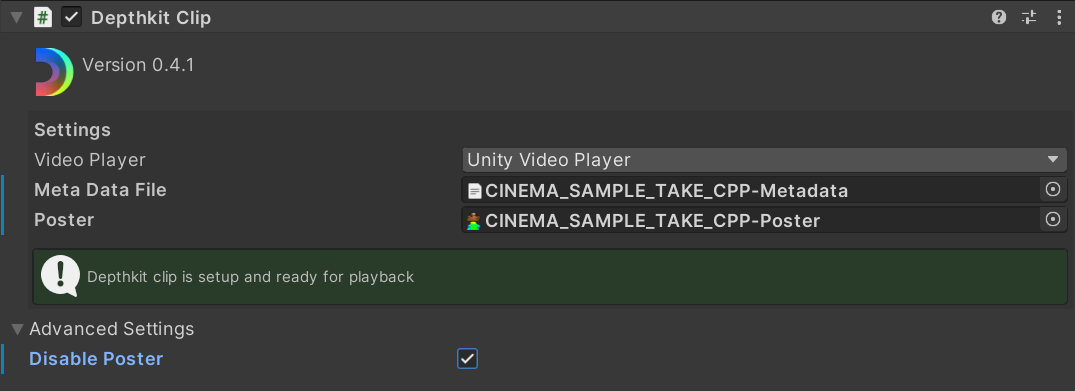
Back in the Hierarchy, select your recently created Depthkit clip. See the Inspector. You will notice that the Depthkit Clip component is alerting you that your Depthkit Clip is not set up. No worries! All we need to do is drag the Depthkit metadata file and poster image to the corresponding fields in the Depthkit Clip component. In the Video player component, drag the Depthkit video to the Video Clip field.
-
If you do not want to use a poster image, simply select the Advanced Settings toggle in the Depthkit Clip component and select Disable Poster.
-
Now your Depthkit clip is set up and ready to play! In the Hierarchy, double click the game object to quickly zoom in on your asset in the Scene view. Hit play to preview your clip in action!

Configuring your Depthkit Clip
Once your Depthkit clip is positioned in your scene, there are a few handy settings that will improve the quality and playback of your clip.
Mesh Density allows you to optimize the density of your mesh to suit your scene and intended publishing platform. Full mesh density maximizes the quality that your clip has to offer, especially when it comes to depth detail and edge quality. However, you may be building to a mobile device, in which case performance is key. In this scenario, you may rely on low or medium mesh density.
Clean Up Filters refine depth data and assist in reducing artifacts in your clip.
Edge Noise Triangle Culling will reduce edge artifacts often caused by video compression. It accomplishes this by filtering out triangles with a value below the specified amount. For best results, increase this value to remove all edge artifacts. Be mindful of maxing out this value and introducing depth holes in your asset.
Long Triangle Culling filters out triangles higher than the value specified. This is most helpful when you have unwanted stretching between depth values. Increase this value to reduce the stretched geometry.
Sheer Triangle Culling is designed to remove depth artifacts that are positioned at a sheer angle in relation to the source depth camera. For best results, increase this value to remove unwanted artifacts.
Edge Smoothing introduces an edge mask that provides control over edge blending. This offers the ability to smooth the edge of your asset for a more polished look. Adjust Edge Smoothing with the Edge Smoothing Radius and Strength.
Relighting is an experimental setting that allows you to adjust the surface normals of your clip.