@AlanWinslow Thanks for sharing the screenshots and photos materials. To help others who may be experiencing this same issue, I’ll reiterate what you’re seeing with some of your visuals:
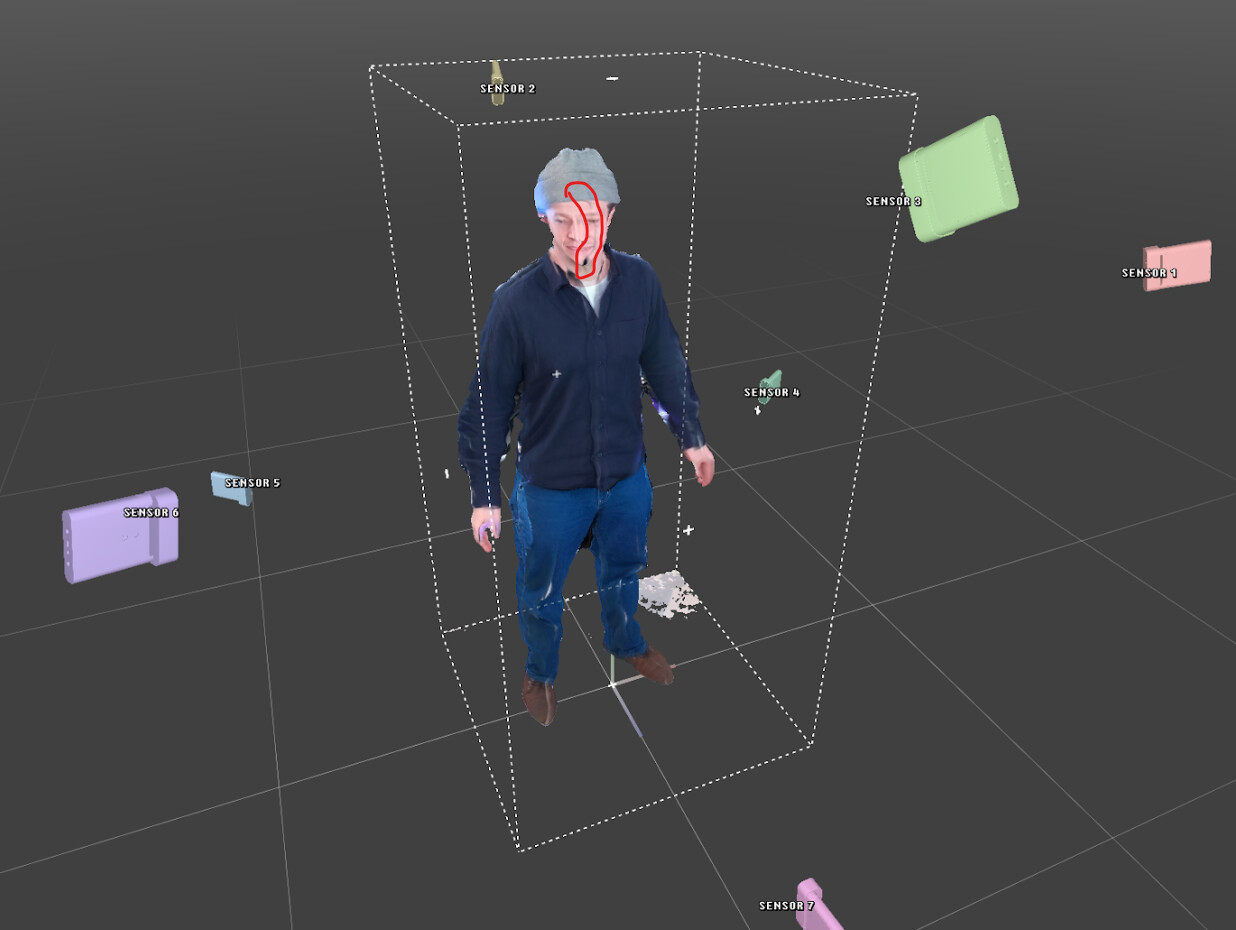
When your subject is facing your hero-position sensor, there is a visual artifact resembling a seam appearing right down the front of your subject’s face. At first glance, this seems especially puzzling because the here sensor (in this case the green Sensor 3 in the Depthkit 3D Viewport) is well-positioned with a clear view of the subject’s face.
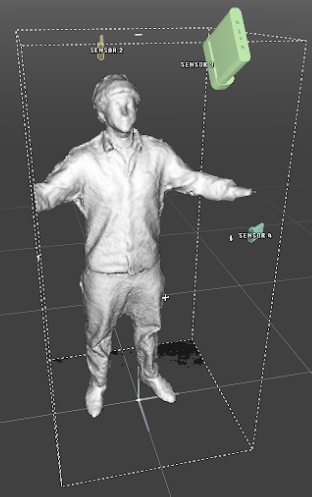
Looking at a shaded view without texturing, we can see that this issue does not appear to manifest in the geometry - The shape of the face doesn’t have any kind of ridge or asymmetry which would indicate geometry misalignment.
Looking at the Texture Contribution view, which shows the composition of the texturing with color-coding by sensor shows that the green Sensor 3 is only contributing to a small area of the forehead, and that the flanking sensors (6/Violet and 1/Red) are texturing the rest of the face with a hard edge at the boundary of the two - right down the center of the face. This can be addressed in the following ways:
- The Texture Blending options can be adjusted to soften the boundary between the two textures, specifically by lowering the Fixed Texture Blend value. Be sure to do this while looking at both the Textured and Contribution views to see how this adjustment affects texturing.
- For Combined per Pixel assets destined for Unity, increasing the Dynamic Texture Blending value will cause much more of the 3/Green sensor to be used for texturing when viewing from the front. Again, do this while looking at both the Textured and Contribution views to see how this adjustment affects texturing, especially when moving the virtual camera around to different positions. These non-destructive settings will be retained once the asset is exported from Depthkit and imported into Unity, but can be further adjusted in Unity in the Depthkit Studio Mesh Source component’s texture settings.
- After adjusting both Dynamic and Fixed Texture Blending settings, then adjust the texture spill settings below them to reduce and soften texture spill artifacts (e.g. the outline of an extended arm projected onto the chest).
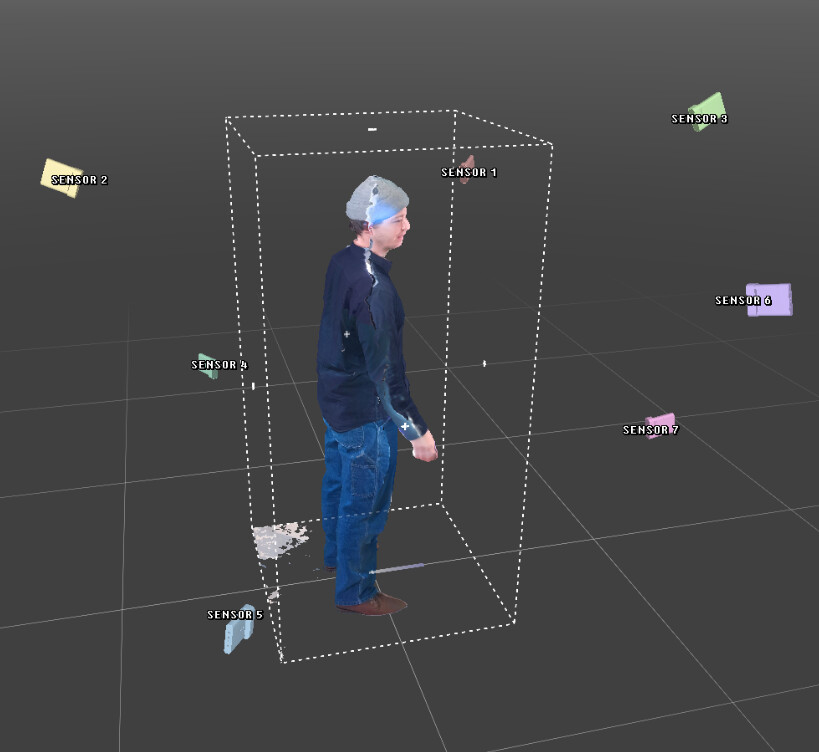
- Finally, one more change which can address these seams is to reposition the sensors to better cover the areas where they are appearing. The seam above looks like it’s the result of none of the sensors having a clear direct view of the affected area, resulting in texturing from oblique sensors which are capturing that part of the body from more extreme angles. This along with a known factory color-depth misalignment issue with some Azure Kinects can result in small pieces of background RGB data (like a dark background or a bright light) ending up in the textures of your capture at the edges of a particular sensor’s perspective. In your 7-sensor configuration, I would consider moving sensors 1/Red and 6/Violet further away from the front / toward the sides, but adding additional sensors to cover those areas would also work.
Let me know if you have any questions about the above, and please share your results once the above recommendations are applied. Thanks!