@JacobPeddicord Thanks for sharing all of these materials. There are a few areas I suggest honing in on to better understand the nature of this issue and ways to improve it:
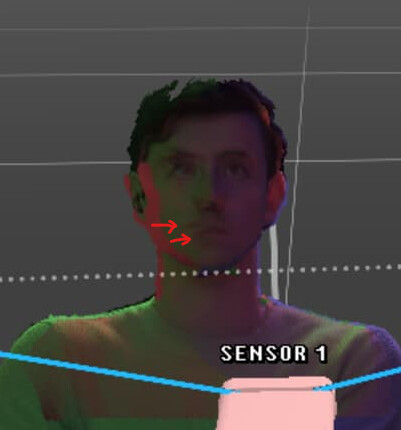
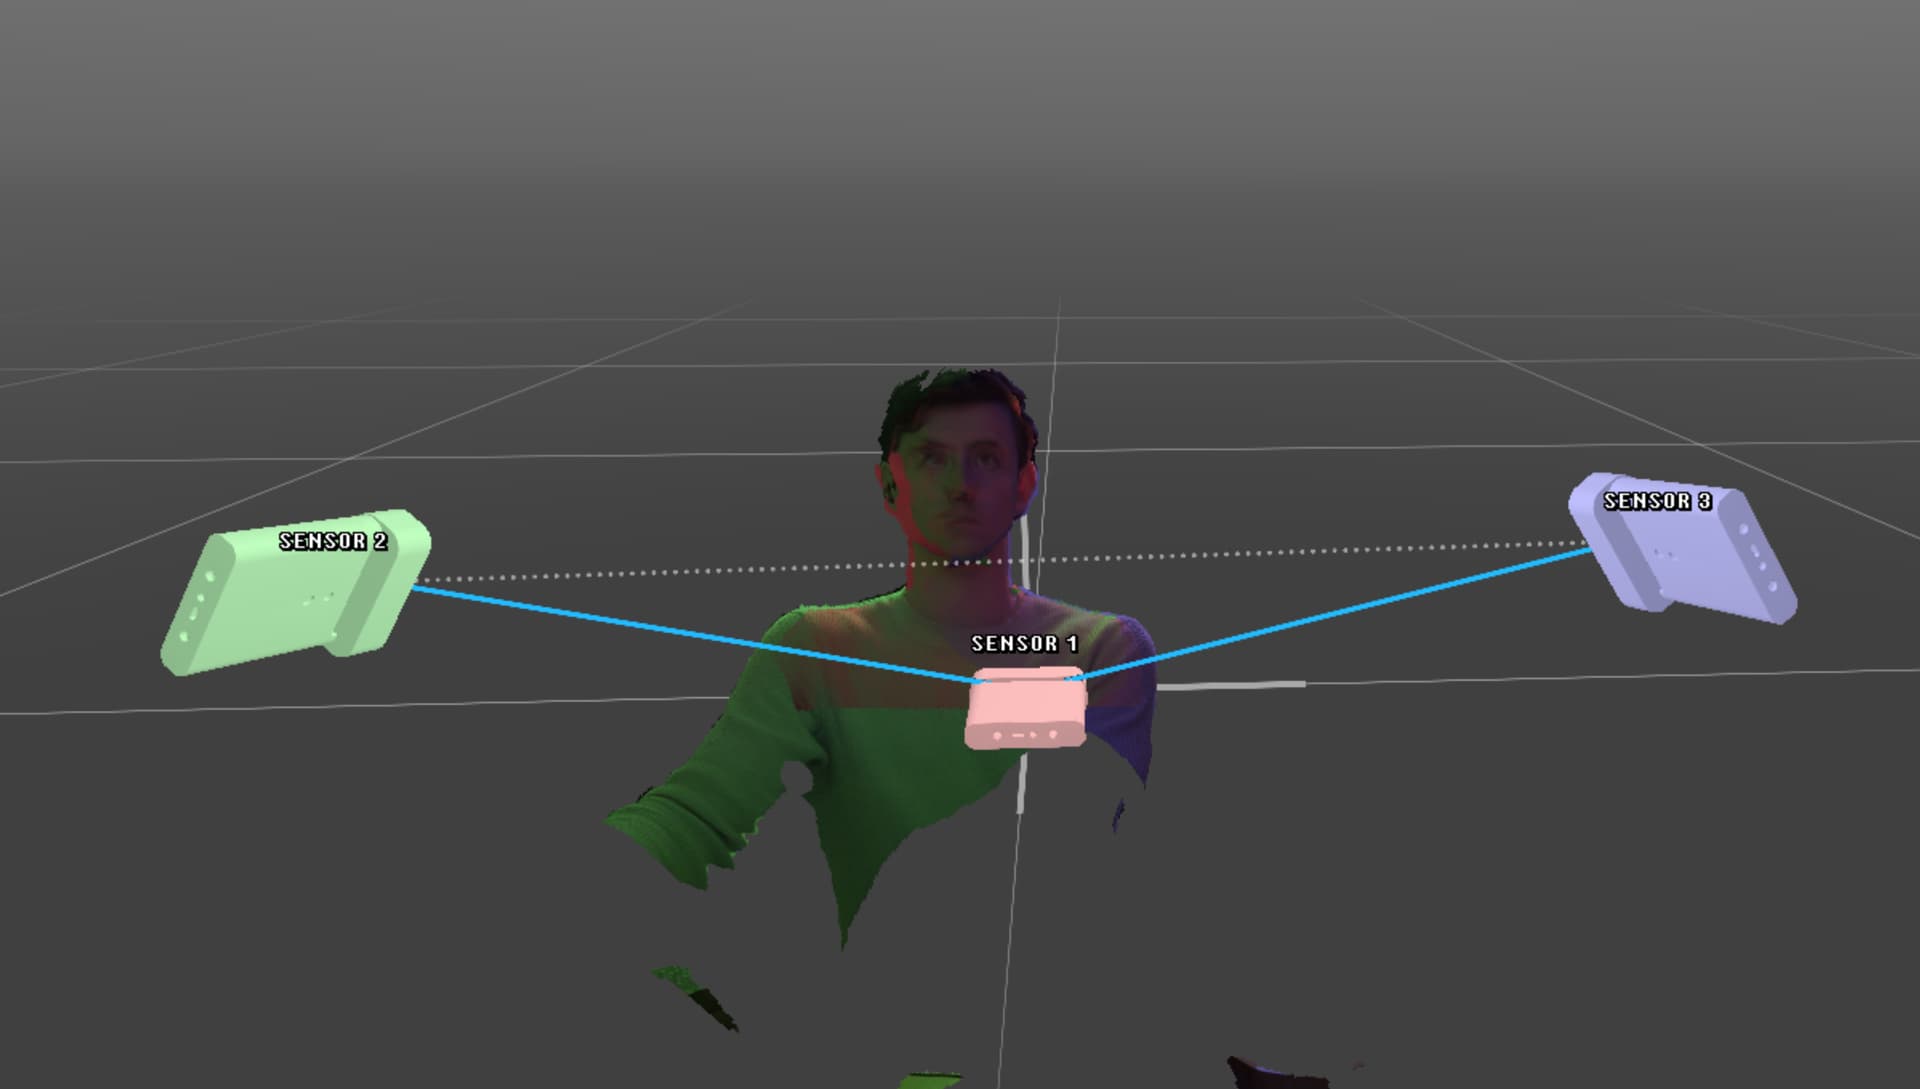
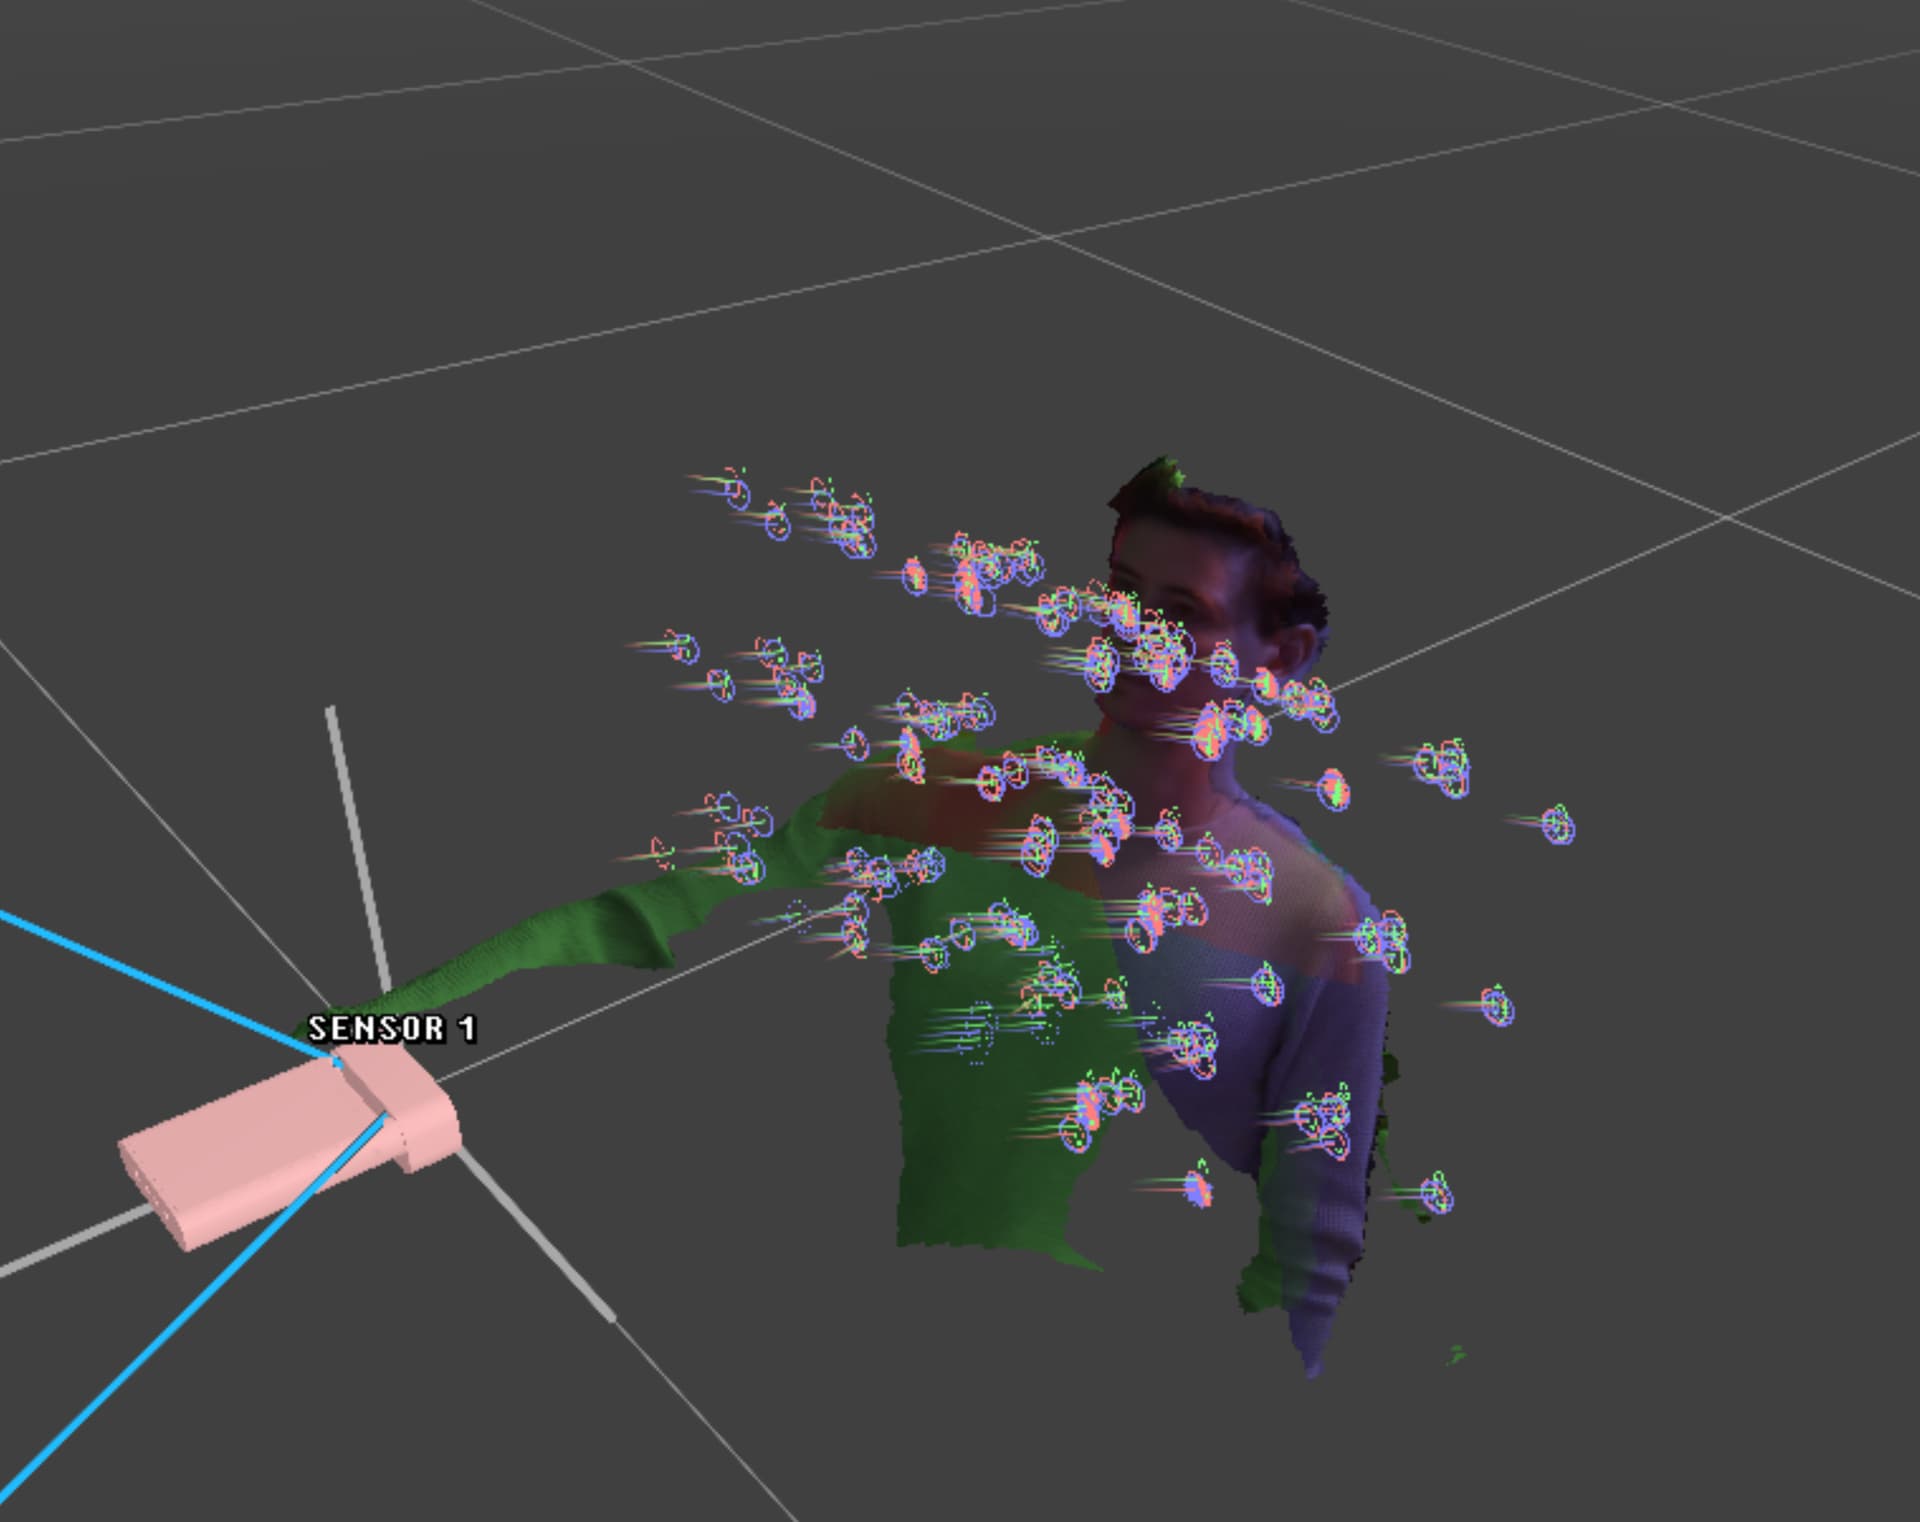
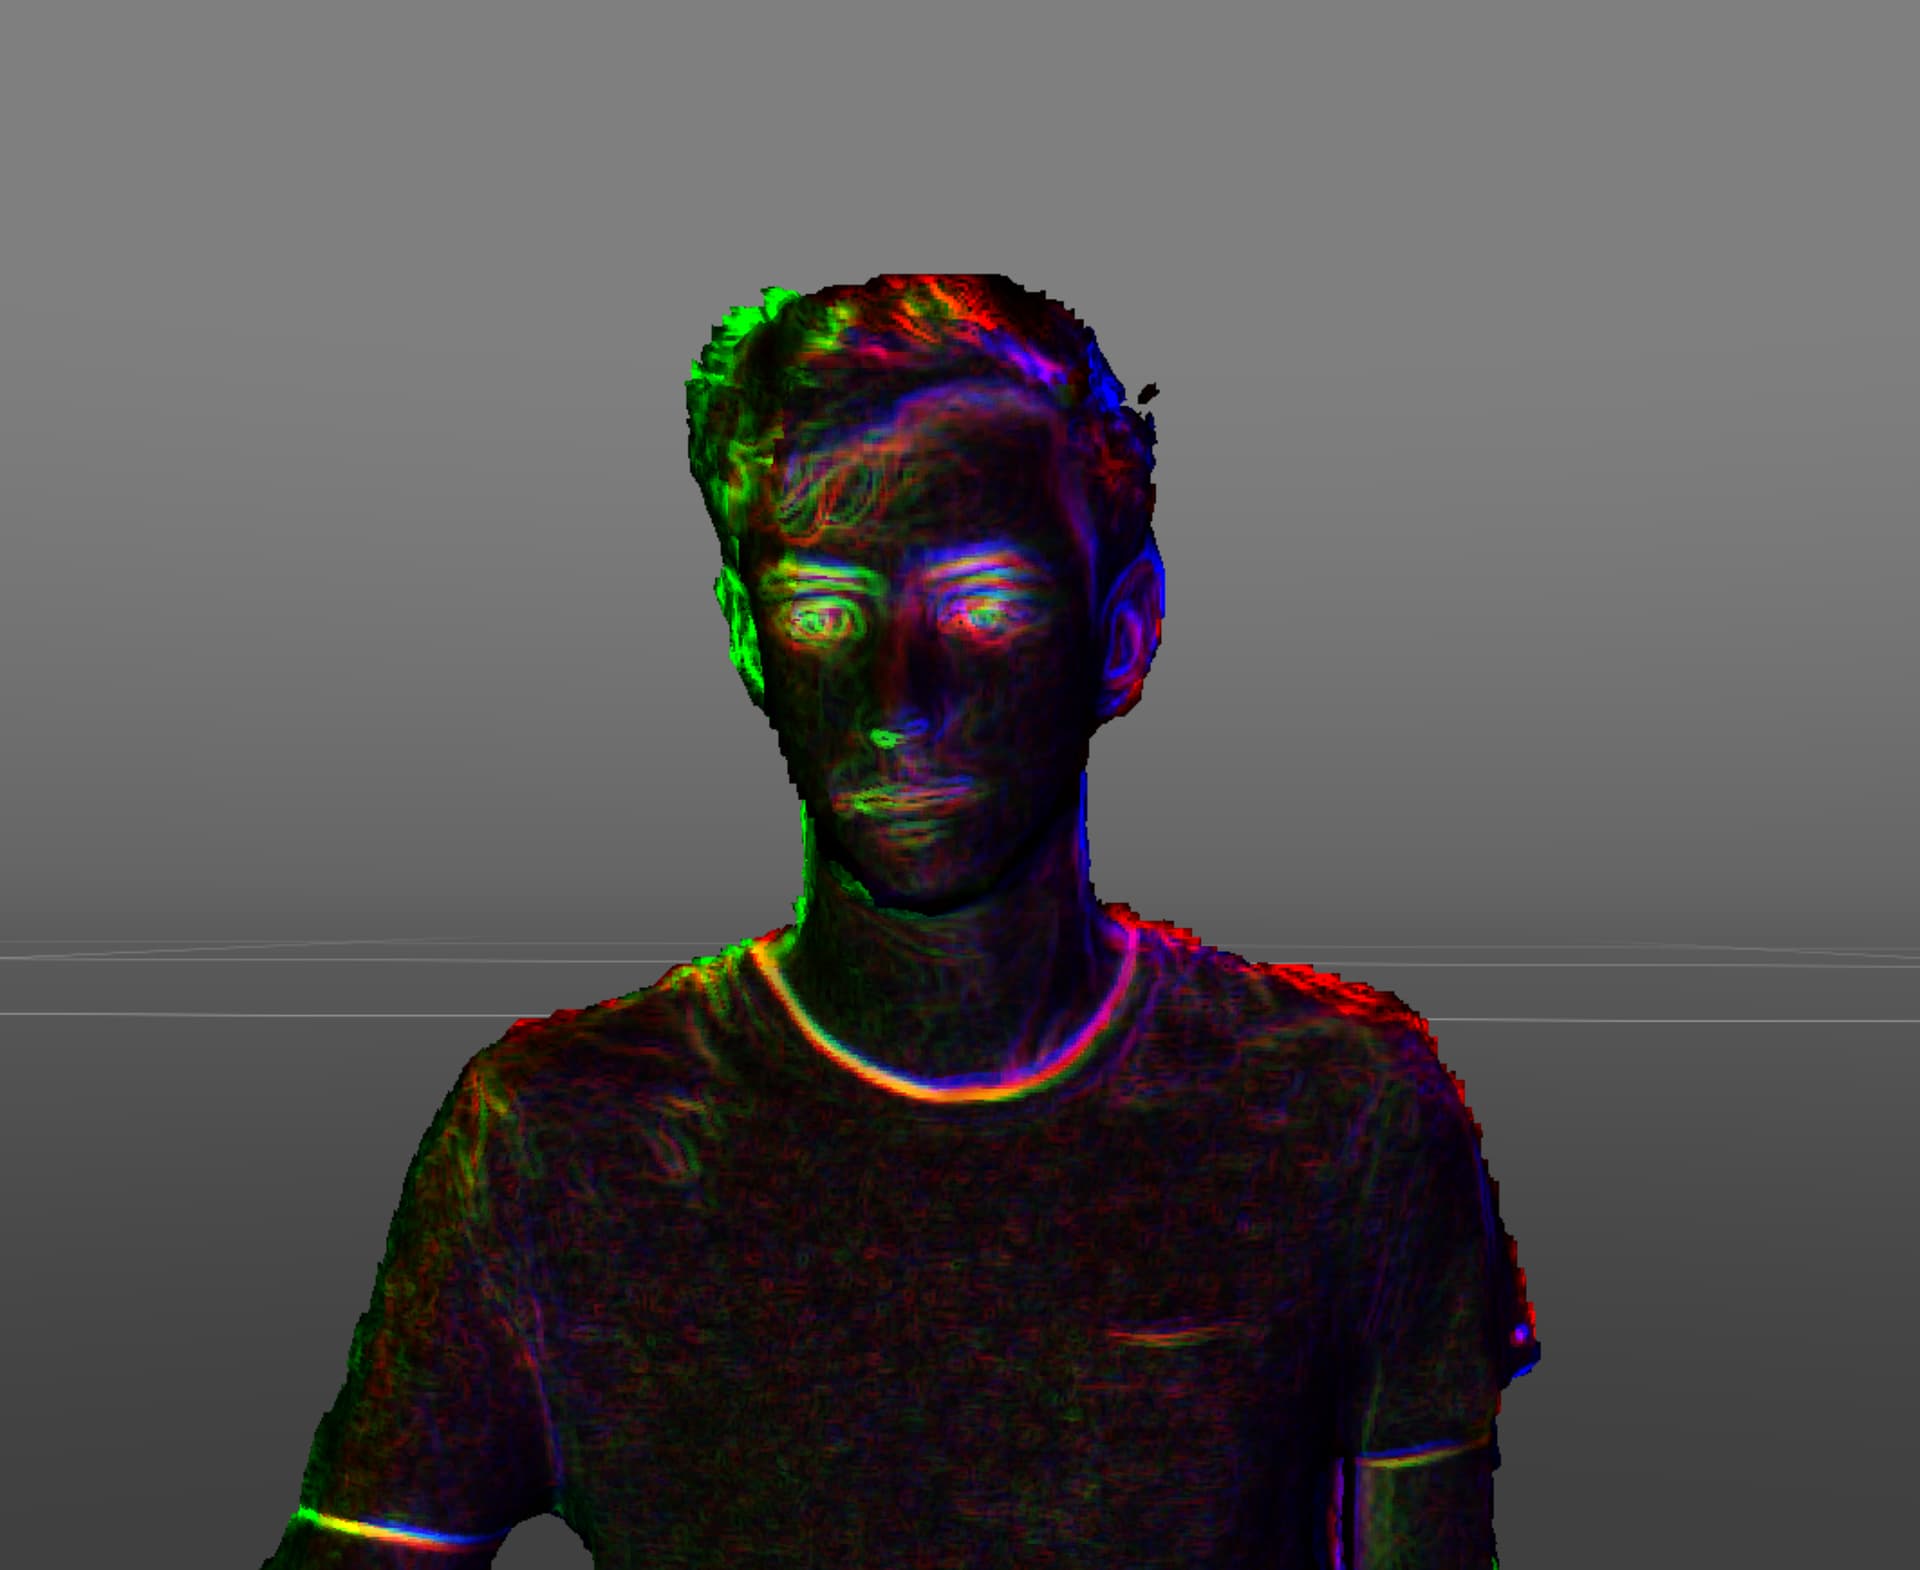
Either of two things may be contributing to texture misalignment (seen here between Sensor 1 in red and Sensor 2 in green):
One way to quickly identify which is to switch from RGB texturing to Infrared texturing while in the Calibration context, and see if the alignment changes. If the alignment is identical in both texturing modes, a good calibration will likely fix the misalignment. If the alignment shifts between the two, then one or more of your sensors has a faulty factory calibration and needs to be replaced.
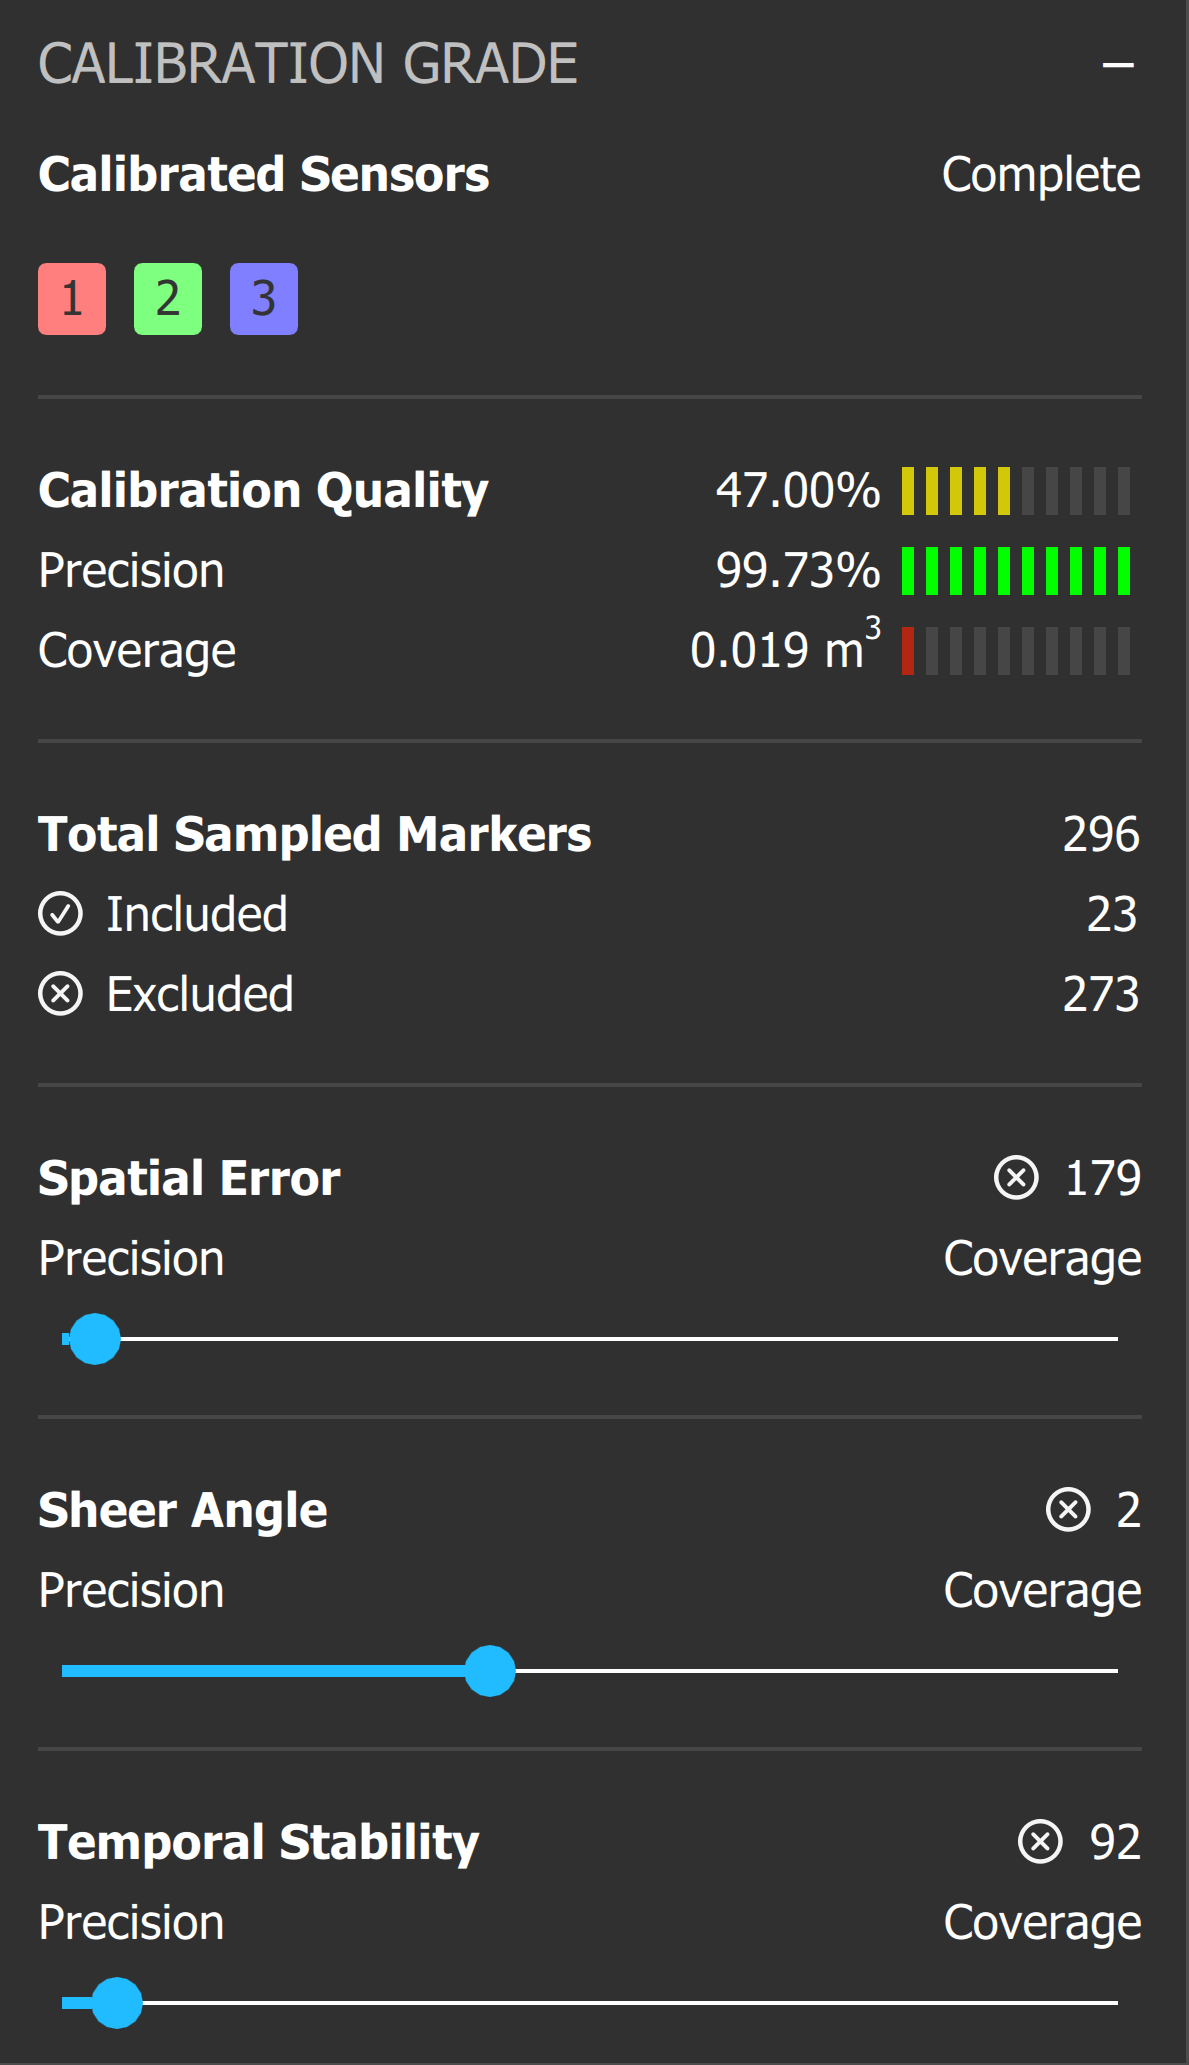
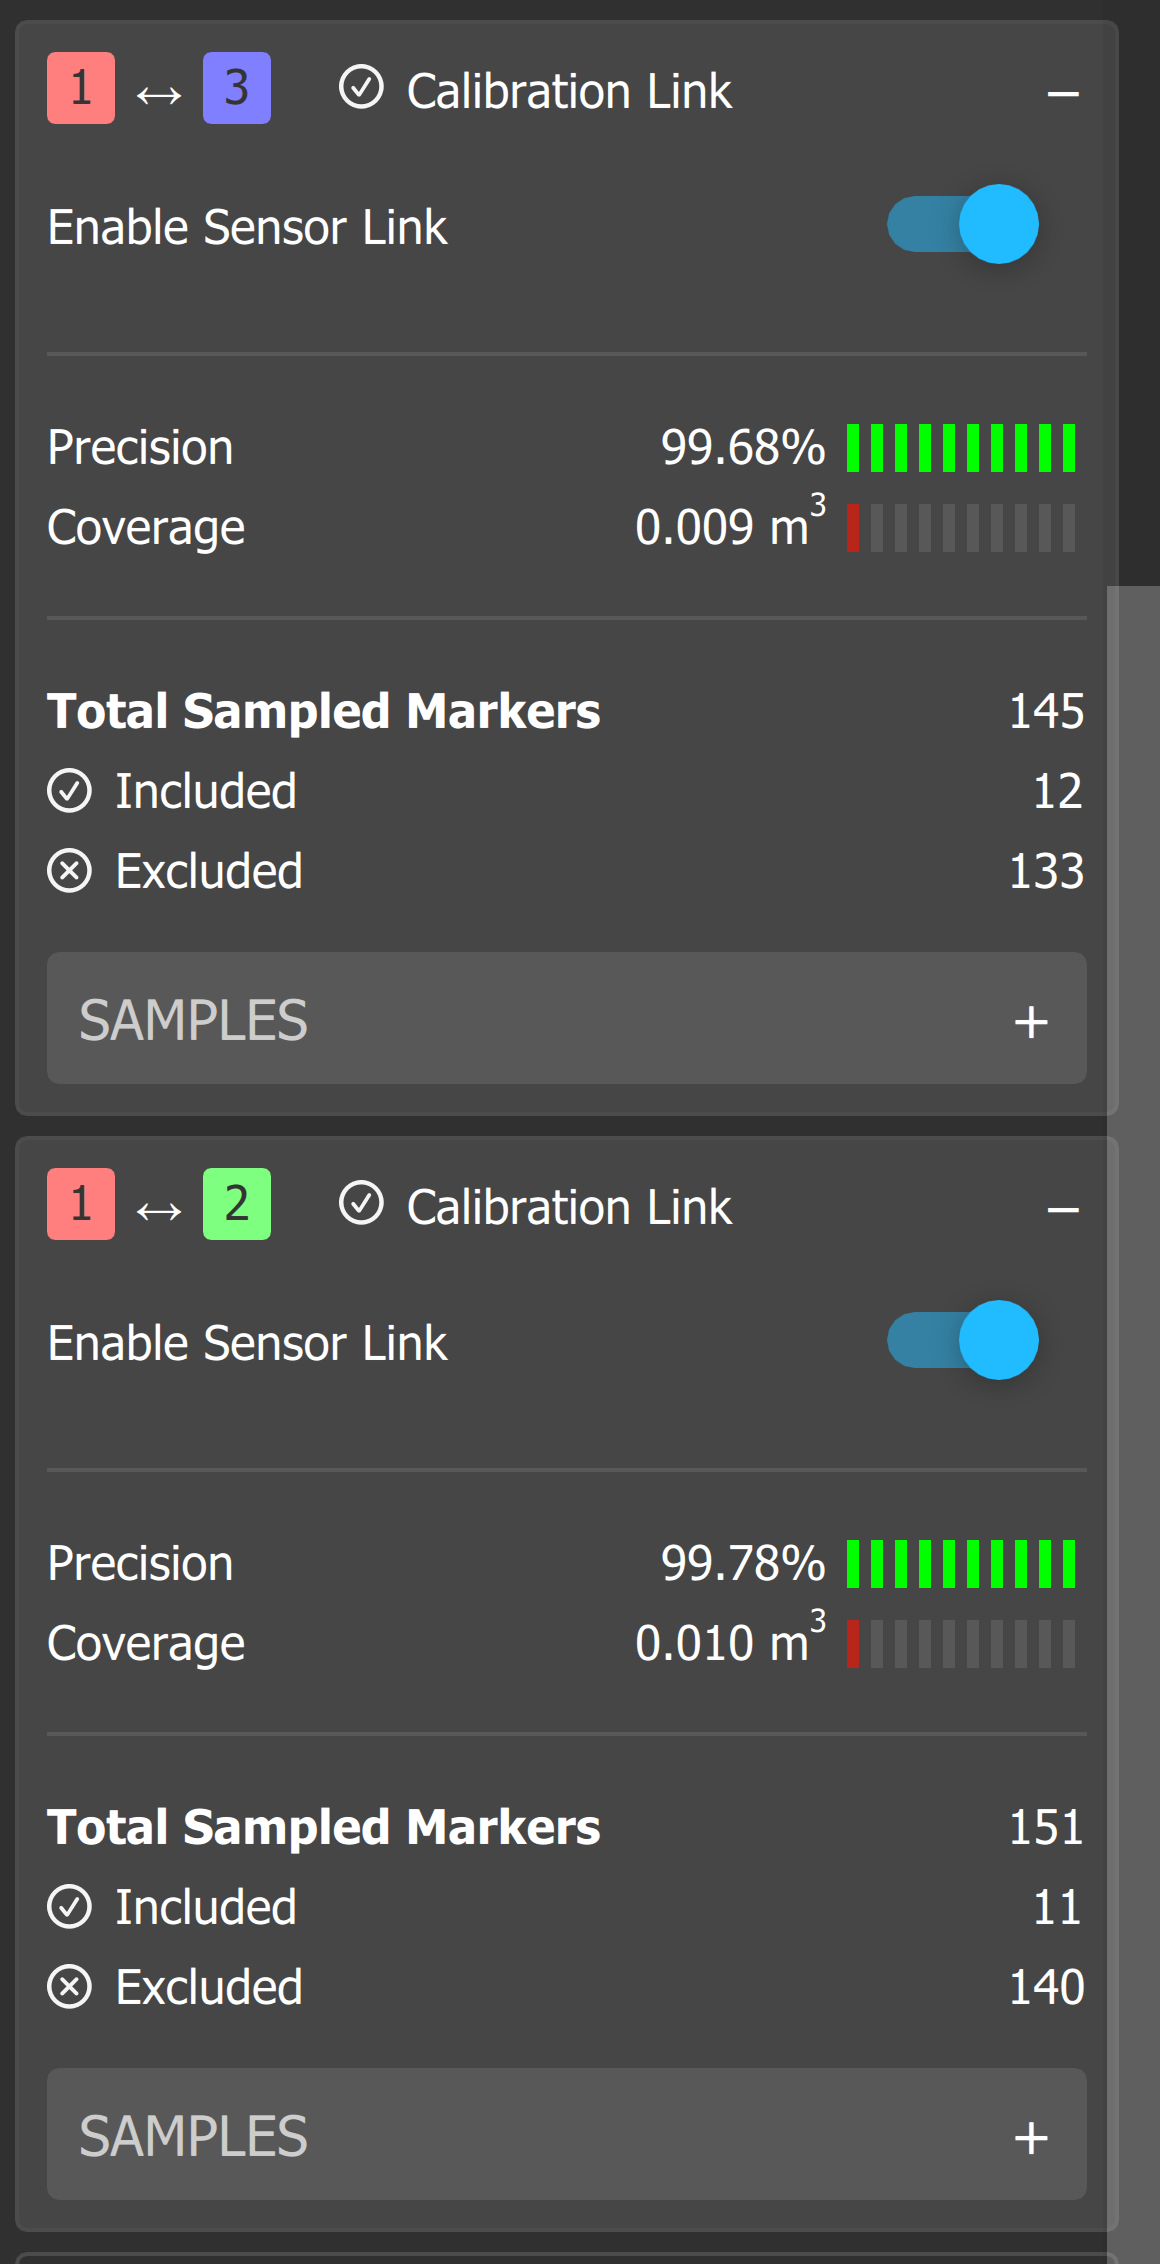
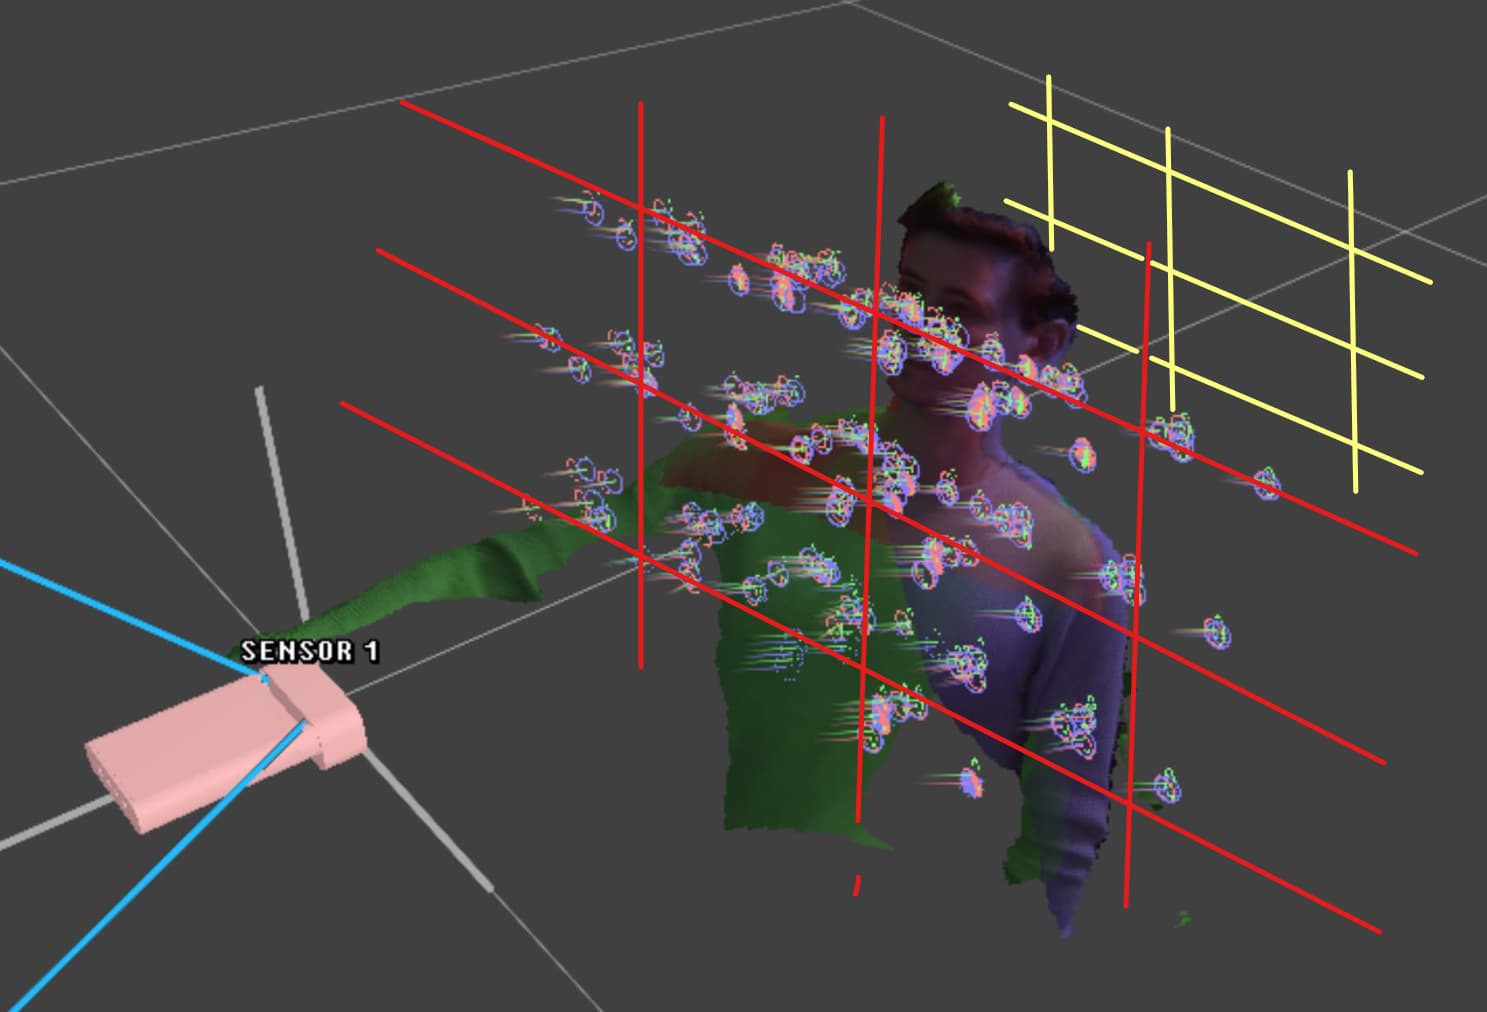
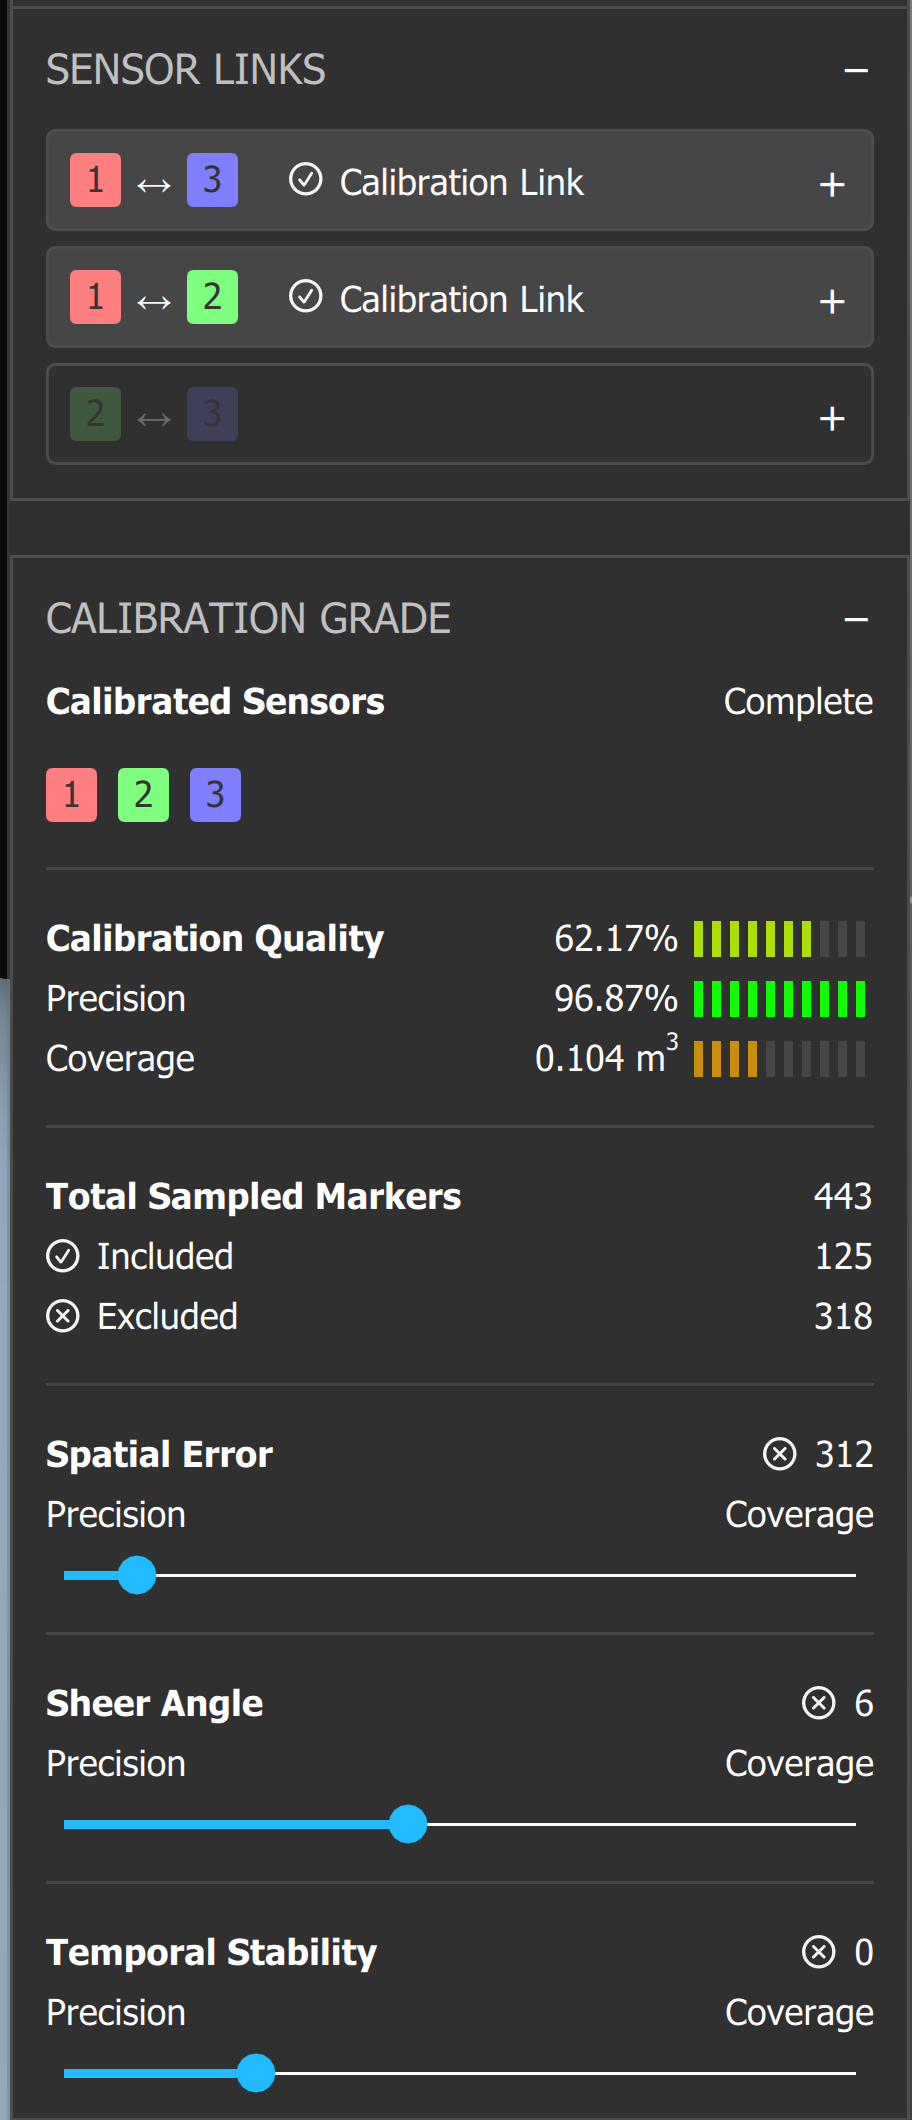
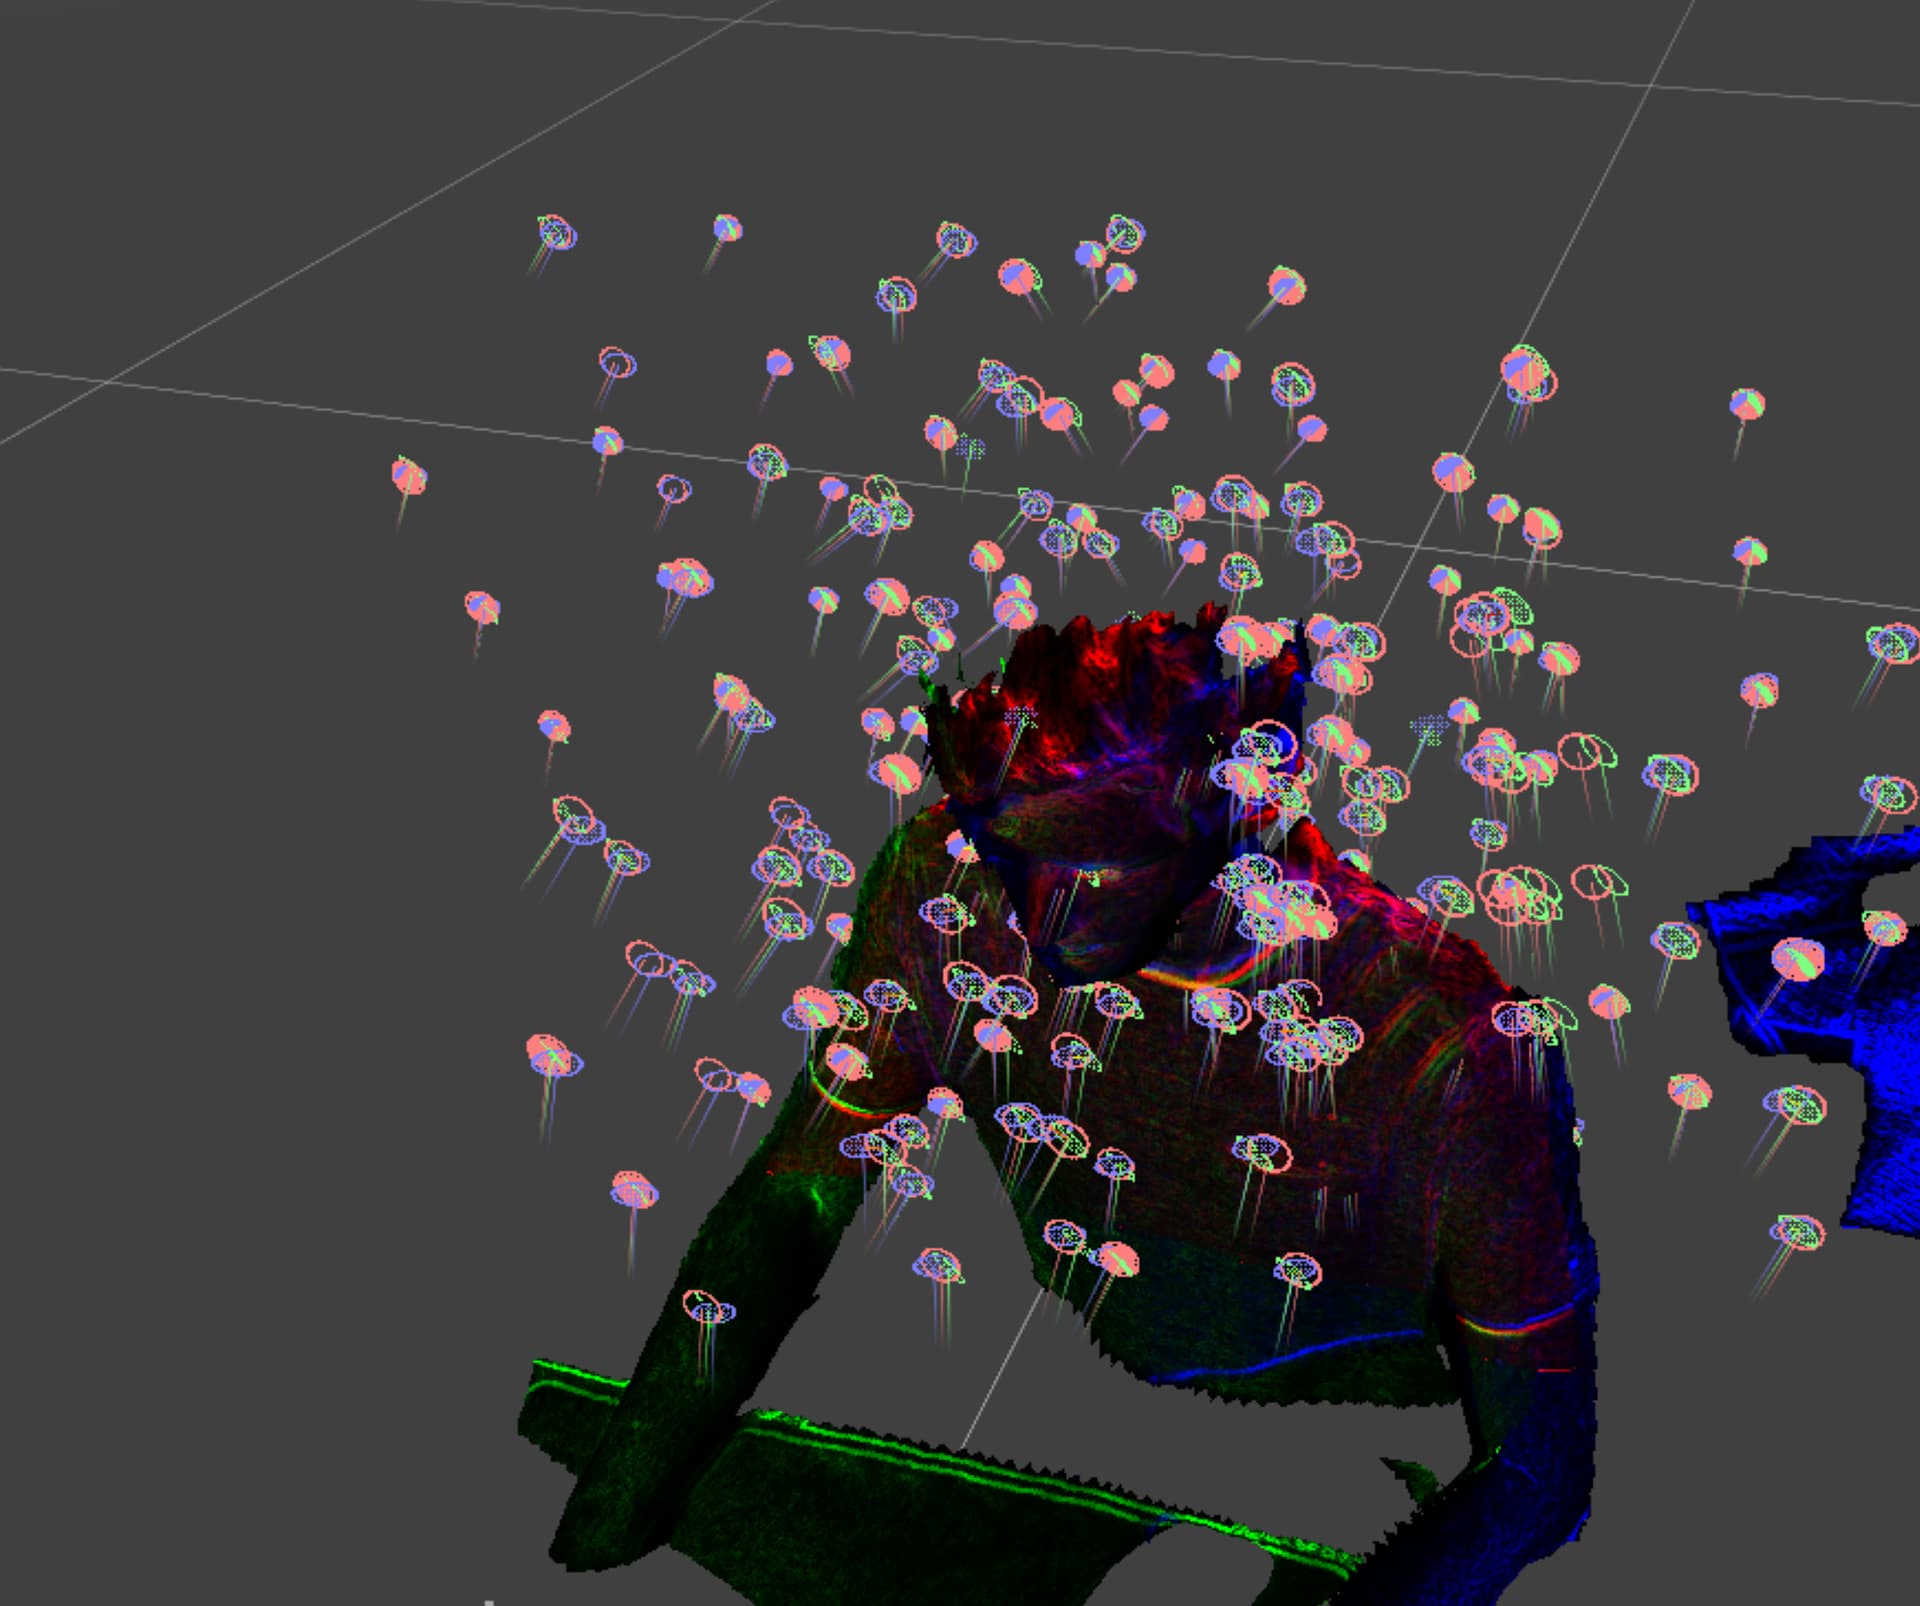
One thing that I think is contributing to the low calibration score is that your calibration samples are all on the same 2D plane (red), at roughly the same distance to the sensors, which is likely why the Coverage metric is so low. To fill that metric up and improve the quality of the calibration overall, collect samples from various positions on that plane, then move the chart to a new plane further from the sensors, and collect another set of samples. The more samples the sensors you collect from more distances, the more useful data the calibration algorithm has to work with.
Once you have more samples, you should be able to open up the Spatial Error and Temporal Stability filters and get a better score. With the data it is currently given, you can see that the current filter settings are removing all but 23 markers from your set, which may cause the calibration to align one point in 3D space well at the expense of alignment around the rest of your scene.
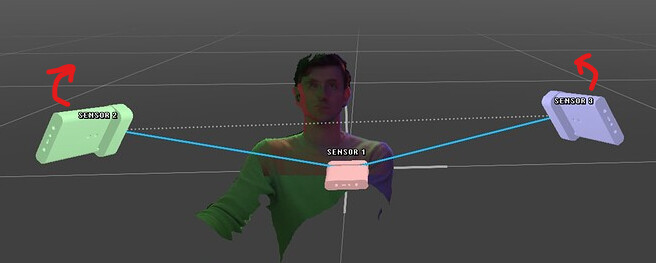
I haven’t varied the distances of the sensors as much as you are in your sensor configuration, so in principle, your instinct to get higher resolution from the center sensor makes sense, but there are some caveats to this:
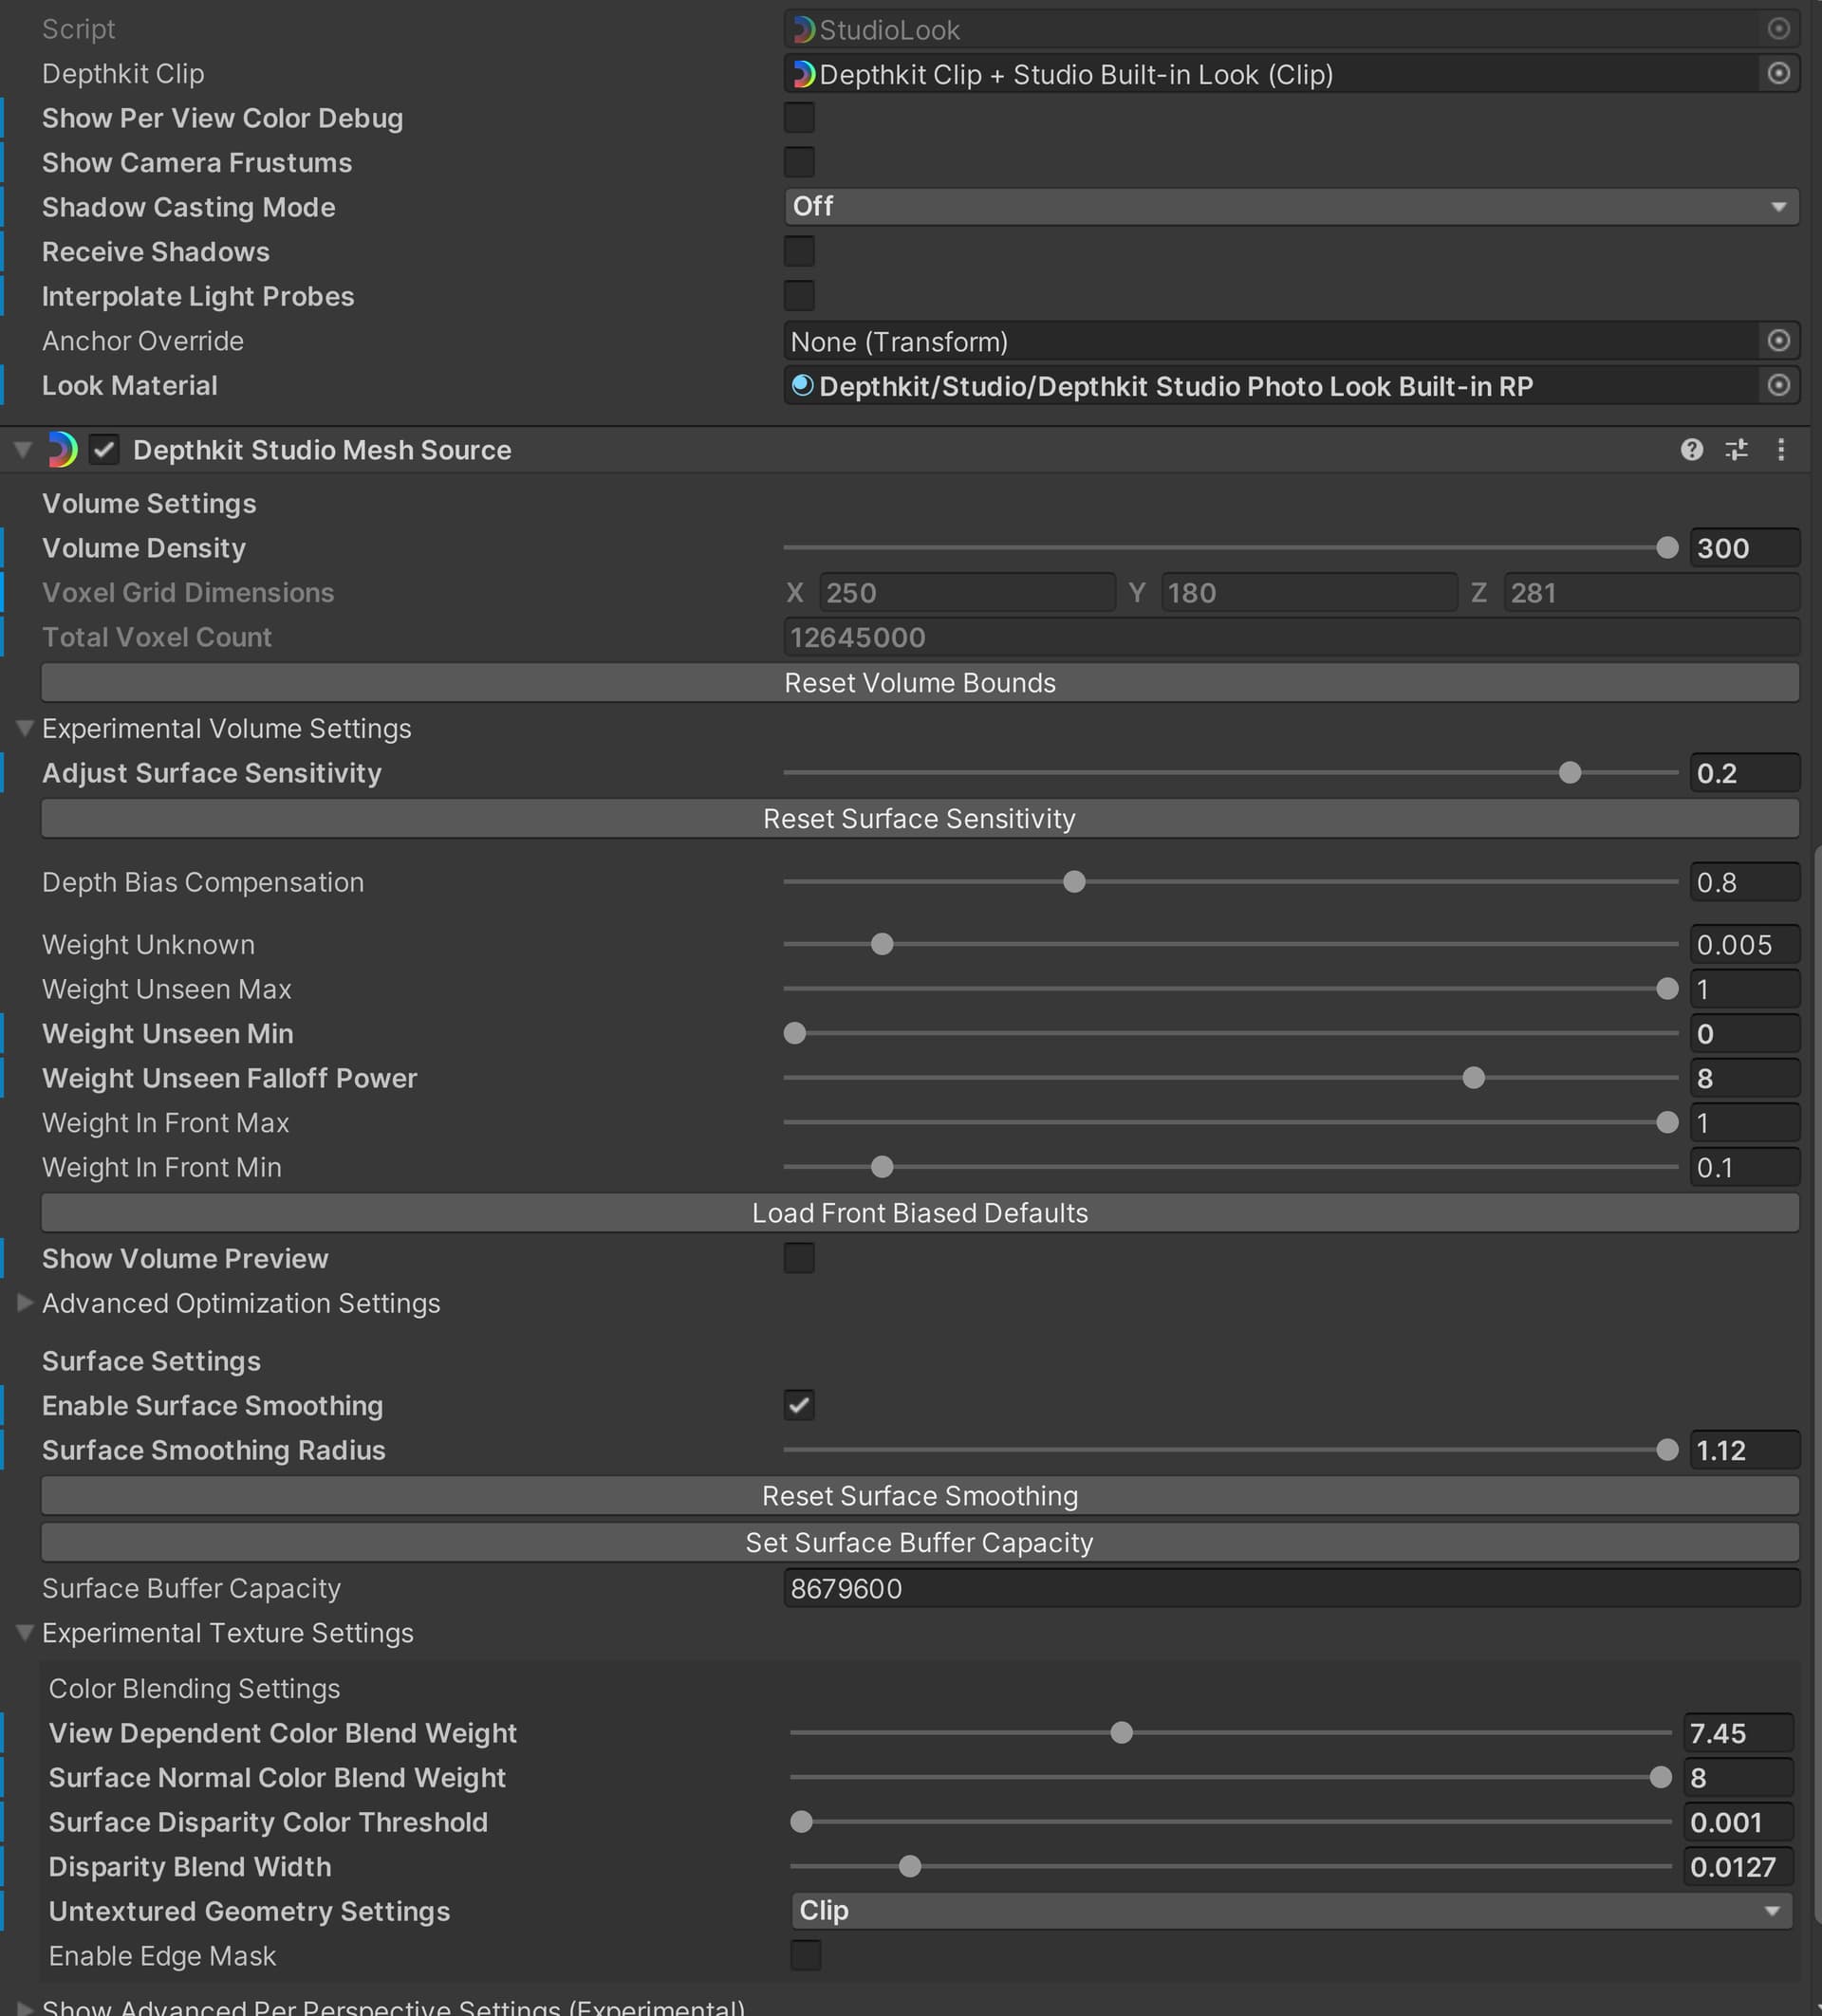
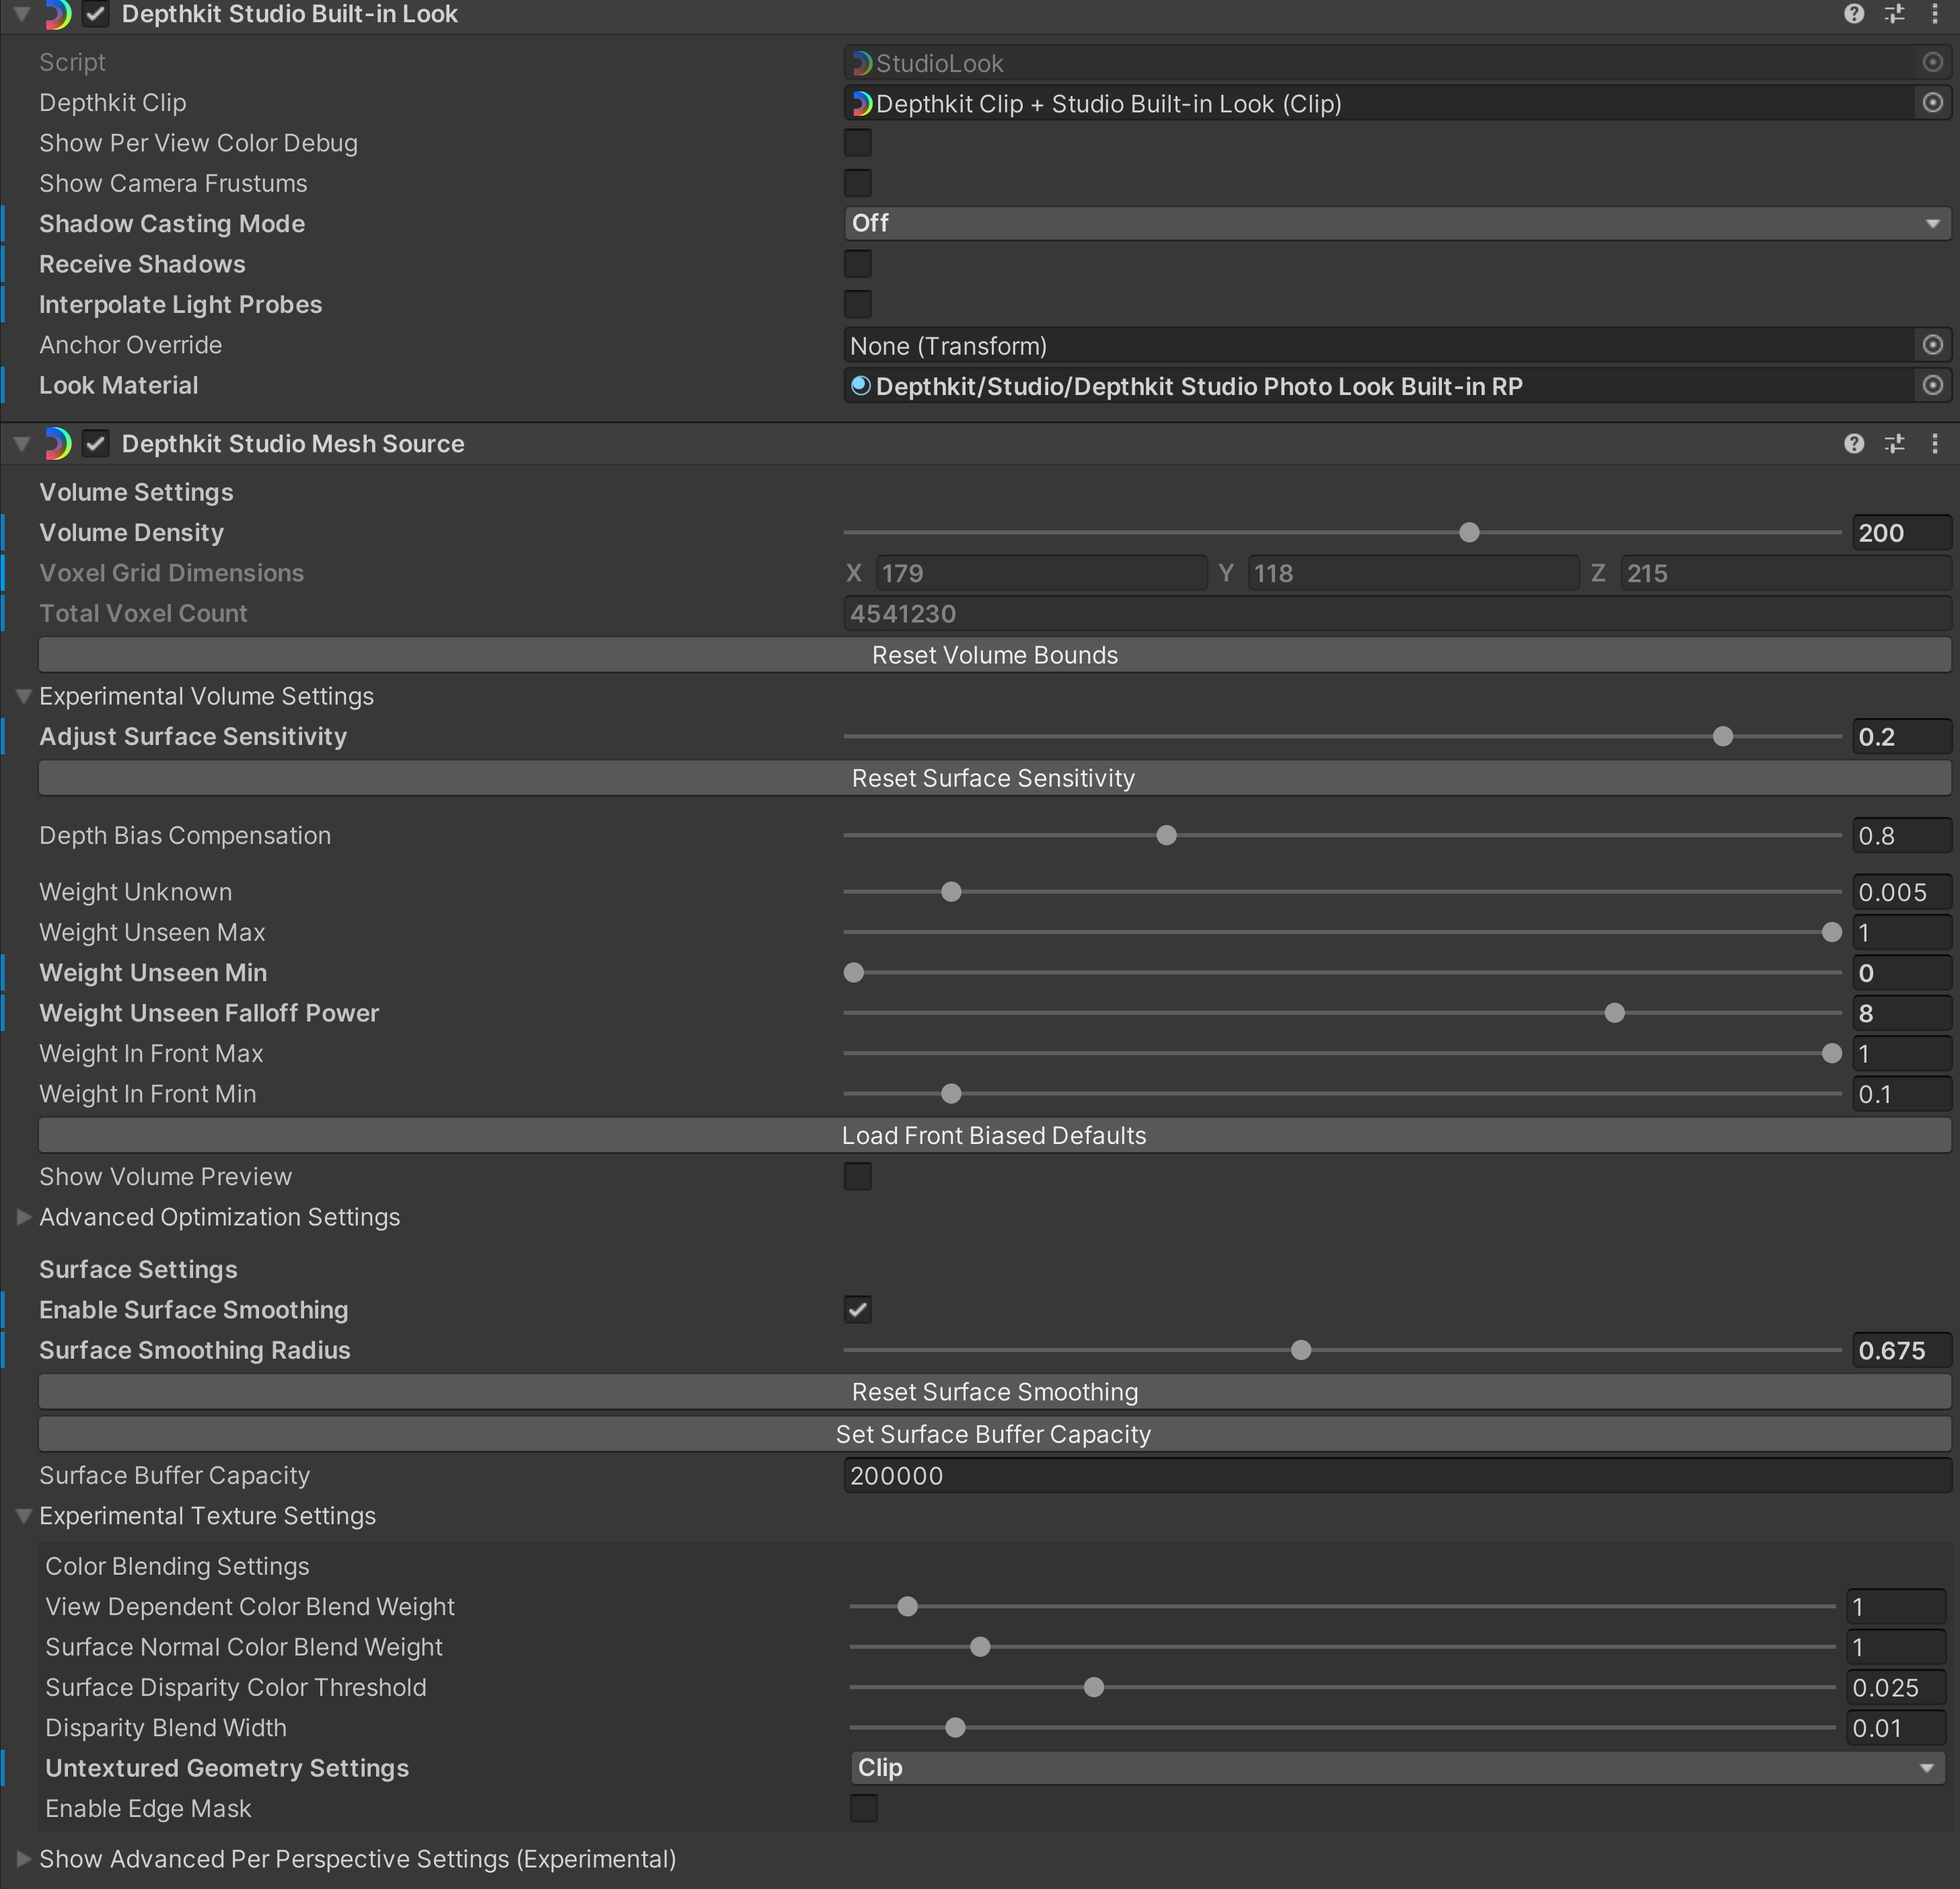
- To avoid harsh edges in the textures (where the edge of the center sensor overlaps with the other sensors) the textures will have to be blended in the Depthkit Studio Mesh Source component > Experimental Texture Settings > Edge Mask setting like Invalid Edge Width and Strength.
- Depending on the View-dependent Texture settings, the benefits of the close sensor will fade away as the viewer moves off-axis of the center sensor and matches a perspective closer to one of the flanking sensors. You can bias this by lowering the Depthkit Studio Mesh Source component > Experimental Texture Settings > Advanced Per-Perspective Settings > Color Weight Contribution for the flanking sensors.
The Per-Sensor Debug Color mode in the Depthkit Studio Look component can be very helpful in seeing how the texture settings are blending the textures from the different perspectives together.
Also, to see exactly how these settings respond to changing view angles, rather than rotating the Scene view camera around the asset, rotate the asset relative to the Game view camera to see how the texture changes at different angles.
Depending on the spatial agency of your viewer, you may want to bring the flanking sensors further out to the sides, as viewing the subject from an angle beyond the physical sensor will reveal the missing geometry in the back.
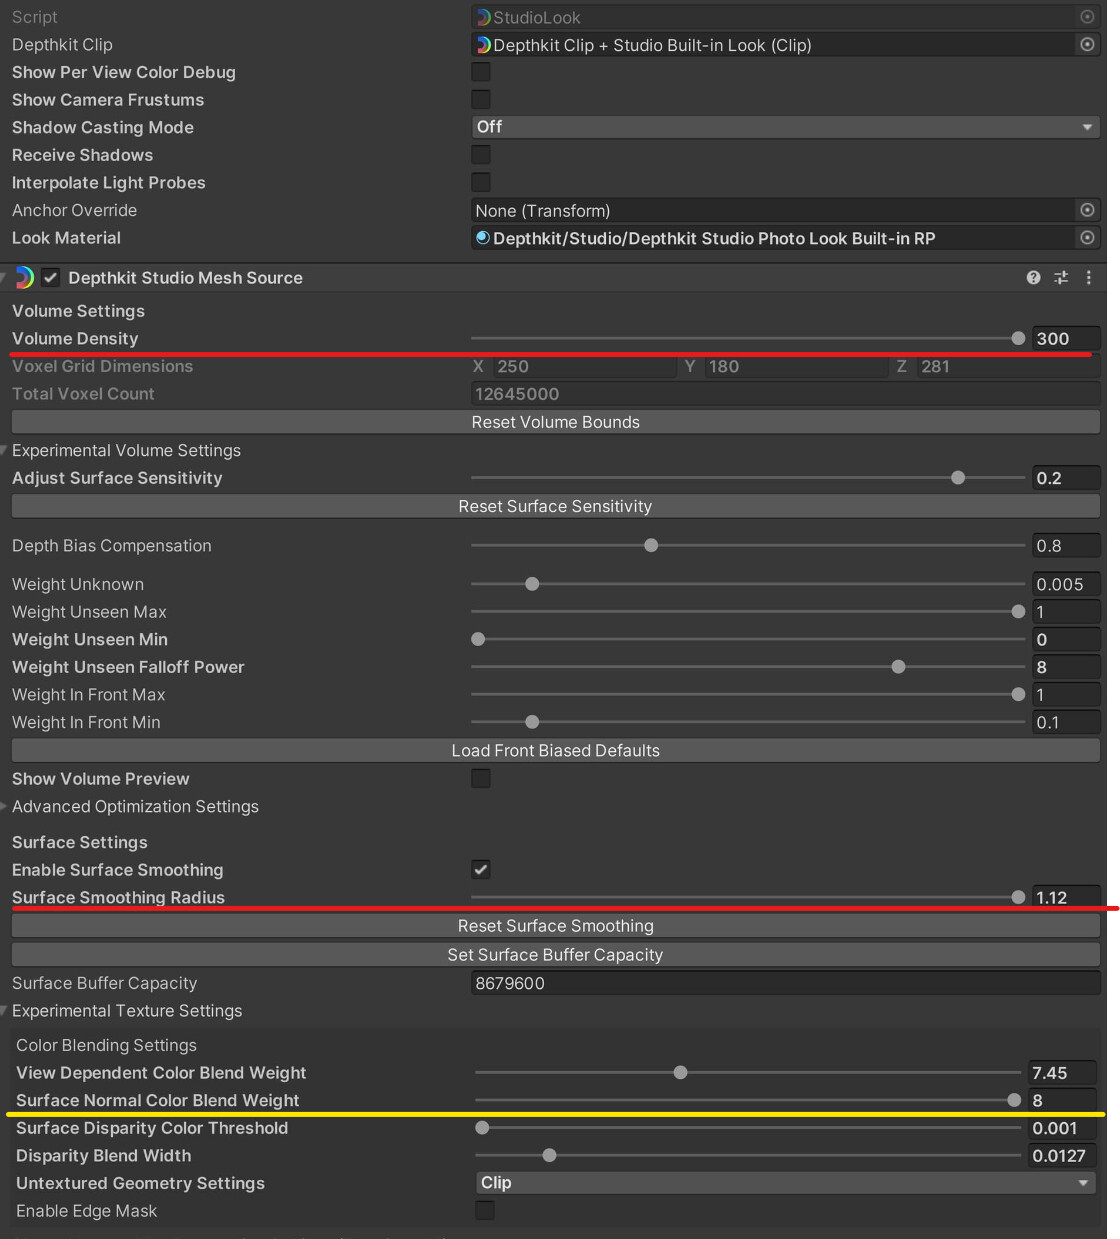
This doesn’t speak to the texturing of your asset, but I also noticed you are using very high volume density and surface smoothing values. Typically, even in our highest-quality workflows, we rarely go above a volume density of 150-200, as doing so reduces real-time performance significantly. Applying high surface smoothing also negates many of the details achieved by a high density so experiment with bringing either or both of those values down.
The Surface Normal value is also very high, and may be negating the center sensor’s texturing. Enable the Per-sensor Color Debug view, and adjust this setting to more evenly blend the textures.
Try some of these suggestions above and let me know how your results compare.